Get ideas & inspirations delivered to your inbox. You won't want to miss a thing, so subscribe free to the Blog Feed or sign up for Free Email Updates on the latest projects, shop news, blog tutorials & more. Check out the Project Gallery, Garden, Recipes & Inspirations tabs above, to see what you have missed. Browse through the sidebar for this week's Popular Posts!
**Please note: Some links may be broken, if this happens, please let me know which post & search for the title of a post on the search tab on the right while I work on fixing the problem.---->

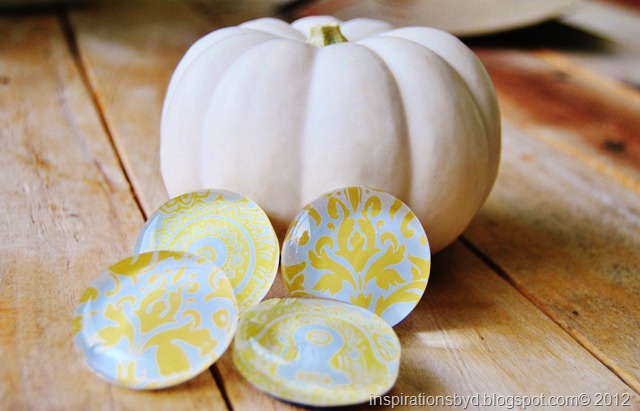
Yellow Magnets-NEW!

yellow damask magnetsMr. M is sick and now my little man is too, not so much with a cold,
but my little guy is having his first asthma flare up since the surgery.
I just returned from the doctors office and he mentioned that several
people are flaring up due to the change in weather.  My asthma has flared up a bit too.
But I'm trying to get the whole gang back to health.  Sleepless nights have begun.
 I hope that it won't last long.
yellow glass magnets
In the mean time, I have finished off these beautiful magnets
 I am so in love with this yellow damask design
I am currently finishing off some push pins and from the looks of it, 
it may be the last batch, not sure yet. Things have been a bit rough and
with the cold front right in our area, well things are looking rather ugly
for my little family.  Medicine, soup and lots of TLC are at hand.
 I hope that you are all safe during the rough weather.
Inspirations by D
For more designs, visit Inspirations by D at Etsy.

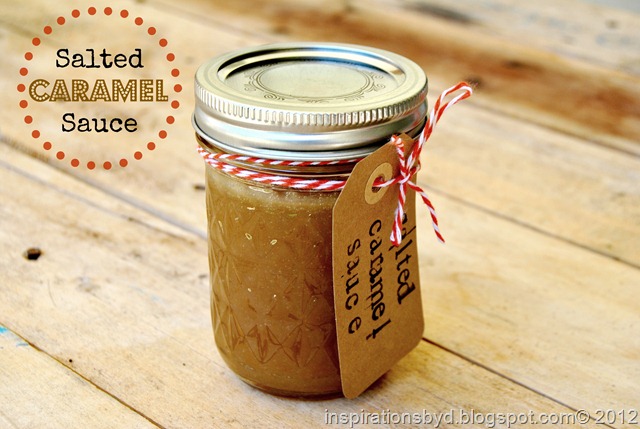
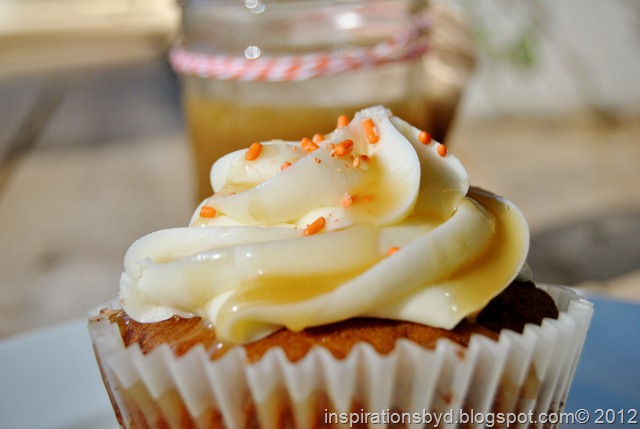
Salted Caramel Sauce

Salted Caramel Sauce
Salted Caramel Sauce recipe
Inspirations by D
I tried this delicious Salted Caramel Sauce recipe, shared by my friend Sasha at LMM,
love this lady and she gave me the thumbs up to share it here with you guys.

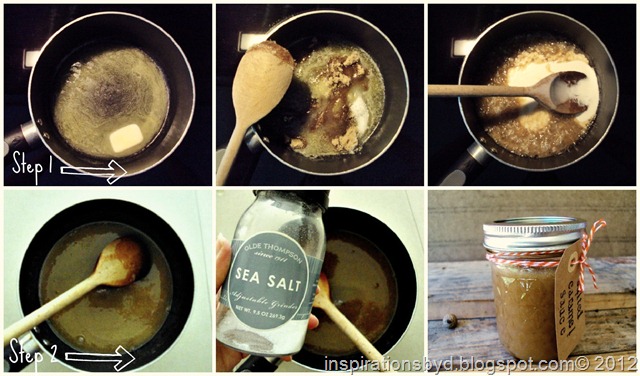
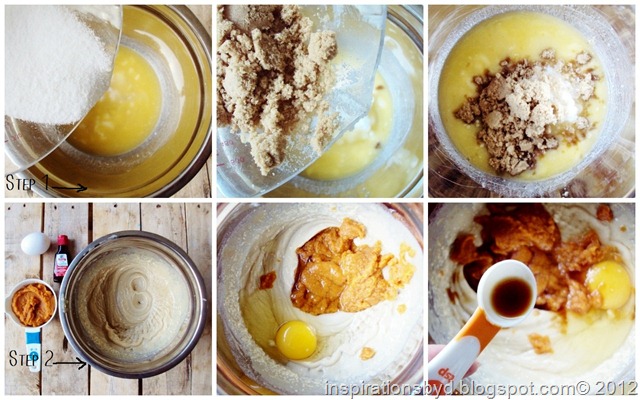
Step 1.  On medium heat, melt butter in a saucepan, when butter is completely 
melted add the sugars, stir constantly,bring it to a boil and then add whipping cream, 
stirring constantly. Bring it back to a boil for about 2 minutes, keep stirring.

Step 2. Remove from heat and stir in vanilla extract stir and add sea salt.  
Let it cool completely, otherwise like this lovely lady said, it will be all over you and 
your kitchen.
 Inspirations by D
Ingredients:
1/4 cup of butter
1/4 cup tightly packed brown sugar
1/4 cup granulated sugar
1/2 cup of whipping cream
1/2 teaspoons sea salt
2 drops of vanilla extract
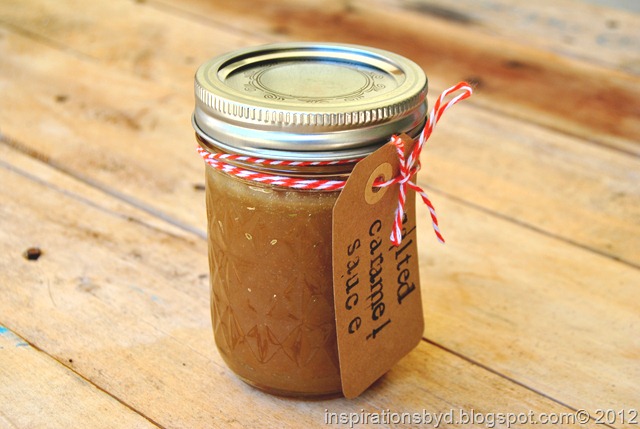
Salted Caramel Sauce
Inspirations by D
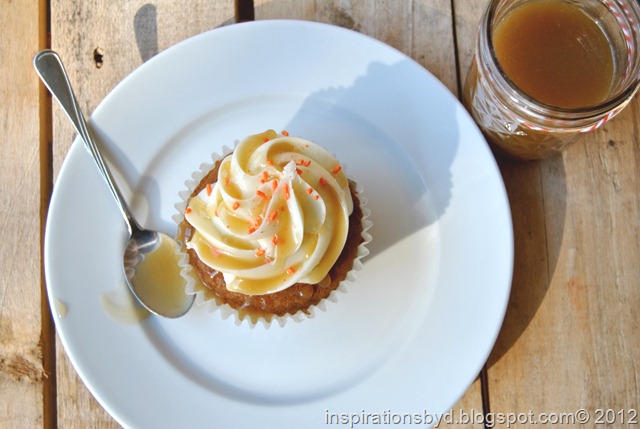
Yumminess!!  Thank you Sasha this was so delicious!

Linking with:
I Should be Mopping the Floor
Tutus and Tea Parties 64
The 36th Avenue
Salt Tree 26
Sew Chatty
Create with Joy43

Best Pumpkin Cookies

Best Pumpkin cookies
Do you remember when I mentioned autumn spices in this post?
I finally baked some pumpkin cookies yesterday and their amazing fragrance 
has been lingering in our home since.  Ah, the warm scent of cinnamon and other
spices fills my mind with cozy images of flannel blankets, falling leaves and a warm
beverage at hand on a cool fall day.  These cookies are so delicious!
Best Pumpkin cookies recipe
While I removed the freshly baked cookies from the oven, Mr. M and little man followed
the autumn aroma to the kitchen, and let me just say a few cookies were already
missing from the batch on the baking sheet. 
After the cookies were completely done, the boys enjoyed a few more, and so did I.
They were completely scrumptious!

I have added the recipe to the end of this post for those who wish to try it.
To make these delicious cookies, you need to do a few simple things.
First preheat your oven to 350 degrees and prepare two ungreased baking sheets.
  •  Step 1. In a large mixing bowl add cream butter, white sugar, & brown sugar then mix it until fluffy.
  •  Step 2. Add pumpkin puree, egg, and vanilla extract and mix. 
Inspirations by D
  • Step 3. In a separate bowl, stir in together flour, baking soda, cinnamon, pumpkin spice and salt.
  • Step 4. Combine flour mixture & butter-sugar mixture together & mix well.  Then, add tablespoons 3 inches apart on the ungreased baking sheets.
Inspirations by D
  • 5. Bake cookies for 10-15 minutes until golden around the edges.
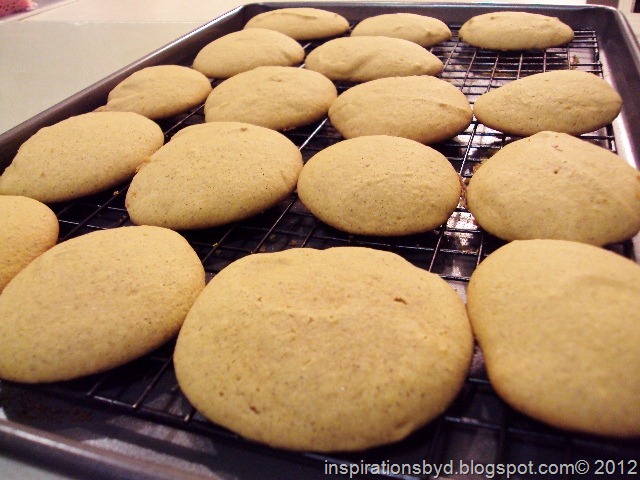
  • 6. Remove warm cookies and transfer to racks.
Pumpkin cookies
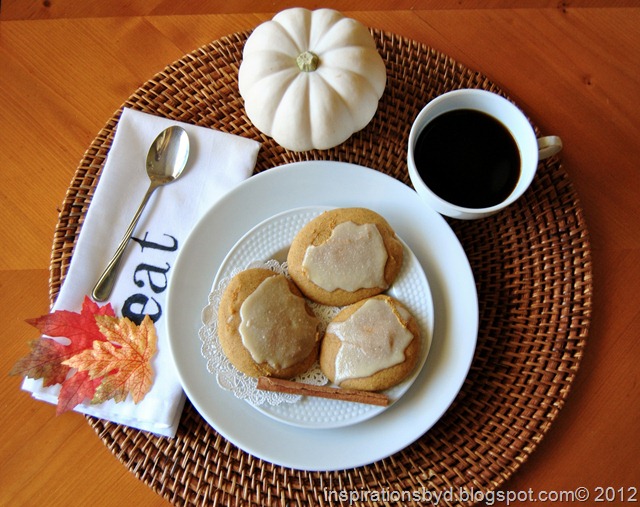
  • 7. Let the cookies cool completely for at least one half hour, then frost with glaze.
Inspirations by D
Inspirations by D
Ingredients
  • 1 cup butter, room temperature
  • 1/2 cup sugar
  • 1/2 cup firmly packed brown sugar
  • 1 cup can pumpkin puree (for those who prefer fresh pumpkin puree, click here for puree recipe)
  • 1 egg
  • 1 teaspoon vanilla extract
  • 2 cups flour
  • 1 teaspoon baking soda
  • 1 teaspoon baking powder
  • 2 teaspoons cinnamon
  • 1 teaspoon pumpkin pie spice
  • 1/4 teaspoon salt
      Glaze
  • 3 tablespoons butter
  • 1/2 cup firmly packed brown sugar
  • 1/4 cup milk
  • 1 1/2- 2 cups confectioners' sugar
Direction for Glaze
In a medium saucepan, heat butter and brown sugar over medium heat until bubbly.
Cook, stirring constantly, for one minute or until slightly thickened.
   Beat in the milk, blend in confectioners' sugar until the glaze is smooth and spreadable.
Using a brush or butter knife, spread the glaze on the cookies.
NOTE: The glaze will harden fairly quickly, it is recommended that you keep the saucepan
over the lowest setting heat possible to prevent it from hardening.

Another way to make this glaze is by mixing all the ingredients before heating.
Then pour your mix into a saucepan and heat.
This prevents it from getting too hard in your pan,
but make sure to rinse it immediately in very hot water to remove left over glaze.
Enjoy your cookies, I know I will.

Inspirations by D Reader Survey

Hello Inspirations by D Readers, I have a huge favor to ask you.
If you have a few minutes today or right now, 
I'd really appreciate you taking the time to fill out this short survey.
I will use the information to make adjustments to the features 
on the blog and sponsorship program.  There are options to skip 
questions if you like.  The survey is totally anonymous. 
Only Inspirations by D will be using this information
to enrich and improve the site. Plus it's fun and I will get to 
know you a bit! 


After you are done, feel free to leave any comments or ideas for me that you 
were not able to express on the survey.  The survey is up temporary, so please 
get your answers in quickly!  Thank you so much!

Oversized Ruler Growth Chart

How to Make Ruler Growth Chart
Hey there, I hope that you are enjoying your day.
Today I'm sharing with you the tutorial for this oversized ruler, 
it was inspired by this one and this one

This giant ruler that you see here, was somewhat of a challenge to photograph
only because it hangs in a very narrow, dark hallway, 
but you get the idea as to what it looks like.
Inspirations by D
I wanted to have one of these babies for the sole purpose of using it as a growth chart 
for my son.  The boys like to make marks on my wall when measuring little man's growth 
process, you know the dad and son.  I am not a big fan of pencil or pen marks on the 
wall, so I decided to make one of these darlings for our son.

What I love about it is that you can take it with you if you move, 
unlike a wall. Another great thing is that you can use it for all your kids.
Okay, so let me begin by adding the supply list.
Supplies:
  • wood board
  • pencil
  • sand paper
  • ruler
  • sharpie
  • wood stain
  • vinyl numbers
1. Mr. M purchased a six foot wood board at a super low price.  We didn't have to cut it, which was great.
The only thing we did was sand the edges a bit to smooth them out.  The width is really your preference, ours is 7 inches wide,

2. After the sanding, I stained it with oak natural wood stain that I had on hand.

3. When the stain was dry, I used a ruler to mark my lines with a pencil,  
I measured them to be one inch apart.  For each inch, I made a line an inch long.  
When I reached a foot (12 inches), I made the lines two inches long to mark a foot.
Then I went over the lines with a sharpie marker and to keep my lines straight, I used my ruler.

4 & 5. My hubs stopped by the hardware store and purchased these sticker vinyl numbers.

6. I placed the numbers 12 inches apart from each other.
DIY Ruler growth Chart
There you have it, a giant ruler for measuring height.
This was really fun to make!
Hope that you enjoyed and Happy Crafting!

Washi Tape Decor

Dress up your dishes, stands, straws and more with 
seasonal colors using "washi tape" from Paper Source.

Do you remember this post and this post?  
It's where I shared ideas on how to decorate using washi tape.
Washi tape is Japanese decorative tape and it feels kind of like
masking tape, but prettier.
 You can find them in all sorts of colors, designs and widths.
Now let me share with you this super, easy decorative idea.

If you can go back to this post, you will see that I made a pretty simple
and plain looking cupcake stand.
For this craft project, I added a bit of color by using a little washi tape.
It beats painting and if you want to change the colors for the next season,
 all you have to do is pull it off and add another color or design. 

Notice that you can get a little creative by making little flags for straws,
this idea is great for parties.
You can make so many amazing little things with washi tape.
For more inspiration visit me at Pinterest and get inspired!
Happy Crafting!


System Pavers Review

Picture this, it's a crisp cool evening in the autumn season and you have the fire pit burning
in your back patio, (don't have a back patio?; just imagine one for now) okay,
you have the fire going and you are gathered with your family or friends around the
crackling fire having good conversation, yummy snacks and beverages,
sharing some laughs and keeping warm with the fire.

Doesn't that sound nice?  I think it does.
Today I am sharing a project idea that my hubs and I have wanted to do for a while.
But we were not sure how to go about it.
I found a site that is helpful with this and they are System Pavers.

The photo you see above is a layout of what we would like for our back patio to look like.
We want to extend the patio a bit further out to place our fire pit as shown in the picture
for those cool evenings.  System Pavers provides several layout  ideas for landscape and
different shapes and colors for pavers to be used in your plan.
See above?  That is what my back yard patio currently looks like.
There is a lot I want to do with this outdoor space.

They have ideas for drives ways, walk way designs, patios, porches and more.
What made me want to use System Pavers is that the stones are durable.
Our home has a concrete  driveway and patio.  After a while the concrete cracks,
but with system pavers you don't have that problem.  It lasts for a long time and even if
something goes wrong, they have a 25 year-warranty.  The benefits of beauty, durability,
selection and more is something worth the makeover.

This is a review post written by me on behalf System Pavers.  All opinions are 100% mine.

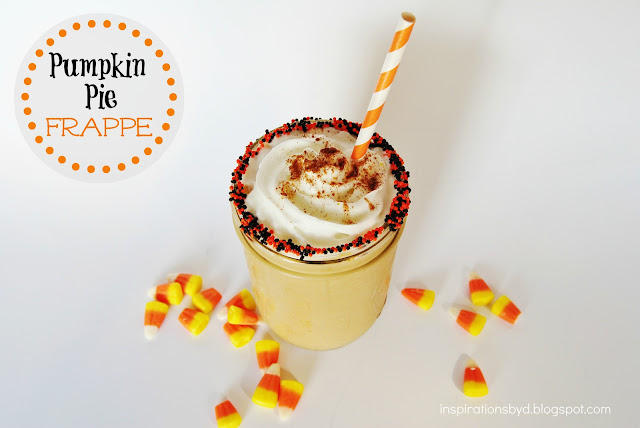
Pumpkin Pie Frappe

Pumpkin Pie Frappe
Drink your pumpkin pie!
Pumpkin Pie Frappe
Pumpkin Pie Frappe
This morning I felt a cool, crisp breeze brush against my face.  
It was Fall saying hello and I knew that it was time to whip up some pumpkin dishes.  
I can already smell the distinctive scent that comes from an oven filled with autumn spices. 

It was still early and I didn't have all the ingredients that I needed for some baked goods, 
so I decided to make something else.  
How would you like to drink your pumpkin pie?
This is truly a pumpkin pie in a cup, creamy and ice cold.
Pumpkin Pie Frappe
Pumpkin Pie Frappe
I love all things fall, especially this time of the year, so I whipped up this fun frappe.
What's neat is that you can share this beverage with other pumpkin pie lovers and make it presentable by adding a mini pie on the side or inside as a garnish, oh the possibilities!
Here is the recipe to make your own:
  • 1/2 cup premade coffee
  • 2 cups of ice
  • 1/4 cup of sugar
  • 3 Tablespoons of pumpkin puree (can)
  • 1/2 tsp vanilla extract
  • 1/4 tsp pumpkin spice
  • 1 cup of half and half or your milk preference
  • 1/3 cup vanilla ice cream
  • whip cream + caramel for rim
  • sprinkles
You may adjust the amount of each ingredient to meet your taste preference.  
I added extra cinnamon and nutmeg to my drink and oh yes, a little extra ice cream.

Place all the ingredients in a blender, while your drink is mixing, grab a cup and line the 
rim with caramel.  Place the sprinkles in a flat dish and holding your cup upside down, 
press it unto the sprinkles.

The caramel acts as a glue to make the sprinkles stick to the cup, and tasty too.
Once your mix is well blended, pour it in the cup, add whip cream if desired and garnish with cinnamon or 
pumpkin spice.  You may also add a swirl of caramel on top.  Serve.
Pumpkin Pie Frappe
For fun, add faces or other artwork!
Makes about 2 servings.

Get Inspired this Fall with Miracle-Gro & the Gardenieres

This is a Sponsored post written by me on behalf of Miracle-Gro for SocialSpark. All opinions are 100% mine.
Hi everyone, today I want to share with you some gardening ideas for the Fall.
I live in the SE part of the country and gardening down here can be tricky when it comes to your soil.

I went over to Gardenieres and Miracle-Gro Facebook page  for great Fall project ideas from none other than real gardeners from around the states.

After viewing all their great tips, I concluded that the area that needs the most work in my garden is my soil.  I chose this project to work on because the secret to a great garden is great soil.
My soil is a combination of clay and sand.  This kind of soil is terrible for growing a garden, due to the lack of nutrients and oxygen in the soil.  So to help my garden grow well this Fall season and next Spring,
I need to dig into my beds about three inches or so and add  moisture control soil by Miracle-Gro.  I can use any combination of soils for different plants and purposes.

For instance, Miracle-Gro Garden Soil can be used for flowers and vegetables especially formulated for annuals, perennials and veggies.  This improves the existing soil to build strong roots and it feeds plants up to three months with Miracle-Gro Continuous Release Plant food.

Another great product to use during feeding time is Miracle-Gro Liqua Feed.  It makes feeding as easy as watering.  It feeds plants through leaves and roots and it is safe to use with all flowers, vegetables, trees and shrubs.  This is perfect for my gardening needs.  

These Miracle Gro products will strengthen my plants' roots, preparing it for Spring during the fall season and it will improve growth and foliage.

I love visiting Miracle-Gro Facebook page because you come across many gardeners across the country with  gardening stories that you can relate to.  They are helpful when it comes to growing anything whether in the garden or in pots.  I recommend that you visit Miracle-Gro Facebook page and "Like" their them for your gardening inspiration and needs.  View the many photos of gardens from all over the country and even add yours.

Are you planting or preparing your garden for the Fall?  Do you have future plans to start your own potting project?  Visit Miracle-Gro Facebook page and share your stories and ideas.
Hope to see you there!
  
(1) Miracle-Gro

Advertisement
Visit Sponsor's Site

Inspired by Pallet Furniture

Pallet Furniture
themicrogardener

lilblueboo
inspiracionline
There is so much you can do with pallets, it just amazes me.
Mr. M was inspired to work with pallets after viewing different furniture ideas.
If you remember, he worked with some pallets for this project
and has not stopped since.

He built a desk for me, but I don't have a photo to share at this moment,
but if you visit Funky Junk Interiors, it is exactly like hers.
He followed her tutorial, and now we have a large desk to meet our needs.
Pallet Furniture   
We were also in need of night tables for our bedroom and Mr. M decided to build
them out of pallets.  I was not sure about it at first, considering that pallets tend to
have rough edges, but when he was finished with the tables, I was smitten with them.
The edges were sanded and clean, without taking away that rustic look. 
DSC_0516
Of course it needs to be filled in in many areas, but once filled, sanded and painted,
I'm sure that it will work in our room.  My current dilemma is what color to paint it.
Any suggestions?
DSC_0520a
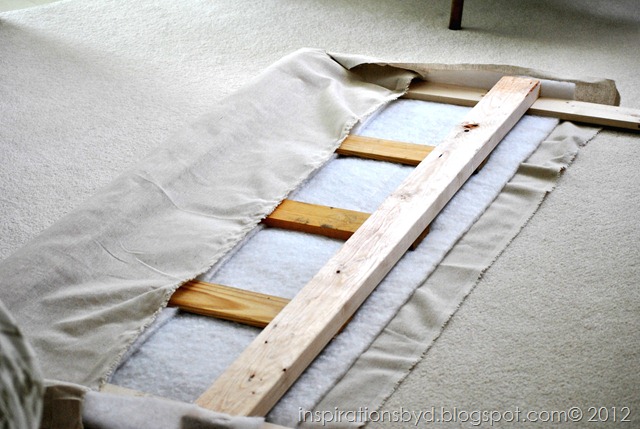
This is the headboard that we recently worked on.
The frame is made out of pallets, can you tell?
There is a tiny problem though, due to the overlapping of the wood,
it makes it difficult to add nail heads evenly.  My man was not thinking about nail heads,
so it's going to remain that way, sigh!

I may have to leave them out of this one, unless I place them around
the headboard like the Pottery Barn headboard.
Help me here, I need suggestions, leave them out or put them in?

So once these items are finished, I'll post the final reveal for you to see, wish me luck.
Hope that you enjoy!
For more pallet ideas go here and get yourself inspired!


Pin It button on image hover