Get ideas & inspirations delivered to your inbox. You won't want to miss a thing, so subscribe free to the Blog Feed or sign up for Free Email Updates on the latest projects, shop news, blog tutorials & more. Check out the Project Gallery, Garden, Recipes & Inspirations tabs above, to see what you have missed. Browse through the sidebar for this week's Popular Posts!
**Please note: Some links may be broken, if this happens, please let me know which post & search for the title of a post on the search tab on the right while I work on fixing the problem.---->

Showing posts with label Recipes/ Cooking. Show all posts

Old Glory Berry Pie

www.inspirationsbyd.blogspot.com
Hello, and Happy Independence Day Weekend!  Today I wanted to share
with you this delicious Patriotic Pie recipe from TipHero.com, thank you tip hero!
I have added a couple of extra things to mine.
It is a perfect patriotic dessert to share with family and friends during the celebration
of our Nation's Independence.  It may look harder than it really is, but it is pretty simple.

The ingredients that you will need are as follows:

Makes 1 (9-inch pie)
Approximately  2 hours & 45 minutes

  • Pie dough shells (2) 9 inch
  • Star cookie cutter (2 inches) and/or (1 inch)
  • Knife
  • 4 ­½ cups fresh strawberries, hulled and sliced 
  • 1­ ½ cups fresh blueberries


  • ½ cup granulated sugar
  • ⅓ cup of corn starch
  • ½ teaspoon almond extract, divided
  • 1 large egg, beaten for egg wash
  • orange or lemon zest
  • 1/4 teaspoon cinnamon
  • a pinch of sugar for sprinkling over the pie

www.inspirationsbyd.blogspot.com

www.inspirationsbyd.blogspot.com

Directions:  

1. Preheat oven to 425 degrees Fahrenheit (220 Celsius).

2. On a lightly floured surface, place your dough.  If it's on a pie plate, turn upside down
and gently unfold the edges so that it will lay flat on the surface.

3. Roll it flat with a dough roller, if you have one on hand.

4. Cut out your stars using the cookie cutter and cut the stripes with a knife. Set it aside.

5. In a bowl, combine sugar and cornstarch and mix well.

6. Take ¼ cup of the sugar mixture and a ¼ teaspoon of almond extract and add it to the blueberries in a separate bowl.  Add the cinnamon and a pinch of zest to the blueberries.
Toss to coat.  Set aside.

7. In another separate bowl, add the remaining sugar mix to the strawberries and add
¼ teaspoon of almond extract and another pinch of zest, toss to coat.

8. Take a piece of aluminum foil and fold it in half several times to create a two-inch-wide strip.
Fold the bottom corners so that it fits well inside the pie dish, separate the sections by 1/3 and 2/3 areas.

9. With one hand holding the foil in place, gently pour in the strawberries into the 2/3 section, then the blueberries in the 1/3 section. Gently level out the berries and remove the foil.

10. Using the dough that was cut out for the stars and stripes, place the stripes over the strawberries making sure to leave space between the stripes.  Layout the stars over the blueberries.

11. Brush the dough carefully with egg wash, sprinkle lightly with sugar, then cover the
edges of the pie with 2-inch strips of foil to prevent burning or a crust shield.

12. Bake at 425 degrees for 25 minutes, then remove the foil or crust shield,  reduce
heat to 375 degrees and continue to bake for 60 minutes or until the edges are golden and
the fruit is bubbling.

13. Cool pie for an hour before serving.  Goes well with vanilla ice cream!

www.inspirationsbyd.blogspot.com

Enjoy!


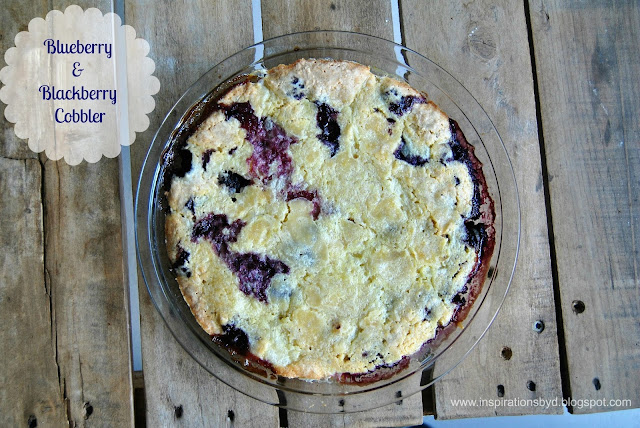
Blueberry & Blackberry Cobbler

blackberry cobbler

Summertime is here and it is the perfect time for sweet & easy recipes.  When I have guests, this is one of my favorite desserts to make.  Scoop it up and add whipped cream and garnish with fresh mint leaves and you're good to go.  

My dad and my sister were recently here visiting for a week and my sister loves desserts, so I just had to whip up some goodies along with sweet purchases.  This recipe is basically the same as the previous blackberry cobbler that I made, but I added blueberries to the mix.  For the ingredients, scroll to the end of the post.

Instructions:
Preheat oven 350 degrees.
Wash the berries and lay them on a paper towel to dry a bit.  Lightly grease an 8-inch baking dish.
Place the berries in the baking dish and sprinkle the berries with the lemon juice.
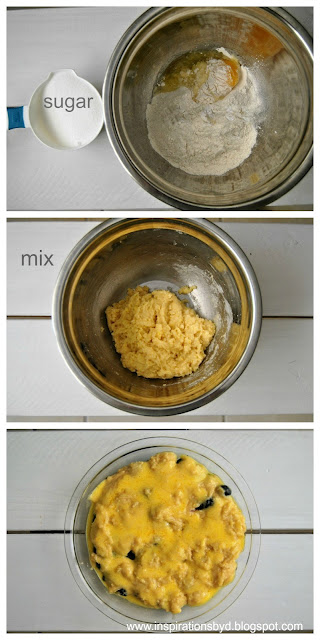
In a mixing bowl, stir in the egg, flour, & sugar until it resembles a coarse meal.
Sprinkle the mixture over the berries.
Drizzle melted butter over the mix.  Bake at 350 degrees for 30 minutes or until lightly brown and bubbly.  let stand for 10 minutes.

www.inspirationsbyd.blogspot.com
Ingredients:

4 cups of fresh blackberries and blueberries
1 tablespoon of lemon juice
1 large egg
1 cup of sugar (if you like it extra sweet, add more sugar)
1 cup of all-purpose flour
7-8 tablespoons of butter
Whip cream (optional)
Garnish: fresh mint sprig
blueberry cobbler
cobbler


Hope that you enjoy!


Linked to:
Massive Sway/SITS Girls


Easy Shrimp and Vegetables

Easy Shrimp and Vegetables
It's no secret that we love vegetables in our home, but what a great and refreshing 
way to add flavor, color, and texture to a dish by combining shrimp and vegetables. 
Did you know that by placing onions is the refrigerator you can avoid tearing up 
when chopping it?  Good to know for those of us that cook with lots of onions.
NOTE: For this recipe, you'll need to have your shrimp already cooked, so make 
sure you cook them before adding it to this dish.
In a pan add a tablespoon of olive oil,  add chopped garlic and cook until oil is hot.  
Add red onions, zucchini, and baby Bella mushrooms.  Make sure your mushrooms 
are rinsed.  Add salt and pepper to taste. While they cook for a minute, bring a pot of 
water to a boil, add 1/2 Tsp of salt to the water and add small potatoes.  I used 
a mixed bag of potatoes that contained, gold, red and blue/ purple small potatoes. 
Let it boil until tender.  Remove potatoes from heat and drain the water.  Set it aside.
recipe
After 2 minutes or so, add cooked shrimp to your vegetable mix.  Cook for another 
2 minutes make sure the vegetables are not overcooked but nice and tender.  
Then add your cooked potatoes to the mix.  Blend and serve.  You may add a side 
of corn on the cob and/ or avocado.
INGREDIENTS: (Serves 3)
1 Tablespoon Olive Oil
2 Cloves of Garlic.
1/2 Red onion
1 Zucchini
3 cups Baby Bella Mushrooms
1 Bag of Cooked Shrimp
1 Bag of Small Potato Mix
Salt & Pepper
I hope that you enjoy this tasty meal, it's easy and fast.  
If you don't like mushrooms or other veggies, just replace them 
with your favorite veggies. 
What I love about this, is that you can even put them on a stick and grill them, 
they make great kabobs too.
Happy Cooking!


Linking to:
Sunday's Best#38
BBQ Link Party/Censationalgirl

How to Make Sushi Rolls-(Re-Post)


I published this recipe in 2013 and it continues to be one of the hottest posts on this blog.
After I posted it, there have been several other blogs that have copied it or changed 
something in the recipe to make it their own.  I wanted to re-post it for those who 
missed it or for those that may be looking for something different to make for dinner.

It is one of our favorite things to eat, especially during Lent and summer.  
Today I will be sharing with you a simple sushi recipe that has no raw fish only imitation crab 
and the rest are veggies.  In the sushi world, we tend to call this a "California Roll".
www.inspirationsbyd.blogspot.com
To make this you will need:

Tip: Cover bamboo mat with plastic wrap to prevent rice form sticking to mat.
www.inspirationsbyd.blogspot.com
For instructions on making sushi rice click this link or here.
Making sushi rice is important to have good sushi.  It needs to be tasty and sticky to roll.
www.inspirationsbyd.blogspot.com
sushi
Add avocado too!
www.inspirationsbyd.blogspot.com
how to make sushi
www.inspirationsbyd.blogspot.com
inspirationsbyd.blogpost.com
Instructions:
  1. Cover bamboo mat with plastic wrap to prevent rice from sticking to it.
  2. Take out a sushi seaweed sheet and cut the sheet to make two smaller sheets. Tip: Using one full sheet will make your rolls too big. 
  3. Place the shiny side of the sea weed sheet faced down over your plastic wrapped bamboo mat.
  4. Wet your fingers to begin placing rice on top of the sheet. Tip: Wet fingers help prevent rice from sticking to your fingers.
  5. Cover sheet evenly and do not overload with rice. Tip: Do not press rice hard, you do not want to mash your rice.
  6. At this point, you may sprinkle sesame seeds over the rice, it adds flavor and texture.
  7. Turn your sushi & rice sheet over to the opposite side. (Don't worry, it won't fall off)
  8. Make sure your sheet is lined up with the edge of the bamboo mat for easy rolling.
  9. To this side of the sheet, add your veggies and crab meat.  Line them up evenly as seen above.
  10. Once you have your veggies in place, start rolling your sushi. Leave about an inch or so out of the end and tuck your sushi in as seen above, then finish rolling the whole sushi roll. (This helps prevent the sushi from falling apart).
  11. Tap the ends of the sushi so it is even and flat.
  12. Once you have your roll wet your knife and slice your roll into half.  
  13. Then cut your rolls about an inch and a half wide, one sushi roll will make 6 sushi rolls/bites.
  14. Repeat steps for more sushi rolls.
You may refrigerate them for company later or enjoy right away.
Happy Eats!

Linked to:
SITS Girls
I Should Be Mopping the Floor
Tutus and Tea Parties
The Frugal Girls
Jennifer Rizzo

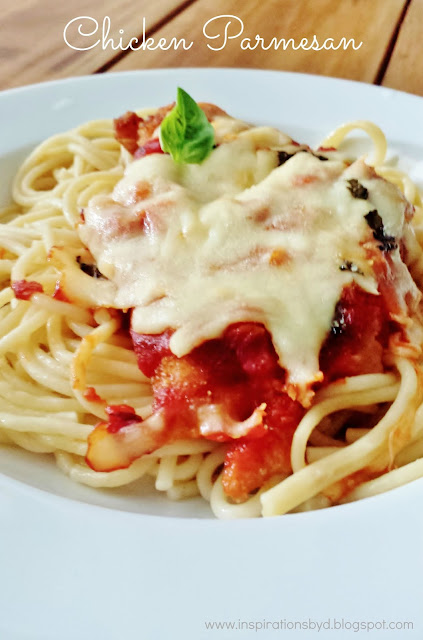
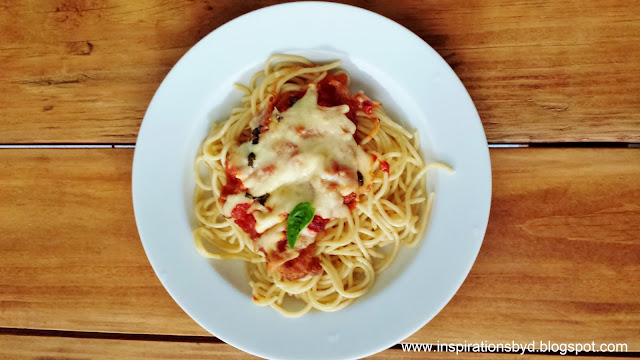
Chicken Parmesan Recipe

Chicken Parmigiana
This recipe is slightly different than other chicken Parmesans out there, it has less 
sauce and a bit crispier.  When I made this recipe for the first time, my little family 
loved it!

I will be sharing the recipe with you today, and hope that you like it as well.  
First let me give you a list of what you need to make this dish:

  • 4 skinless, boneless chicken breast halves
  • salt and freshly  ground pepper to taste
  • 2 eggs
  • 4 cups of bread crumbs or panko bread crumbs
  • 1/2 cup grated Parmesan cheese
  • 2 or more tablespoons of all-purpose flour
  • 1 cup of oil for frying
  • 1/2 cup of prepared tomato sauce 
  • 1/4 cup fresh shredded mozzarella cheese
  • 1/4 cup of fresh chopped basil
  • 2 tablespoons olive oil
  • 1/4 grated Parmesan cheese
  • box of spaghetti
  • 1 tablespoon garlic butter
  • 1 teaspoon salt
  • 1 tablespoon grated Parmesan cheese
  1. Preheat oven to 400 degrees.
  2. Place chicken breast into a large zip-lock bag, on a flat level surface, firmly pound chicken with a meat mallet to a thickness of 1/2 inch.  Season chicken thoroughly with salt and pepper.
  3. Beat eggs in a shallow bowl and set aside.
  4. Mix bread crumbs with 1/2 cup Parmesan cheese in a separate bowl and set aside.
  5. Lightly coat chicken breasts with flour coating both sides.
  6. Dip flour coated chicken in the beaten eggs, then transfer breasts to bread crumbs and coat both sides thoroughly.  Repeat for each breast.  Set aside breaded chicken breasts for about 15 minutes.
  7. Heat 1 cup oil in a large skillet on medium-high heat until it begins to shimmer. Cook chicken until golden, about 2 minutes on each side. The chicken will finish cooking in the oven.
  8. Place fried chicken in a baking dish and top with 1/3 tomato sauce. Layer each breast with evenly with mozzarella cheese, basil, Parmesan cheese and drizzle with 1 tablespoon of olive oil.
  9. Bake in the preheated oven until cheese is bubbly and chicken is no longer pink inside, about 15- 20 minutes.  A thermometer inserted into the center should read at least 165 degrees F.
For pasta:
  1. Boil spaghetti according to box instructions, add teaspoon of salt. 
  2. Drain when done.  Place in a bowl and add garlic butter, sprinkle with 1 tablespoon of Parmesan cheese and 1 tablespoon of olive oil. 
  3. Mix and serve with the Chicken Parmesan.
Chicken Parmesan
Recipe courtesy of All Recipes with adjustments.

Linked to:

Easy Strawberry Donut Cake

StrawberryDonutCake
So it’s after dinner and you forgot to make or buy a sweet dessert for your friends or loved ones, or you just want a late sweet snack, no problem.

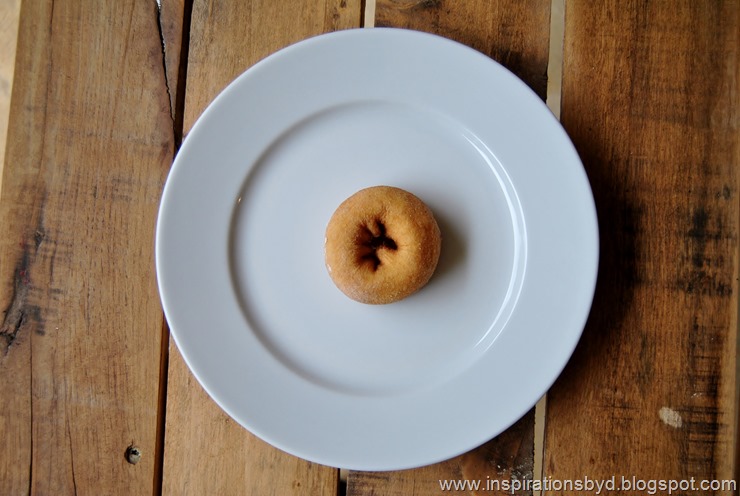
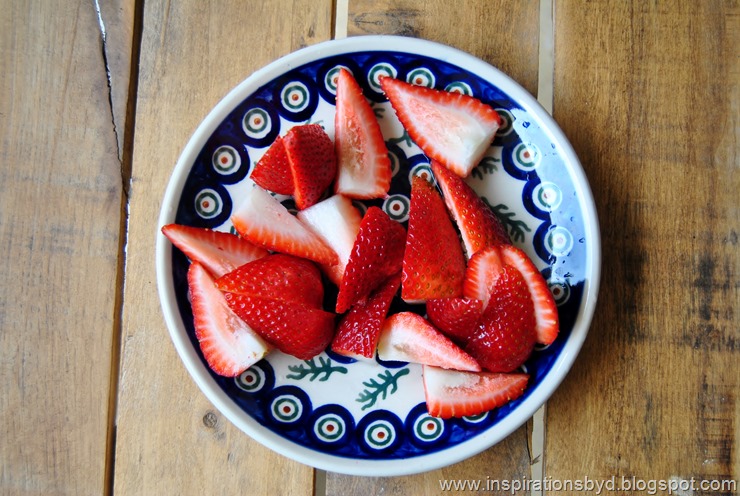
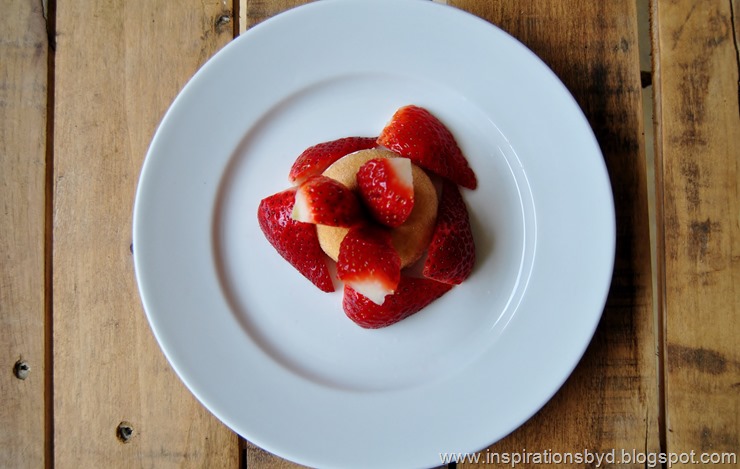
A quick and easy way to satisfy the sweet tooth is by having a package of fresh, ready made donuts available, fresh strawberries, whipped cream and it’s optional to have some strawberry glaze…this adds extra flavor and sweetness to this dessert.  This is so easy. that your little ones can do it. 

Grab your favorite donuts and either cut it in half or leave it as is, then layer the strawberries in the center hole, on top, and sides of donuts.  If you have glaze, go ahead and sprinkle glaze over your strawberry donuts.  Lastly, cover with whipped cream.  For those who really want sweetness…a little side of ice cream wouldn't hurt…oh yeah!  DSC_1919DSC_1916DSC_1926DSC_1922DSC_1932

If you do not have donuts on hand, perhaps fried biscuits like the ones made here, and then the above can work too! 
I hope that you enjoy!!!

Fish Tacos

tacos
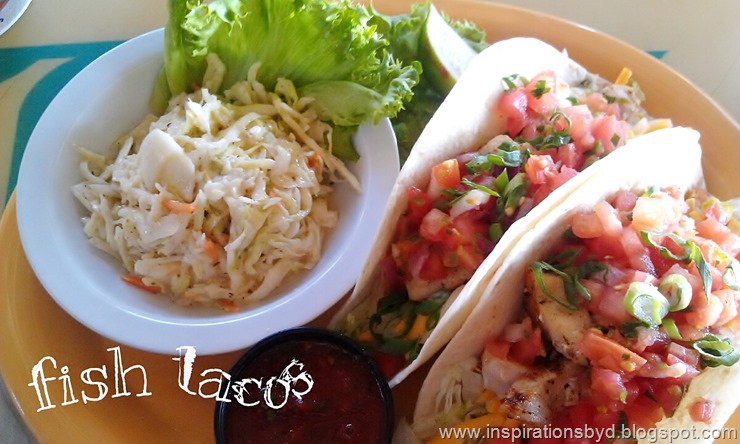
I wanted to try something different other than the ordinary beef or chicken tacos, so my inspiration was to try fish tacos.  It was delicious!  You don't have to be a master chef to cook fish.  If it's prepared and ready to season and cook, you are good to go.
tomatoonionscalliongarlic
For this dish you will need the following ingredients:

Flour tortillas

For the Tomato Mix
4 cups of diced tomatoes (ripe yet firm)
  • 1 red onion, or your onion preference,chopped finely (about 3/4 cup)
  • 1-2 small garlic cloves, minced
  • Scallions/ green onion chopped
  • 1 or 2 lime juice (as per taste)
  • optional to add cilantro sprigs
  • Salt to taste

  • Garnish
  • 2 cups or so shredded lettuce
  • 2 cups of shredded cheese

Fish
  • 1 white fish, such as tilapia, snapper, cod, mahi mahi, or catfish
  • 2 medium limes, halved
  • 1 medium garlic clove, finely chopped
  • 1/4 teaspoon ground cumin
  • 1/4 teaspoon chili powder (optional)
  • 2 tablespoons vegetable oil, plus more for oiling the grill grates
  • Kosher salt
  • Freshly ground black pepper
NOTE: You have the option to bake your fish & use less oil!
picodegallo

Instructions:

Place the fish in a baking dish and squeeze a lime half over it. Add the garlic, cumin, chili powder, and 1 tablespoon of the oil. Season with salt and pepper and turn the fish in the marinade until evenly coated. Refrigerate and let marinate at least 15 minutes. Meanwhile, make the tomato mix and warm the tortillas.

Warm the tortillas by heating a medium frying pan over medium-high heat. Add 1 tortilla at a time, flipping to warm both sides, about 5 minutes total. Wrap the warm tortillas in a clean dishcloth and set aside while you prepare the fish.

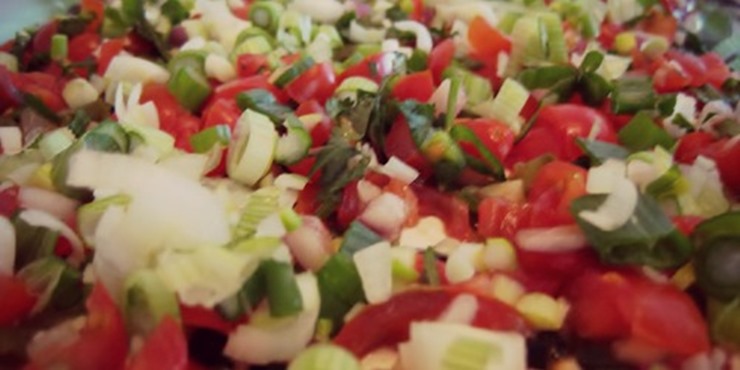
Place the chopped tomatoes in a colander.  Now place the colander on top of a bowl and let it sit for 20 minutes.  Half way through, add the onions, garlic and scallions and give it a light toss. This is to let the flavors mingle.  After 20 minutes, shake the colander to drain off the excess tomato juice.  You will see the drained juice in the bowl below the colander. Discard it.  Take the same bowl, wipe it dry and toss the contents of the colander to the bowl.  Add salt & lime juice. Give it a toss and taste. You can add more lime juice if needed.

Brush the grates of a grill pan or outdoor grill with oil and heat over medium-high heat until hot. Remove the fish from the marinade and place on the grill.

Cook without moving until the underside of the fish has grill marks and is white and opaque on the bottom, about 3 minutes. Flip and grill the other side until white and opaque, about 2 to 3 minutes more. (It’s OK if it breaks apart while you’re flipping.) Transfer the fish to a plate.

To construct a taco, place shredded lettuce and shredded cheese in a warm tortilla, break up some of the cooked fish, place it over the lettuce and cheese, and top it with the tomato mix and any optional garnishes.
xo-
Enjoy!


Linked to:
SITS
My 1929 Charmer


Pin It button on image hover