Get ideas & inspirations delivered to your inbox. You won't want to miss a thing, so subscribe free to the Blog Feed or sign up for Free Email Updates on the latest projects, shop news, blog tutorials & more. Check out the Project Gallery, Garden, Recipes & Inspirations tabs above, to see what you have missed. Browse through the sidebar for this week's Popular Posts!
**Please note: Some links may be broken, if this happens, please let me know which post & search for the title of a post on the search tab on the right while I work on fixing the problem.---->

Cake Pops

Cake Pops
My son and I were craving these goodies the other night and I couldn't resist making them; the pictures are not the best quality due to the darkness in the room that night, but hope that you enjoy, I know that we did:-)

We started with what we needed...
Classic Yellow Cake Mix (and ingredients listed on the box)
Styrofoam to hold up the cake pops
1 Tablespoon of Shortening 

This is what we did.
Placed the cake mix in the bowl.

Added the ingredients specified on the cake mix and followed the directions from the box.

We mixed the batter with hand held mixer.

We poured the batter into a non stick cake mold.

Baked according to the directions on the box, then when it was done I took it out of the oven and allowed it to cool on the counter.
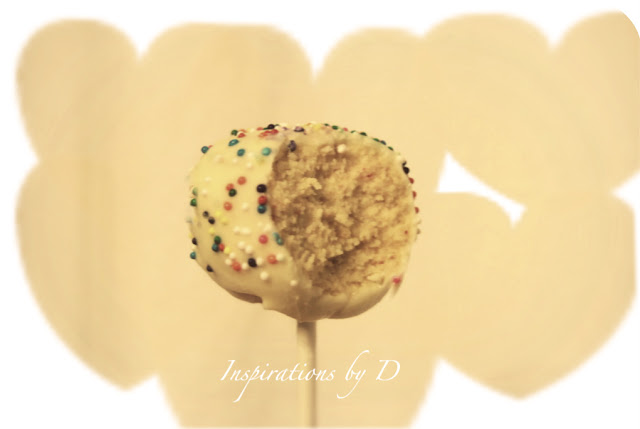
We then cut the cake into pieces and crumbled the cake with our hands in a bowl.

We added a 1/3 of the frosting to the crumbs, some people use 1/2 of the can, we prefer more cake so we used less frosting.

I then had to mix the frosting and the cake crumbs together.
I got messy, I mixed with the spoon first, then had to use my clean hands to mix the rest.  After the cake crumbs and frosting looked like play-do, I rolled the mix into individual balls at about 1"  in the palm of my hands, then placed them on a non stick cookie sheet, you may also use waxed paper.

One box makes about (35 to 40) 1"  cake balls. I then placed the cake balls in the freezer for about 10 minutes, this helps harden the chocolate candy faster when it is applied to the cake balls.

I then melted the candy in the microwave.
You must follow the directions on the box otherwise you'll have a disaster, like I did.
Once these are melted, I stirred the melted candy with a small spoon, 
when it is smooth, I added the spoon full of shortening to thin out the consistency a bit and then I stirred again.
Once the candy was smooth, I took a candy stick and dipped it about an inch into the melted candy, this serves as the glue to hold the cake ball and stick together.
I placed the stick in the center of the cake ball, but not all the way through, about half way. I added the candy coated sticks to all my cake balls.

 I then dipped the balls into the melted candy making sure it was completely coated, sorry guys I forgot to take a photo of that process.
I coated the cake pops on their sides first,
 it's a tricky process, you can take a look at the process on the Bakerella video.
You may use a spoon to help with the coating.
When your cake pop is completely coated, 
slightly tap it on the spoon or bowl so that the excess candy can drip off, 
remember do not tap it too hard or your cake ball may slide off the lollipop stick.
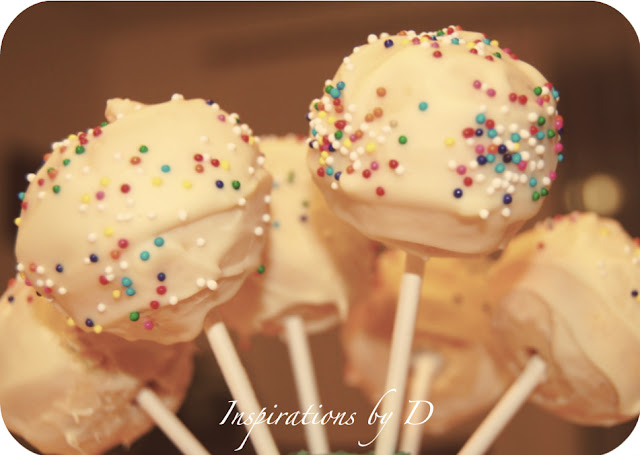
After I coated the pops with the melted candy, I sprinkled some confetti candy for color while the chocolate candy was still soft.

Cake Pops
I gently placed the cake pops on the Styrofoam to hold them up in place.  After they were all done, I placed the cake pops in the freezer for about 10 minutes to harden the chocolate.

Cake Pops

Hello Delicious!
Cake Pops
If you try this recipe, I hope that you have as much fun as we did making them, and even more fun eating them, yum!
Enjoy!
(Retro effect on photos thanks to photobucket editing.)


Don't forget to Rate My Blog @ Top Mommy Blogs

Box Tops for Education and a Winn Dixie $ 25 Giveaway (Winner Announced!)

Time's Up!

The winner of the $25 Winn Dixie Gift Card Giveaway is:

#44 Lynda Del.

Congratulations Lynda! I've sent you an email.


I have unpacked the summer clothes, blown up the pool and enjoyed a couple of lazy days in the sun, but even though summer is in a full swing, back to school season is just around the corner.
As I mentioned previously, this will be the first official school year for my son and with all the school budget cuts in our nation, I want to make sure that he is provided with everything that he needs in his new school for a better learning experience.

I was happy to be informed that this summer Winn-Dixie is making it even easier to get a jump start on back to school savings for you, me and our schools.  At Winn Dixie earning extra Box Tops can be as simple as stocking up on just two of your favorite participating General Mills products.  What is Box Tops?  Click here to find out.

I have already purchased a few grocery items for our family, including Honey Nut Cheerios, Lucky Charms, Betty Crocker Mix and Yo-plait just to name a few. 
You and I can earn cash for our children's schools by clipping Box Tops coupons from hundreds of participating products such as the ones I mentioned and sending it to our school Box Top Coordinator.  Box Tops also offers easy ways to earn even more cash for our schools online.

Learn more about Box Tops for Education and how you can help your child's school by visiting them here.  Visit Box Tops for Education on Facebook and on Twitter.

Winn- Dixie $25 Gift Card GIVEAWAY

How to Enter
To be entered to win the $25 Winn-Dixie Gift Card, just answer the following question in the comments section of this post.  Which participating General Mills products are you looking forward to purchasing during the Box Tops for Education offer at Winn-Dixie in an effort to help your local school?

Contest ends Wednesday August 3, 2011 at 8pm CST.  One entry per person, please.  This contest is open to U.S. residence only.  Winner will be selected by Random.org and announced here on 8/4/11.
Remember to include your e-mail so I may contact you if you win.
Good Luck!

"Disclosure: The Winn-Dixie gift card, information, and giveaway have been provided by General Mills through MyBlogSpark."

Random Ramblings


ONE
Hello all, I hope that you had a wonderful weekend.  I had a productive one myself.  My husband and I have been working on our little hallway nook project and I cannot wait to add the finishing touches.  There are a few things that I need to get before it's complete.  I will post all about it once we are done.  Do you have any projects that you are working on?

TWO
As for the photo above, do you like it?  It is a Chalkboard Pendant Necklace.  I just had to make it, I couldn't resist.  It is certainly a conversational piece.  I will be adding this piece to my shop later on today.  If you like it, drop by the shop where you will see more photos.  I may be be adding more, in silver and other finished materials later this month and the key word is may because I'm not quite sure yet.
I mentioned that I was closing the shop, but until everything is gone, it will continue to remain open.  I have been digging around my craft closet and have found a few things that I need to post in the shop so stay tuned.

THREE
My little one will begin kindergarten in only a few weeks.  We are all excited about it.  I have to admit, I'm a bit nervous about the whole thing, but that will be another post.
Enjoy your week!


Don't forget to Rate My Blog @ Top Mommy Blogs

Silhouette Tutorial

Hi everyone, I want to thank you all for participating in this great giveaway offered to you from Blurb.   We have a winner...click here.
Now for this great tutorial!
Silhouette Tutorial
You are going to love this one.  After trial and error and other tutorials, 
I have finally come across the easiest way to make these lovely Silhouettes.
Everyday Mom Ideas has an easy four step guide on how to create your own from your computer.  
To get started you will need the paint.net program. 
Visit everydaymomideas for the instructions and get your craft on!
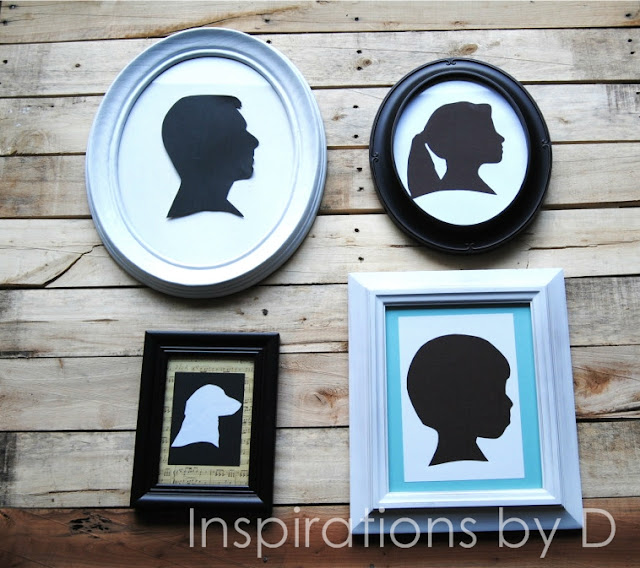
Create your own silhouettes for your home I did.
I grabbed some picture frames to frame my silhouettes and even spray painted a couple in white.
After I was done creating my silhouette on the computer with paint.net, 
I took the "save ink approach" and made the silhouette the size I wanted to frame it on the computer screen.
I took a thin piece of printing paper and traced the silhouette from the screen onto my paper,  
yes I know, but it saved me some ink. 
Another approach that works well also is taking a picture and placing it against the window 
and tracing your photo over it.
Then I cut out the template and traced it on the scrapbook paper.
I cut it and glued it on my background then I framed it.
To view how my silhouettes turned out click here.
Hope that you enjoy!

Shabby Chic Magnets


This is an exclusive design available only at Inspirations by D.  We won't be making this set anymore.  These four glass magnets are available here.
We are having a discount at Inspirations by D shop for a limited time only!

Shop here!
Don't forget to Rate My Blog @ Top Mommy Blogs

A Touch of Blue

source: bhg
pinkwallpaper
(source)

Etsy
Just a touch of blue to serve as inspiration for the home.  
Do you have anything blue around your home?

Linked to:

How to Grow Sunflowers

One of the many flowers that we are growing in our garden this year is the sunflower.  
This flower is easy to plant and it does well on it's own, so there is very little
 maintenance.  My son has taken the pleasure of planting his own sunflowers 
around a couple of flower beds and he is a proud little gardener as he watches 
them grow.
If you want to grow your own sunflowers, here is what you need to do:
Buy a packet of sunflower seeds from your local garden store.
Sunflower seeds are best sown outdoors directly into the garden. 
For individual planting, put the seedling or seeds in just about any sunny location.  
Make sure they are visible from your deck, porch and windows; 
you will want a good view for these lovely flowers.
Whether you plant directly outdoors or transplant them, 
make the final spacing as follows:
  • Giants: Space three feet apart in rows three to four feet apart.
  • Regular/Intermediate sizes: Space two feet apart in rows three feet apart.
  • Miniatures: Space one foot apart in rows three feet apart.
    Poke your finger into the soil making a small hole in the
    ground and plant one seed then cover with soil.
     After planting, cover them with a screen,
    as the birds and animals love to dig the seeds out.
    You can also start them in a seedbed and transfer them when they are small.
    Sunflower plants grow well in average to rich soils. They need to grow their roots deep and wide, to enable them to withstand strong winds. If you have a choice, sandy soils are not recommended, as they are easily uprooted in loose soil. Rich soil is important when growing giant varieties.
    How to Grow Sunflowers
    You can protect the sunflowers against birds and squirrels by covering the entire flower with an old nylon stocking, a cheese cloth bag or any other covering that allows light and especially air to flow through.  Do not use plastic bags, it will rot your plant.
    These lovelies have grown pretty fast in our yard.
    Do you know that sunflowers face the direction of the rising sun?   
    These flowers will make your yard look beautiful and you may also
    use them to adorn your home with cuttings.

    Hope that you enjoy growing your own sunflowers this summer.
    What flowers are you growing in your garden this year?

    Linked to:

    Savvy Southern Style #83

Blurb GIVEAWAY (Winner Announced)

Thank you for participating, the winner for the Blurb giveaway was selected by Random.org.
Miranda said...#15


I would make a book full of baby pictures of my daughter.
July 8, 2011 5:47 PM


Happy Friday!
I have received my Blurb book in less than a week and I am thrilled with how my book turned out.  I worried that the pictures were not going to print well, but they are gorgeous, they show great color and sharpness.  The binding and cover are durable.  It was fairly simple to create the book.  Blurb provides many templates, but for my book I used photo templates only.  I love my book!
As I stated before, Blurb is a creative and marketing platform that unleashes the creative genius in everyone.   The Blurb platform makes it easy to design, publish, market and sell professional quality books. 
GIVEAWAY
To celebrate the weekend, Blurb is giving away to one lucky Inspirations by D reader 
a  $ 75 Free Book Coupon so that YOU can create your own book! 

Think about all that you can do, a blog book, cook book, wedding book, 
family book, travel book...the ideas are endless.

How to Enter
To enter to win $75 Free Book Coupon Giveaway, just answer the following 
question in the comment section of this post.  What will your book be about?  
Please leave your email so that I may contact you if you win.

Contest ENDS  Friday 7/15/11 at 8pm CT. Winner will be selected by Random.org.
Good Luck!
This giveaway is now closed.
Don't want to wait?
Create your book now and Save 20% On Your Entire Blurb.com Order (Code BLURB20)


Pin It button on image hover