

Today, I will share with you how I created a simple border with Vinca flowers in my backyard. As you know, during the winter months, our yards tend to look pretty sad and dull, and in the spring, we can bring them back to life by planting flowers. I chose Vincas for this little project. I wanted to create a border with these flowers because they bloom year after year. They are round, flat flowers that appear on top of 12 to 15-inch stems. These drought-tolerant bedding plants thrive in any soil type as long as it is fast-draining and not overly fertile. These are very easy to care for. I purchased small flowers in a pack of 12 that only cost me ten dollars, so I got a lot of starter flowers that will eventually grow nice and thick to fill the whole space and will look lovely. You may also plant these in pots if you do not have a yard or space to plant them.

What you will need:
- Measuring tape
- Garden Hoe
- Rake
- Small Shovel + Medium Shovel
- Flowers
- 2 Sticks with string
- Garden cutting knife or scissors
- Soil
- Mulch (rocks)
- Bucket
- Stakes
- Border ( I used bricks)
- Gloves
- Water + watering can
As you can see, the space is full of weeds, and to make it interesting, I decided to add a border. Later on, we will fill the remaining soil with grass.

The first thing I did was choose a location in my backyard to plant my blooms. I then marked a straight line across to make the rectangular shape even. I used a measuring tape to measure how wide I wanted the space to be. You may use sticks and string to do this. Stretch the string between the sticks and mark the line with a trickle of ground white limestone, which is available at garden centers.

Once I marked the area, I then began removing weeds by using a hoe and a rake. When I removed all the weeds in the area, I evened out the soil so that it was all at the same level otherwise, it would remain lumpy, and you do not want that if you use rocks as mulch. The amount of mulch or soil that you use depends on the space that you will work on. This is a fairly sized space measuring approximately three yards on one side and two yards on the other, both sides of about twenty inches wide. I purchased one bag of soil and six bags of rock mulch.

Once leveled, I placed a weed control barrier to prevent weeds from growing through. You may also use cardboard, brown paper bags, or newspapers to do this. To keep it down, you may pinch the ends with spikes to hold it in place. When the covering was laid out and ready, I took my flowers and placed them where I wanted to plant them and marked the spots.


Then the flowers were planted and filled with healthy soil to help them grow. The extra soil that was removed was thrown in another part of our yard.
When the flowers were in place, I watered them and my husband helped me place the rock mulch. Originally I wanted wood chips, but in order to prevent critters and termites, it is best to use rocks or rubber mulch around the home if you live somewhere where termites may be a problem.
Finally, we added simple bricks that we already had on hand to create an edge to finish the border. There are many choices for edges, but to save money, we opted for the bricks.

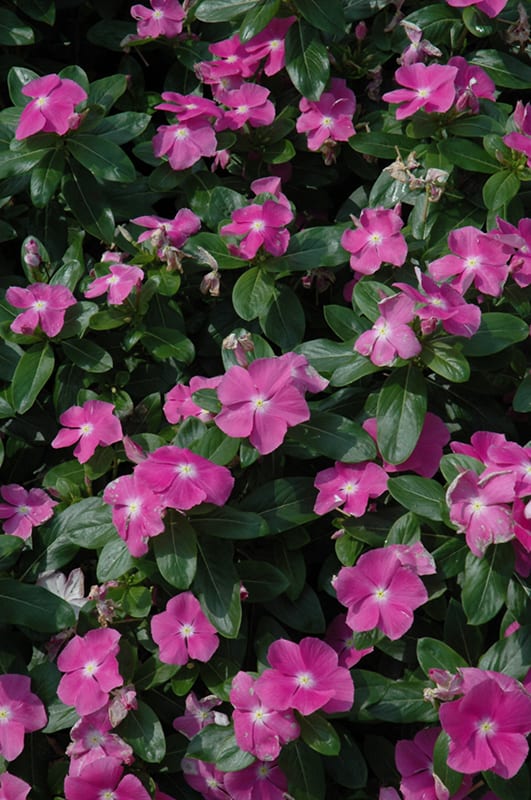
After several weeks or a couple of months, they should fill in like the photo below filling the flower bed and covering the mulch. I cannot wait for these beauties to grow.
There are so many lovely ideas for a backyard. If you enjoyed this DIY you may also enjoy how to lay a patio as well. The ideas for a backyard are endless. Do you have any ideas for your outdoor space?
Happy Gardening!
(*I will be compensated for this post. This post also contains links.)
