Get ideas & inspirations delivered to your inbox. You won't want to miss a thing, so subscribe free to the Blog Feed or sign up for Free Email Updates on the latest projects, shop news, blog tutorials & more. Check out the Project Gallery, Garden, Recipes & Inspirations tabs above, to see what you have missed. Browse through the sidebar for this week's Popular Posts!
**Please note: Some links may be broken, if this happens, please let me know which post & search for the title of a post on the search tab on the right while I work on fixing the problem.---->

DIY: Acorn Garland

DIY: Acorn Garland
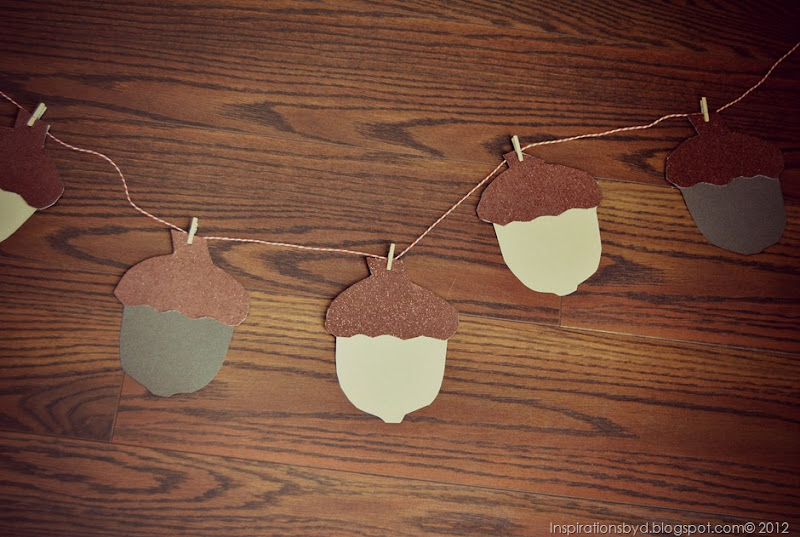
A simple acorn garland can bring in Autumn flare into any decor.
 This past week we made our own acorn garland.
It's a great project for kids and parents to make together. 
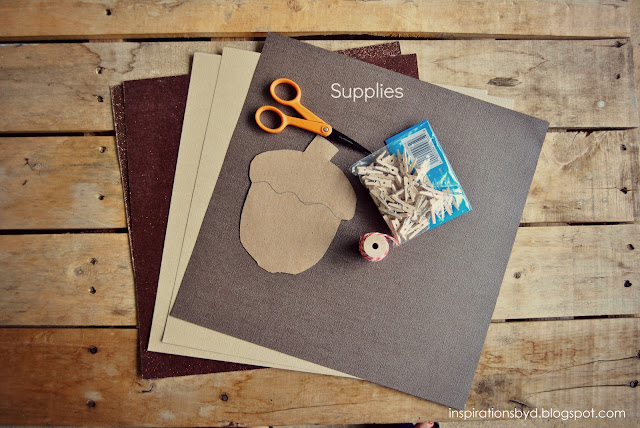
To create your own, you will need the following supplies.
MATERIALS:
  • Scrapbook paper textured or different designs.
  • Scissors
  • Pencil
  • Tiny Spring Clothespins
  • Baker's Twine
  • Glue
  • Acorn Template
1. Print your acorn template and use it to trace and cut out the acorns
    from the scrapbook paper using the back side.

2.Trace as many as you want to use to create your banner and cut them out. We made six.

3.Trace the top portion (the cap) of the acorn on your dark paper, then cut those out.

4.Paste the acorn caps to the acorn cutouts.

5.When the glue is dry, you can clip them on the twine with the small clothes pins.
DIY: Acorn Garland
Now you can hang them anywhere in your home for Autumn.  
To make it fun, you can write names or words on the acorns.
DSC_0550a
Thank you for stopping by and hope that you enjoy making these.
If you do not have time to make your own from scratch,
visit Paper Source Crafts, for a kit.
Hope that you enjoy!


DIY: Autumn Wreath

DIY: Autumn Wreath
This weekend I started adding little signs of the Autumn around the home. 
We enjoy adding small reminders of fall harvest such as 
pumpkins, acorns, autumn wreath, and flannel blankets around the house.  
By adding these small touches, I am reminded of what the Fall season was like when I 
was a child.  I recall the beautiful colors of the branches on the trees, 
and running through the colorful fallen leaves on the sidewalks as they lay in a pile outside.

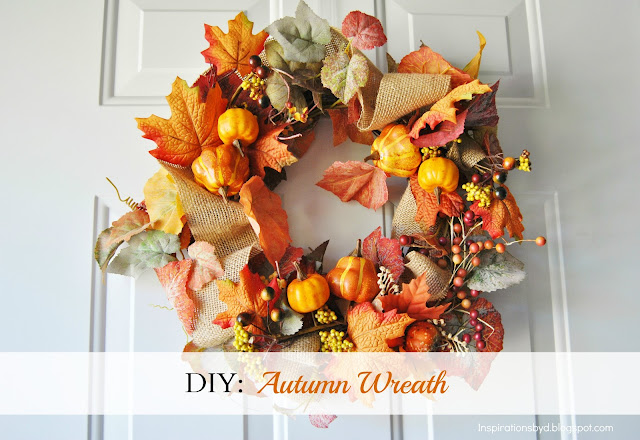
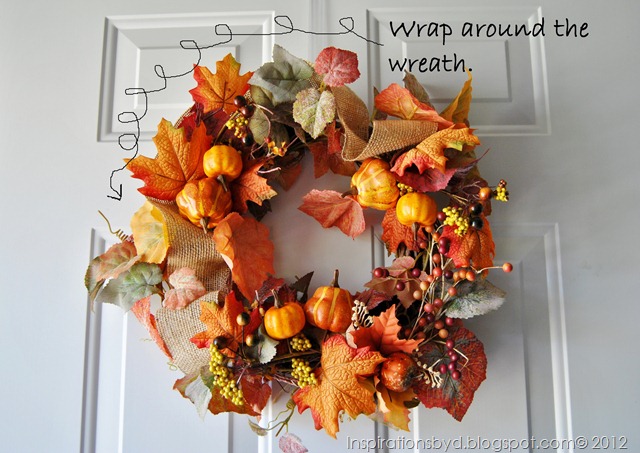
So to bring back that warm and cozy feeling, I made my front door wreath with plans 
do add a few more touches later on to our home.
I gathered my supplies from the Dollar store, 
but you can also go to your local craft shop or other market.
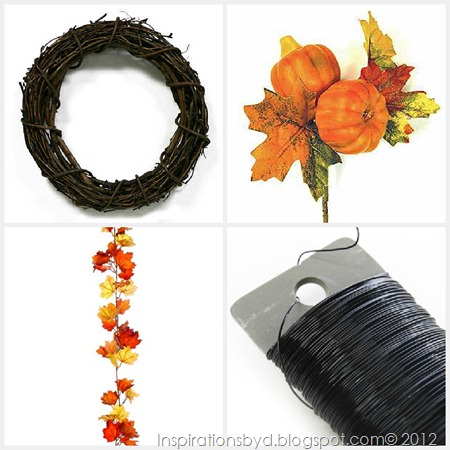
The Materials I used were the following:
  • Grape vine wreath
  • Ready made leaf garland  (may need two if leaves are sparse)
  • Artificial pumpkin pick with leaves
  • Harvest mixed berry branch
  • Floral wire
  • Scissors
  • Burlap (already had on hand)

fallwreath
fallwreatha
1. Lay your grape vine wreath on a table.

2. Take your leaf garland and place it over the grape vine wreath to form a
circle over the wreath covering it completely.

3. Take your floral wire, and use it to tie the garland to the wreath to secure it in place. 
You may need to cut several pieces of the floral wire to tie up any loose sections.

4. Once your garland is securely tied, you will take the berry branch or branches, 
and attach it to the wreath, using the floral wire to secure that as well.

5. The next step is to add your pumpkins or gourd picks around the wreath,  
stick each one securely within the grape vine wreath, 
you may secure it with the wire if necessary.
DSC_0485
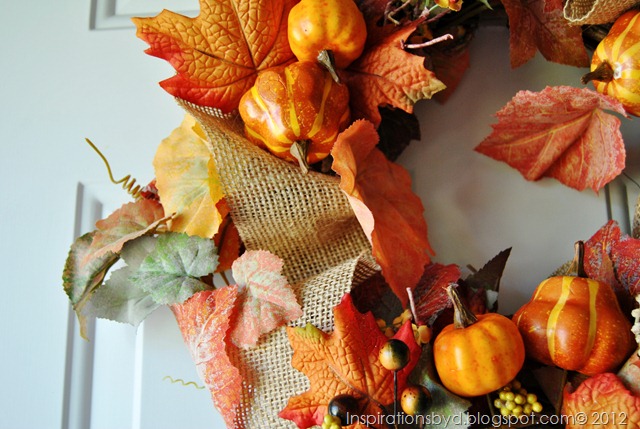
6. To add the burlap, you can either use a burlap ribbon, 
or use burlap fabric and cut strips to form a ribbon.
Place the  burlap ribbon in a looping form around the wreath, 
tucking it into the grape vine wreath or use the wire to secure that as well.
I just tucked it in.
DSC_0496
How to Make Fall Wreath
If anything feels loose, remember to use the floral wire to secure any loose pieces and
keep the knots out of site by tying them on the back of the wreath.

Photo of the Day


DSC_0554

DSC_0556
DSC_0559
This is the time of year that we get the most butterflies in the Butterfly Garden.
I have to say that aside from ladybugs, these are the only other insects that don't make me cringe,
beautiful aren't they?
I can't help, but to grab my camera and photograph there beauty.
Do you have butterflies in your area?

Linked to:
thehollierogue


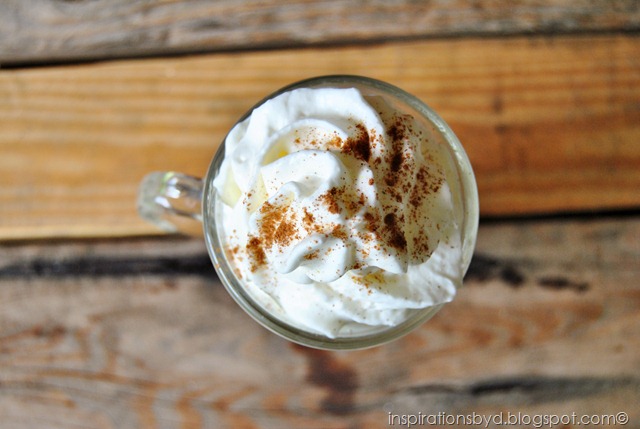
White Hot Chocolate

White Hot Chocolate Recipe
 We had guests arrive by surprise a couple of days ago, but it was much to their surprise that we had our roof replaced during their stay.  I wish we had known that they were coming, then we could have changed the repair date.  Can you imagine the chaos that was going on at our house, mostly outdoors?
Oh it was musical with the bang, bang here, and the cong, cong there, magical I tell ya,
I thought that the ceiling was going to fall on our heads.

Our guests were staying over for two nights, so I tried to make their stay as comfortable as possible.  I managed to make everything comfy & cozy to make them feel at home.  I also decided to make a decadent drink for us all and since we all love chocolate, I made it extra special. I decided to make my hot chocolate "white chocolate"  instead of dark chocolate and boy was it ever good.   
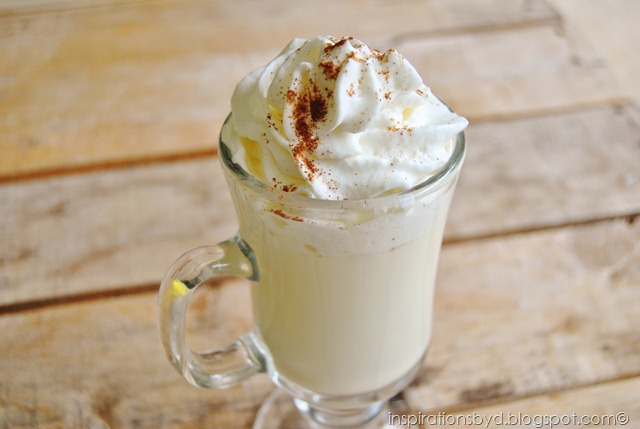
If something in this big wide world can be referred to as 'perfection in a glass', then it must be this white hot chocolate drink.

Oh the thoughts of a crackling fire on a cool breezy night holding this warm and delicious delight.
Oh cool air come soon!
DSC_0485
Ingredients:
3 cups half & half or light cream
2/3 cup white baking pieces or chopped white chocolate baking squares.
1 3 inch piece of cinnamon stick
1/8 teaspoon ground nutmeg
1 teaspoon vanilla extract
1/4 teaspoon almond extract
Ground cinnamon (optional)
Whipped cream (optional)
DSC_0493White Hot Chocolate RecipeWhite Hot Chocolate Recipe
This drink is so easy to make, but I must warn you, it is rich.  If you are looking for something that is not as rich, I would add less white chocolate to the recipe and for those who prefer slim and skinny drinks, I would substitute the half & half with fat free half and half or skim milk.  So are you ready?  Here is what you do:

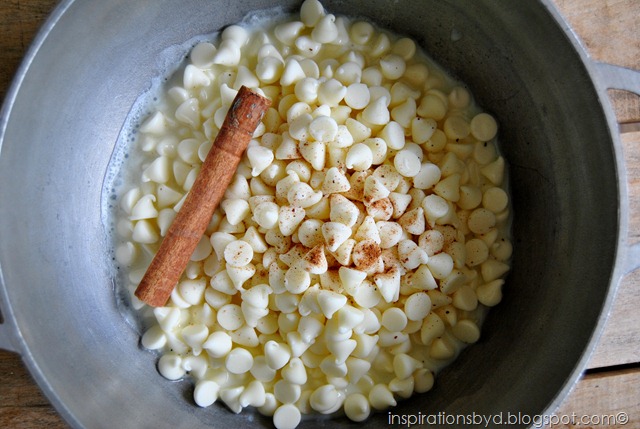
In a medium saucepan combine 1/4 cup of the half and half, the baking pieces of chocolate, cinnamon and nutmeg.  Stir over low heat until baking pieces are melted.  Add remaining half & half.  Cook and stir until heated through.  Remove from heat.  Remove and discard cinnamon stick.  Stir in vanilla and almond extract.  If desired add whipped cream and cinnamon to top it off.  Enjoy!

Linking to:
Craftberry Bush
Home Stories A 2 Z
Tip Junkie 10/2
The 36th Avenue 9/27
SITS Girls
Crystal and Co.#63
Crazy for Crust
I Should be Mopping the Floors #35 

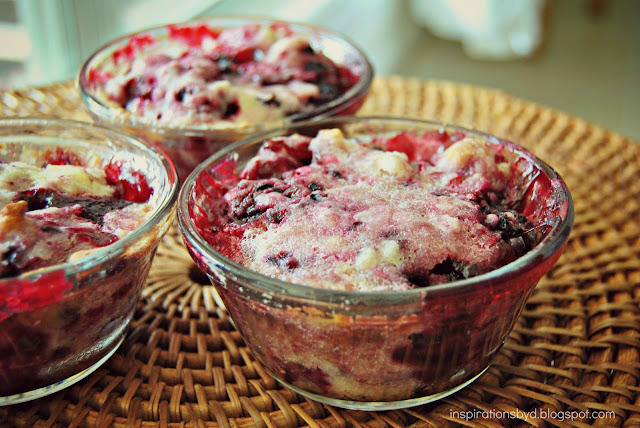
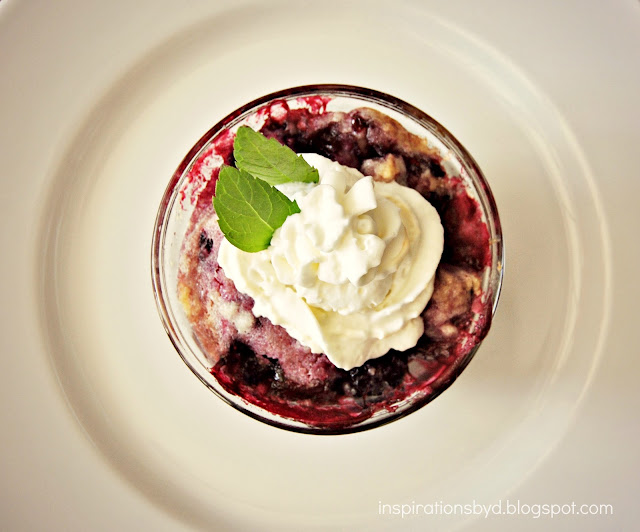
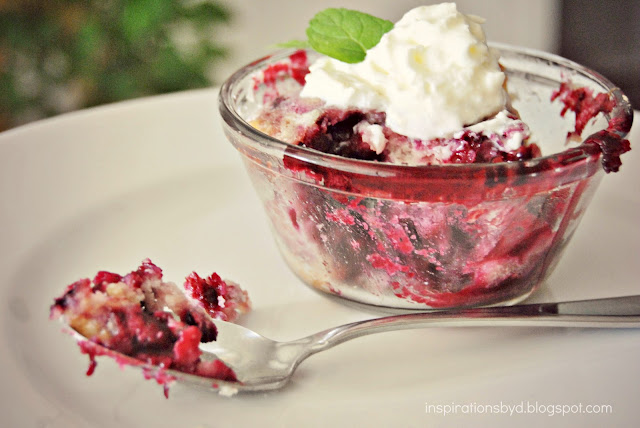
Blackberry Cobbler


Blackberry Cobbler

 This is the easiest blackberry cobbler ever!  This is truly delicious!
I found this recipe in Southern Living a few of years ago and I've been making this dessert ever since. Share this dessert with your family and friends the next time you want to entertain.

I'm all about simple, so this is a lovely fit to my simple lifestyle, fresh fruit and 5 easy ingredients. 
Ingredients:

4 cups of fresh blackberries
1 tablespoon of lemon juice
1 large egg
1 cup of sugar (if you like it extra sweet, add more sugar)
1 cup of all-purpose flour
7-8 tablespoons of butter
Whip cream (optional)
Garnish: fresh mint sprig
Preparation:

Preheat oven 375 degrees.  Place blackberries in a slightly greased 8-inch square baking dish, sprinkle with lemon juice.  Stir together egg, sugar, and flour in a medium bowl until mixture resembles coarse meal.  Sprinkle over fruit.  

Drizzle melted butter over topping.  Bake at 375 degrees for 35 minutes or until lightly browned and bubbly.  Let stand 10 minutes. 
Easy Blackberry Cobbler
Blackberry Cobbler
Easy Blackberry Cobbler
Serve warm with whip cream and garnish with fresh mint sprig, if desired.
{TIP}For a cute presentation, bake for the same amount of time 6 (8oz.) ramekins
on an aluminum foil lined baking sheet as I did above and serve cute individual servings.
Serves 6
Enjoy!


DIY: Felt Leaf Garland

DIY: Felt Leaf Garland
pottery barn knockoff felt leaf garland
 There’s a wonderful world of possibilities in the world of felt.  I created a home accent garland with some felt sheets, blending seasonal colors and shapes.  This is great for kids' playrooms or just to decorate around the house.  My inspiration came from a Pottery Barn catalog. 
Let me show you how I made this garland.
Materials
  • Leaf template
  • Scissors
  • Embroidery needle
  • Ribbon (8-9ft)
  • Thread
  • Felt Sheets
  • Chalk (optional)
  • Pencil
  • Fabric glue

Instructions
1. Print out your leaf template.

2. Use provided leaf template to trace and cut out leaves from felt sheets.
Note:  the number of leaves used for this banner was 10, plus extra leaves for overlapping.
3. Use chalk to outline where your stitching will go.
4. Stitch your thread on a few leaves, not all.
5. Take two felt leaves of the same shape;
Slit lines with the scissors to one as you see below, on the orange, felt leaf.

6. Once the slits are done, brush the fabric glue to the slit leaf and press it over
the second felt leaf of the same shape.
The felt leaf in the back will show through the slit as seen below giving it a 3D effect.

7. You may cut smaller leaves to glue over larger ones for a different effect.
8. After you are done decorating your leaves, take the ribbon, threaded needle and stitch your leaves on the ribbon, you only need one stitch.
9. Then knot the string to close it and secure it, cut the extra thread off.
how to make felt leaf garland
Now you have a felt leaf banner!
Hang it on your mantle, door, mirror or bed frame. The kids will love it in their playroom too!
Happy Crafting!


End of Summer Giveaway -ENDED!

True Random Number GeneratorMin: Max: Result: Powered by RANDOM.ORG

Congratulations to #3- Hoa!

Hoa   September 4, 2012 7:54 PM        .3
                  Subscribed via e-mail.
alittlepieceofheaven777(at)yahoo(dot)com


Win Jen's look by entering this amazing Michael Kors Aviator
sunglasses giveaway only at Inspirations by D.
I'm ending the summer with a fabulous giveaway!
Don't let summer go by without these lovelies!
To enter this amazing giveaway, all you have to do is subscribe to this blog &
leave a comment on THIS post letting me know that you subscribed.

This Giveaway is now closed.


Pin It button on image hover