Get ideas & inspirations delivered to your inbox. You won't want to miss a thing, so subscribe free to the Blog Feed or sign up for Free Email Updates on the latest projects, shop news, blog tutorials & more. Check out the Project Gallery, Garden, Recipes & Inspirations tabs above, to see what you have missed. Browse through the sidebar for this week's Popular Posts!
**Please note: Some links may be broken, if this happens, please let me know which post & search for the title of a post on the search tab on the right while I work on fixing the problem.---->

DIY Glitter Votive

glitter votive

I have a scented candle that I love, although I can't light it up due to allergies and asthma, 
I keep it warm to release the fragrance and it works well that way.  As you can see it's
 green, and although I love green, I don't have green decor in my home, so I decided to 
dress it up with a lot of glitter.
I used what I had on hand, my votive, Mod Podge glue, paint brush, and the glitter.
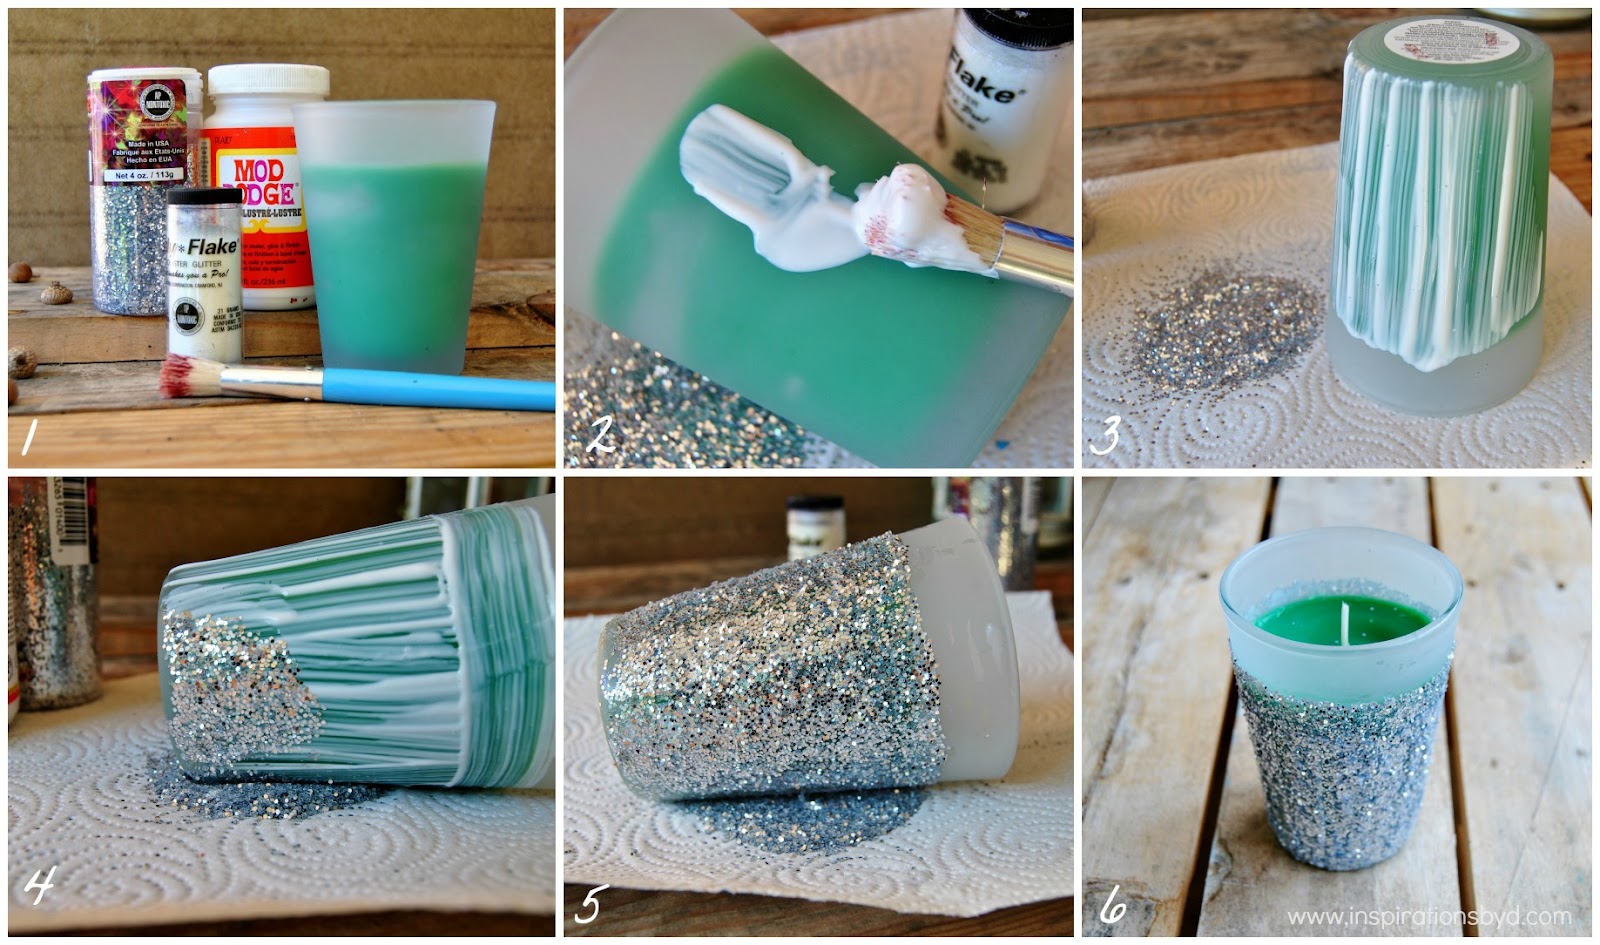
For those with unsteady hands,
I recommend using masking tape to cover the area where you will not add glitter.
-- Simply paint your glue onto your votive.
-- Then sprinkle or roll on your glitter and that is it.
Now you have a sparkling votive perfect for the Holidays and great for New Years.
Happy Crafting!

Linking to:
Craft O Maniac
Polka Dot Pretties
Create with Joy
My 1929 Charmer
Tutus and Teas Parties
A Night Owl
The 36th Avenue
Sew Chatty
The Trendy Tree House
Lil Luna
Salt Tree

Easy Chalkboard Lettering Tip

Easy Chalkboard Lettering Tip
Chalkboard Lettering Tip
DSC_0613
How to create Chalkboard Lettering

Here is a simple and easy tutorial to get that chalk font that you have
been seeing all over the net on your own chalkboard.

  • Simply print on paper, the art or words you wish to draw on your chalkboard.
  • On the back of the print, use a chalk to color over the print, make sure you cover the print completely.
  • When you are done, take a pencil and trace over the print so that the chalk will transfer over to your board.
  • Then if you wish, color in with chalk or chalk ink or make necessary corrections to your transfer.

DIY: Felt Ball Ornament (Updated Photos)


 It's that time of the year again when everyone shops, travel, entertain and
decorate for the Holidays.  This year I wanted to add white to my Christmas tree,
 so I opted to make my own white felt ornaments.  Do you remember the scrunch flower tutorial?

In this tutorial you may use that method or use the method below to make the scrunch flower.
Lets begin.
(1)  You will need the following:

       (2)   Using your round template/cup, trace circles on the felt.  Cut out your circles.  {To make several of these ornaments, you will need lots of circles.  Each of these flowers has about 5-6 felt circles.}   Make sure you cut a smaller circle for each flower that you make, it will serve as a base.

       (3)   Place a drop of glue on the center of your large circle and fold in half.

       (4)   Take your folded circle and fold again in the shape of an "s" or use the method on the previous tutorial.  Either one works fine.  The "s" form gives it more depth.
www.inspirationsbyd.blogspot.com

(5) Glue the folded pedal to the base and continue gluing your folded pieces 
around the base until it's filled.

(6) Place the top pedal to cover the open center.

(7)  When done, this is what your flowers will look like.  Repeat for more felt ball ornaments.

(8) Turn your flowers over to their back.

(9) Cut a piece(s) of ribbon; glue one end of the ribbon to the back of the flower 
using one drop of glue.  Glue the other end of the ribbon over the glued ribbon to hold it in place.

(10) Add glue to the back side of another flower and lay over the ribbon & flower.

(11) Press firmly to make sure it is glued properly and evenly.

(12)  This method should form your scrunched felt ball.

You may spray it gently with adhesive and add sparkle to your ornament(s) with fine glitter.
And there you have it, a Scrunched Felt Ornament.


Happy Crafting!!


Pin It button on image hover