themicrogardener

lilblueboo
inspiracionline
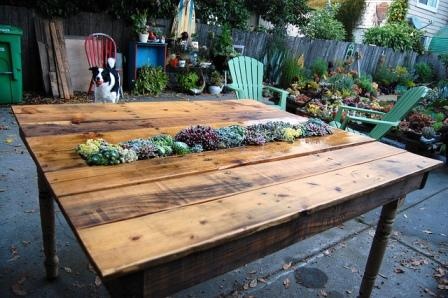
There is so much you can do with pallets, it just amazes me.
Mr. M was inspired to work with pallets after viewing different furniture ideas.
If you remember, he worked with some pallets for this project
and has not stopped since.
He built a desk for me, but I don't have a photo to share at this moment,
but if you visit Funky Junk Interiors, it is exactly like hers.
He followed her tutorial, and now we have a large desk to meet our needs.

We were also in need of night tables for our bedroom and Mr. M decided to build

lilblueboo
inspiracionline
There is so much you can do with pallets, it just amazes me.
Mr. M was inspired to work with pallets after viewing different furniture ideas.
If you remember, he worked with some pallets for this project
and has not stopped since.
He built a desk for me, but I don't have a photo to share at this moment,
but if you visit Funky Junk Interiors, it is exactly like hers.
He followed her tutorial, and now we have a large desk to meet our needs.

We were also in need of night tables for our bedroom and Mr. M decided to build
them out of pallets. I was not sure about it at first, considering that pallets tend to
have rough edges, but when he was finished with the tables, I was smitten with them.
The edges were sanded and clean, without taking away that rustic look.
have rough edges, but when he was finished with the tables, I was smitten with them.
The edges were sanded and clean, without taking away that rustic look.
Of course it needs to be filled in in many areas, but once filled, sanded and painted,
I'm sure that it will work in our room. My current dilemma is what color to paint it.
Any suggestions?
I'm sure that it will work in our room. My current dilemma is what color to paint it.
Any suggestions?
This is the headboard that we recently worked on.
The frame is made out of pallets, can you tell?
There is a tiny problem though, due to the overlapping of the wood,
it makes it difficult to add nail heads evenly. My man was not thinking about nail heads,
so it's going to remain that way, sigh!
I may have to leave them out of this one, unless I place them around
the headboard like the Pottery Barn headboard.
Help me here, I need suggestions, leave them out or put them in?
So once these items are finished, I'll post the final reveal for you to see, wish me luck.
Hope that you enjoy!
For more pallet ideas go here and get yourself inspired!


