Get ideas & inspirations delivered to your inbox. You won't want to miss a thing, so subscribe free to the Blog Feed or sign up for Free Email Updates on the latest projects, shop news, blog tutorials & more. Check out the Project Gallery, Garden, Recipes & Inspirations tabs above, to see what you have missed. Browse through the sidebar for this week's Popular Posts!
**Please note: Some links may be broken, if this happens, please let me know which post & search for the title of a post on the search tab on the right while I work on fixing the problem.---->

Coney Island Astroland Park (Guest Post)

Astroland Cyclone
Guest post by Mikey (my husband)

One of our many stops back home in Brooklyn was to Coney Island Astroland Park.  
This nostalgic, family-friendly amusement park brought back so many childhood memories.  
Home to The Cyclone, this New York City National Historic Landmark is listed in 
the New York State Register of Historic Places.  You may read the history 
of this Amusement Park here and here.
Wonder Wheel
I remember coming here in the summer months as a child with my dad.  My weekends 
were filled with cotton candy, seafood and the kiddie roller coaster.  
It was happiness for me as a five year old and as a teenager.
As I tried to catch a glimpse of the kiddie roller coaster to show my little one,
 I noticed that it was gone.  It was replaced with another ride but not from my memories.
   They were testing the Soaring Eagle while we were walking around 
eating Nathan's famous hot dogs.  I wanted to ride it so bad, but had to 
wait until the weekend when it was to open.  
Like myself, my son loved it!  He loves carnivals and amusement parks
so this was a special treat for him.
This sign was pretty BIG and visible.
...need I say more!  :)

Mikey
Don't forget to Rate My Blog @ Top Mommy Blogs

Blurb Review

Have you heard of Blurb?
 It is a site where you are able to create your very own "anything" book. 
You will find all the tools you need to make your own photo book, cookbook, baby book, travel photo book, blog book, story book...and so much more.
They offer quality printing and binding with a range of choices from hard to soft cover paperbacks.  It also provides an array of trim and sizes.  Best of all, once you publish your book, you have the choice of selling it online in their bookstore and receive a profit.  Doesn't that sound GREAT!

I have taken the opportunity to create my own personal book with Blurb. 
My book features family moments which I decided is not for sale.  I published it for our family to enjoy and I am sure that creating your very own would make a great gift for your family as well.
Blurb's software is full of layouts, designs, ideas and more.  At first it was a bit overwhelming, but once I got going, it became a fun project.  I can't speak for the written portion of the software, because I only used photo pages and I played with different layouts to see what worked best for me.
The software is pretty easy to use.  Make sure your computer runs fast and smooth before downloading the software, otherwise creating the book may be delayed on a slow computer.
Although the software can automatically adjust the size of my photos, I found it to be a bit challenging only because I was hoping to have full page photos in my book.  Due to the size quality of my pictures, that was not an option for me, so I had to settle for smaller photos.  Over all, it was a great experience and I enjoyed working with the Blurb software. 
I can't wait to receive my book!
I think that my next creation with Blurb will be a story book for my little one or maybe even a craft book, who knows.  There are so many ideas.
Will you be creating a book of your own?
I hope you do.  Have fun.

Create your own book and get 20% off your by using code: BLURB20

(Disclaimer) This is a Sponsored post written by me on behalf of Blurb.  All Opinions are 100% mine.

Our 12th Wedding Anniversary & DIY Rose Ice Cubes

Create these Rose Ice Cubes for a Special Occasion. 
Visit Jonathan Fong Style for a list of what you will need and instructions on
how to make these beautiful and romantic ice cubes.

It is our 12th Wedding Anniversary and we are celebrating!
We look back on twelve years ago, when we stared in each other's eyes.
We repeated our vows, our hearts were soaring
We exchanged rings; we brushed each other's tears
We said "I do" and sealed our contract with a beautiful kiss.
And through the years, we have still stared into each other's eyes
We have laughed, we've cried, 
We have disagreed, we have compromised, and we have made up
We have tried to never let the sun go down on our anger,
We have tried to remember the words uttered long ago and have tried to
 keep them fresh every day.
We have worked at it, and we have prevailed
We persisted, and we are victorious
And now, we stand here together, 
to once again stare into each other's eyes
Repeating our vows, letting our hearts soar even higher.
Remembering the rings and what they mean,
Cherishing the tears,
saying I do again, and again and again.
And keeping our contract solid, and fresh, and beautiful.
With a Kiss.


Decorate Using Maps

Decorate Using Maps
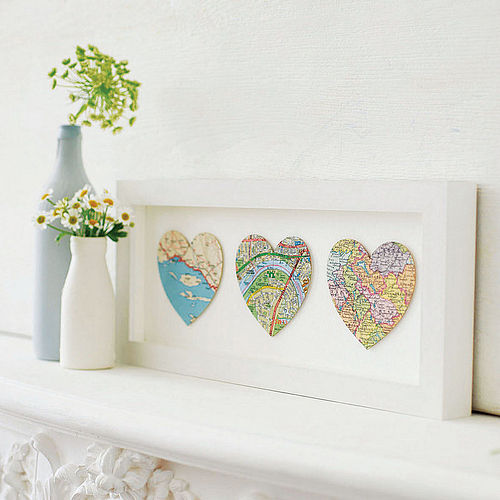
Don't know what to do with your old maps?  Here are several ideas to get you started.
 Lamp Shade
Create a banner
Great for displaying alphabet...

Remember this post?  Why not use maps too!

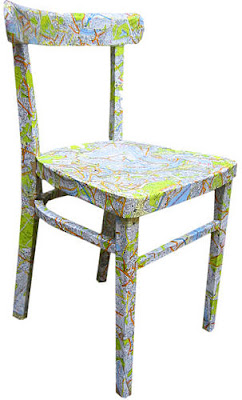
Mod Podge  furniture or other items around the home or office.
(images: notonthehighstreet)
What can you create using Mod Podge and Maps?
Hope that you enjoy these ideas and get creative this summer!


Don't forget to Rate My Blog @ Top Mommy Blogs

Decorate Flower Pots

Decorate Flower Pots
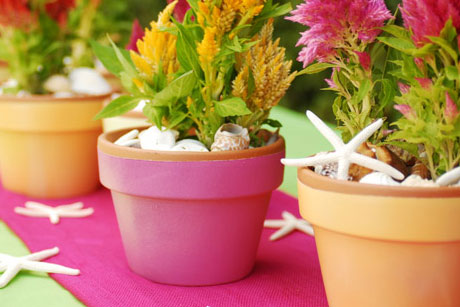
Here is a beautiful way to add character and elegance to a flower pot, 
just add shells and paint your pots in vibrant colors.  Add  graphic stencil design elements
to make them standout.

What a creative way to store bath necessities and make it look fabulous.  Great for guests!
marthastewart

 These were wrapped in fabric, aren't they lovely!  
Grab your mod podge and your favorite decorative fabric and start wrapping your planter.

Are you having a barbecue?  How about using this colorful display for your utensils!

These are all beautiful ideas for your flower pots this spring. 
I hope that you enjoy them and make some of your own.
Which one is your favorite?

Don't forget to Rate My Blog @ Top Mommy Blogs

A Moment of Reflection


It's between You and God

 People are often unreasonable, illogical and self-centered.

   Forgive them anyway.
 If you are kind, people may accuse you of selfish, ulterior motives.
   Be kind anyway.
 If you are successful, you will win some false friends and some true enemies.
   Succeed anyway.
 If you are honest and frank, people may cheat you.
   Be honest and frank anyway.
 What you spend years building, someone may destroy overnight.
   Build anyway.
 If you find serenity and happiness, others may be jealous.
   Be happy anyway.
 The good you do today, people will often forget tomorrow.
   Do good anyway.
 Give the world the best you have, and it may never be enough.
   Give the world the best you have anyway.
    Why?
 Because in the final analysis, all of this is between you and God….
   It was never between you and them anyway.


Mother Teresa 

Don't forget to Rate My Blog @ Top Mommy Blogs

How to Make Chalkboard Mugs

Chalkboard Mugs
I remember a few months ago when I saw something similar in a store.  
I wanted to buy them, but when I returned to the shop, I was 
told that they were sold out.  I was so disappointed.  
I really wanted to get those cups.  
Since I haven't been able to find anything else like them, 
I decided to make my own.
I got these HUGE cups at the local supermarket at a great price.  

This is a great way to personalize your tea and coffee, 
maybe even soup or cereal.  They are great for my next kaffeeklatsch.

For this project, I used chalkboard labels instead of chalkboard paint, less mess.
  Here is what you will need to make your own:
Ceramic mugs/cups
Chalk or chalk ink
Make sure that your labels can be used by both chalk or chalk ink.
First thing you should do is to make sure your cups are nice and clean.
Second, make sure that you have the correct size label for your mug.
If you need to adjust the size of the label, you may cut it down as I did.
Once you have the right size, just peel it and stick onto your mug.
Next, write what ever you like with the chalk or chalk ink.
chalkboard mugs
That's it, wasn't that easy?
 These label mugs bring a creative style to your mornings. 
Happy crafting!


Grilled Cheese Reinvented


I had to post this today, I wanted to share the simple, 
yet so delicious new way to make grilled cheese.
Just the other night we had grilled cheese sandwiches and tomato vegetable soup,
 and it was so filling and tasty. 
 The next day I found this beauty.  I read the recipe and it has all of 
our favorites in it; bacon, cheese, and avocado. Although the recipe requires
 apples, I omitted the apples on mine, only because I didn't have any on hand.
If you would like this yummy recipe visit Jana Laurene at her 
beautiful blog Janalaurene.com and have a taste for yourself.  
She has other recipes that you may want to try.

Hope that you have a great weekend!

Photo of the Day


I wouldn't mind waking up to this scene every morning, beautiful isn't it?  
What is your favorite scenery? 

DIY: Fabric Flower Headband

Do you recall the post on how to make fabric flowers?
 If you do, you may use them to apply them to a headband.  
If you are new here, and do not know how to make fabric flowers, 
click here to get the scoop.

You will need a simple headband and your choice of ribbon (optional)
 a glue gun
 fabric glue
 felt
(filigree is optional, you may use felt instead)
Gently and with tiny dots, use the fabric glue, not the glue gun, to glue the ribbon to the headband.
  Gently press it against the metal headband to make it flat and neat making sure there is no excess glue coming out.  This is used to cover the shiny metal on this band.  You also have the option of wrapping the ribbon around the headband. 
Wait for it to dry.
Now that your flowers are done and have been adhered to a piece of felt, you have the option of gluing the flower to the filigree base, or just use the felt already attached to the flower.
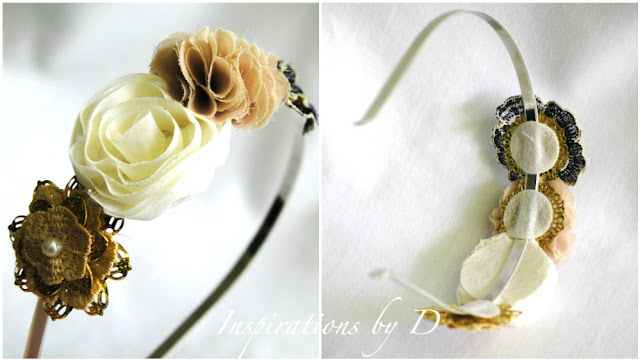
When that dries, hot glue the underside of another piece of felt,  to your headband as seen below on the right and press that felt against the other felt or filigree, to hold the flower in place. 
(Note: if you use felt, make sure it is the same size as your felt base.)
DIY: Fabric Flower Headband
Target inspiration
  Once that is dry, you are done.
Play with as many types of fabric flowers as you like, there are different variations;
 rosettes, sheer fabric flowers and even fabric lace flowers as seen above.
The lace flowers are glued one over the other,
 using a filigree metal to separate them and a small decorative pearl was glued on top to finish off the look.
For other tutorials on making floral headbands visit these blogs:

Happy Crafting!


Don't forget to Rate My Blog @ Top Mommy Blogs


Pin It button on image hover