Get ideas & inspirations delivered to your inbox. You won't want to miss a thing, so subscribe free to the Blog Feed or sign up for Free Email Updates on the latest projects, shop news, blog tutorials & more. Check out the Project Gallery, Garden, Recipes & Inspirations tabs above, to see what you have missed. Browse through the sidebar for this week's Popular Posts!
**Please note: Some links may be broken, if this happens, please let me know which post & search for the title of a post on the search tab on the right while I work on fixing the problem.---->

Happy New Year & New Magnets!

glass clock magnets
 With all the hoopla of the New Year, I wanted to make something
really cool to start off 2013.  I saw a few beautiful pocket watches
with glass domes and totally fell in love with their nostalgic flare.
So guess what I just had to do, yep, you got it!
I mimicked the look by creating these beautiful magnets.
I just love them, don't you?
glass clock magnets
You may find them at The Shop Here.
Hope that you have a safe and wonderful New Year.
Any resolutions?

New Year Inspiration from LMM


Hello friends, I'm squeezing in this lovely inspiration from Sasha at
LemonadeMakinMama, love her to death, have I mentioned that?
She writes about her family and shares creative ideas on her blog.
Sasha is the friend next door that you want to hang out with to exchange daily stories.  
There is a lot of creativity in this momma and her photos prove it.
She is one of the gals that really inspire me and I wanted to share a Giveaway that
she is hosting over at her beautiful blog.

Included are some silver and gold dessert plates, some coordinating napkins, a box of rock candy swizzle sticks, 20 gray stripey straws, a teeny white candle, a great sample of lotion that will make your hands feel like silk, and some sparkly little ear bobs.  
If you are interested in entering to win this New Years' Giveaway,
head on over to her blog to enter.
I hope that you have a Blessed and Happy New Year!

New Year's Eve Inspiration

Happy New Year, 1700s Paris Inspired New Years Eve Printable Cupcake Topper And Wrapper Set- Simply Print, Cut, Assemble, Enjoy
Hello friends, I have collected a few ideas to inspire your New Year's Eve
dinner, party and entertainment.  
We have the cupcake toppers above available at Etsy.
A wonderful table display below with a New Year theme, lets use the clocks around our homes.

Sparklers for your sweets below.
Party ideas! Sparkling New Year’s Eve Cupcakes via gastrogirl


A lovely table display above with glitter covered horns.

Have your champagne in a bucket full of ice.


Decorate your champagne glasses with gold or silver paint confetti
dots using feather and freckles tutorial.


And this is my favorite, I love this idea of using a fabulous backdrop for photos.
For the pinata clock tutorial visit the link.
I hope that these ideas have inspired you.  Visit this post for more inspiration.
I hope that you have a wonderful New Year!

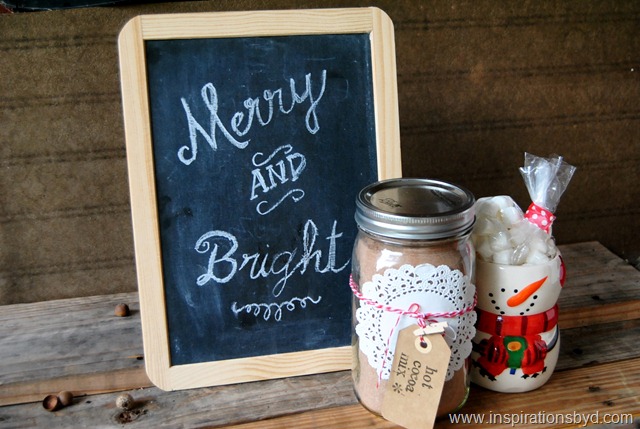
Merry and Bright..


Hello friends, just dropping by to wish you a Happy Holiday.  
I must take some time off to spend with the family and refresh the mind.  
I hope that you enjoy the festivities and 
time well spent with loved ones.  Merry Christmas!

Christmas Home 2012- Simple

DSC00727
Welcome to our Christmas home.
It’s all about enjoying our surroundings during this time of year.
My son and I are fighting the flu and it seems as if Mr.M may catch it as well,
so there’s a lot of coughing, sniffles,...
We just want to cozy up by the fireplace, drink our liquids and rest.
I kept my décor very simple this year, a tree and little reminders here and there.
Here is a collection of photos.
DSC_0734
DSC_0743
DSC_0712
DSC_0741GiftsDSC_0677DSC_0699DSC_0704DSC_0730DSC_0732DSC_0744DSC_0633 (2) - Copy
More of the fireplace here.


DSC_0707Christmas treeMerry Christmas !
Garlands Here.

Linking to:
Not Just a House Wife
The Nester " Christmas Tour of Homes"
Savvy Southern Style

Wreath Makeover


wreath makeover
Hello friends.  Before I begin, I just want to share my deepest sympathy with the families
in Newton, Conn.  My heart goes out to all the families who lost loved ones and
suffered through this whole ordeal.  Our prayers are with them.
DSC00730
Allow me to begin my post.
My traditional wreath was old and in very bad shape.  It had been in the attic throughout
the hot summer months, most of the decorations melted off and the rest were falling apart.

I decided to take my dated wreath and give it a face lift with some plastic
vintage ornaments and boy am I glad I did.  I love it!
I traded my traditional look for a whimsical one, bright and colorful.

I was inspired by the Pottery Barn wreath on the cover of their catalog,
 but because I didn't have enough ornaments,
I just used what I had on hand to make it my own.
All I used was; the old wreath, floral wire, scissors to cut wire, & ornaments.
DSC_0718
After removing all the old wreath's decor,
I simply wired the ornaments one at a time to a single branch on the wreath .  
Twisted it around until it was secure, ornament after ornament, side by side.
DSC_0722
DSC_0736DSC_0734
Now I have a lovely whimsical bright wreath.
It looks so cheery and bright.
Is there an old wreath that needs some TLC in your attic?
I hope that you have a safe and happy week.


Homemade Hot Cocoa Mix in a Bucket

Homemade Hot Cocoa Mix
I have a sweet gift idea recipe for you guys today.  I have made this yummy
Hot Cocoa recipe, tried it and loved it!  It's perfect for neighbors, teachers, co workers and more.

To make this Hot Cocoa Recipe Mix you will need the following:
  • 4 cups of instant dry milk
  • 1 1/2 to 2 cups sugar, if you like it super sweet you may add more to your mix.
  • 1 cup powered creamer
  • 2/3 cups unsweetened cocoa powder
  • 1 package of instant store bought chocolate or vanilla mix pudding (optional)
  • chocolate chips (will melt and make the cocoa taste like melted candy bars)
  • (optional) add cinnamon to mix about a tablespoon or so, it makes it delicious
Homemade Hot Cocoa Mix
   Steps 1 - 4.  Mix all the ingredients into a dry large bowl; the dry milk, sugar, powdered creamer...

   Step 5.  This is optional, but I grinded my chocolate chips and added it to the mix.  
   You may keep your chips whole if you wish.

   Step 7.  This is also optional, add your pudding mix to the ingredients, I had vanilla on hand.  
   This just makes the cocoa creamier and rich in flavor.

   Step 8.  Add your cocoa powder.

Use a whisk to stir everything together, if the cocoa mix clumps, just smash the little balls with a fork.
When everything is evenly distributed, transfer into a clean mason jar, sealed canister or coffee can.
This recipe makes about 15 cups of Hot Cocoa.
Homemade Hot Cocoa Mix
Decorate your mason jar or coffee can as you wish and add marshmallows.

Add instructions on how to make the cocoa.  

For this recipe the instructions should read:

Add 1/3 cup of mix to mug and add Hot water 
or hot milk, top with marshmallows if desired.  Enjoy!
Psst!  For extra rich flavor, add brown sugar and enjoy.
Homemade Hot cocoa mixHomemade Hot Cocoa MixHomemade Hot Cocoa MixHomemade Hot Cocoa MixHomemade Hot Cocoa MixHomemade Hot Cocoa Mix
You may add one or two mugs to your gift or place it in a basket for gift giving.
Get creative and use your imagination.

The way I love to make my cocoa is by warming up the milk in a sauce pan
and add my cocoa mix to the milk stirring it for a minute, then I pour it into my
mug and top it off with marshmallows, cinnamon and whip cream, oh how yummy!
  I hope that you enjoy it.


Cookie Swap Inspiration Board

Hello friends.  Isn't this a sweet idea for a Cookie Swap Party?
Lovely decor, sweet goodies for swapping and just a fun time.

I am also dropping by today not only to inspire you, but I want to share THIS
special sale at Tiny Prints because the Holidays are fast approaching and you want to
have your Gifts or Holiday cards and invitations ready.
So here we go:

For One Day Only (Today, Saturday) - 
Free Custom Notepad With Purchase of 50+ Holiday Cards
 
Use code FREENOTEPAD at checkout to enjoy one (1) free personalized notepad 
when you order 50 or more holiday cards or holiday party invitations. 
Mug must be ordered with holiday cards and/or holiday party invitations for 
promotion to  apply. This offer applies exclusively to personalized notepads, holiday 
cards and holiday party invitations, and is not applicable to Notepads by Erin Condren, 
previously placed orders, shipping, taxes or rush processing fees. 
This promotion code may be combined with other select offers and is valid for 
one-time redemption per billing address only. Offer is only valid on Tiny Prints and 
is not applicable on treatweddingpaperdivasshuttefly, third party or 
partner websites. To prevent abuse, we reserve the right to discontinue or modify 
this offer at any time without notice. We reserve the right to cancel any order at any time. 
Offer expires 12/8/12 at 11:59 pm (PT).

NOTE: This promo IS stackable, meaning it CAN be combined with other offers, 
like free shipping, site wide  etc.

Tiny Prints Sitewide Sale: 25% off Any Order! 

Friday through Sunday only s
ave 25% off all orders using the code DEC25 at checkout. 
There is no  minimum purchase required for this promotion. This offer cannot be 
combined with other offers.  This offer is not applicable to previously placed orders or toward the 
purchase of Erin Condren weekly planners/life planners, William Arthur holiday cards, 
greeting cards, gift cards, gift certificates, calendars or photo books. 

Offer expires 12/9/12 at 11:59 pm (PT). 
Now go get your cards now & have them delivered by next week.
Happy Weekend!

(Disclaimer) This is a Sponsored post written by me on behalf of Tiny Prints.  All Opinions are 100% mine.

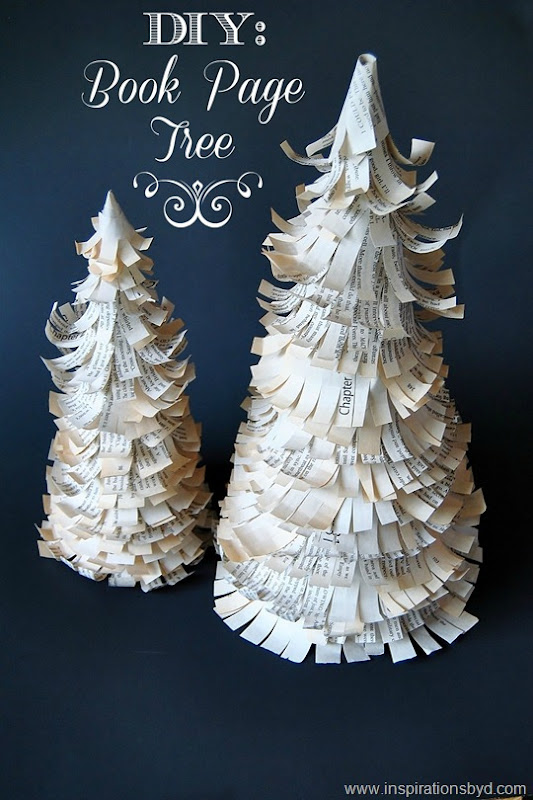
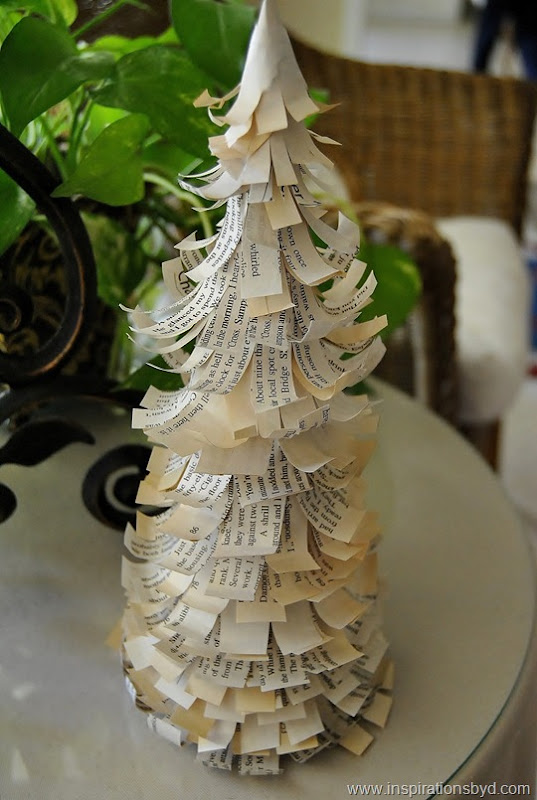
DIY: Book Page Tree

DIY: Book Page Tree
This year I have kept my decor simple as always, but I also kept it 
neutral.  I have used household items for decorations such as books,
glitter, old boxes, extra fabric that I had in my closet and well you get the picture.

As you may re-call, last year I made a paper wreath.  This year to coordinate
with my wreath, I made these paper trees out of the same old book I used last year.

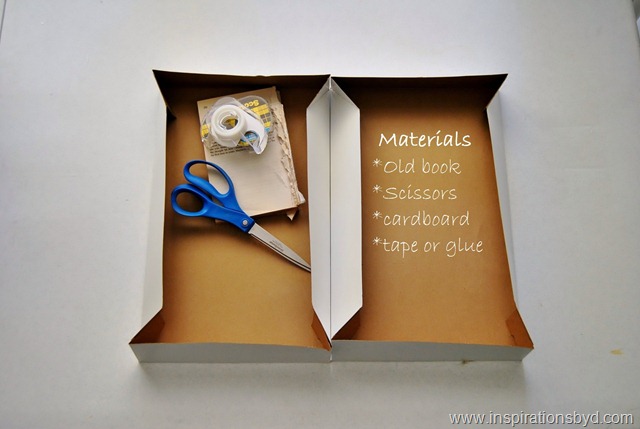
These trees were simple to make, all you need is an old book,
a thin cardboard or poster board,  lots of tape or glue, a pencil and scissors.
I did not want to work with glue this time, I was all glued out, so I used tape instead.  
DSC_0623
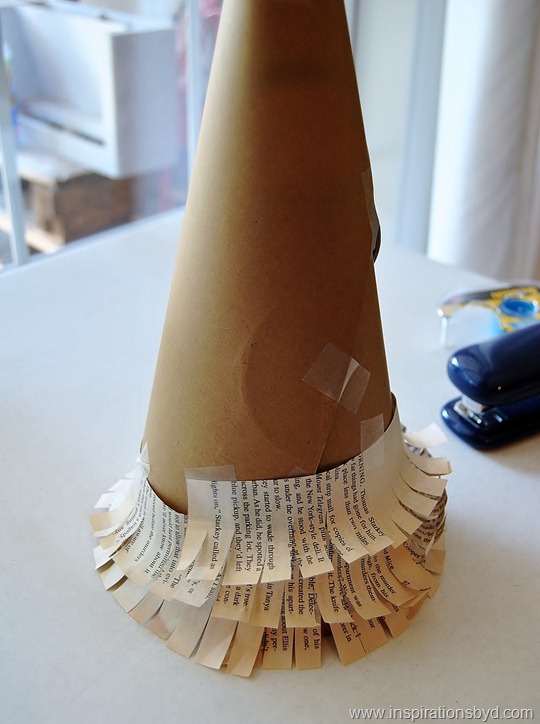
First cut out your card board and form a cone.
Make sure the bottom is even so that it doesn't tilt.
tape it, glue it or even staple it, whatever works for you.

Once your cone is formed, take a sheet of your book and roll it. 
You may use a pencil to do this, it will give your sheet a curled look.
When your sheet is curled, cut it in half the long way to get two strips.

Begin taping/ gluing our sheets to your cone starting from the bottom.
Work your way around it and up the cone.
 For the very top of your cone, make a small cone with your paper
making sure the edges are curled up and glue it to the top of your tree.
DSC_0625
Book Page Tree
Once you are done, you will have a paper tree.
Remember, for this little project you may use any kind of paper you wish.
Happy Crafting!


Pin It button on image hover