Get ideas & inspirations delivered to your inbox. You won't want to miss a thing, so subscribe free to the Blog Feed or sign up for Free Email Updates on the latest projects, shop news, blog tutorials & more. Check out the Project Gallery, Garden, Recipes & Inspirations tabs above, to see what you have missed. Browse through the sidebar for this week's Popular Posts!
**Please note: Some links may be broken, if this happens, please let me know which post & search for the title of a post on the search tab on the right while I work on fixing the problem.---->

Make a Raised Garden Bed

www.inspirationsbyd.blogspot.com
On today's post, I will share our latest project, a "Raised
Garden Bed".  I will keep the post short and sweet.
There are several ways to construct a raised
garden bed, and it all depends on your budget, the size that you
want and the wood you will use.
Our garden bed is 18 inches in height, that gives me enough room to
plant vegetables like carrots, sweet potatoes, and onions. It is 3 x 6
feet. In order to get an idea for the type of garden bed that you
want to build, I will provide this link here.
There, you will see several varieties; you may choose which one to make.

We planted some seeds this summer in biodegradable egg cartons,
so when they sprout, we may plant them in our vegetable garden.
You may view that in my Instagram account.

www.inspirationsbyd.blogspot.com

www.inspirationsbyd.blogspot.com
We added chicken wire to the bottom as well as this dark weed
liner to prevent weeds from growing & critters from digging
from underneath the bed.

www.inspirationsbyd.blogspot.com
My husband measured the width & length on the ground
in order to remove the grass to prepare the ground for the raised bed.

www.inspirationsbyd.blogspot.com
We added the soil and mixed it with organic compost. 

www.inspirationsbyd.blogspot.com

After the soil was mixed into the garden bed, we added the plants.

www.inspirationsbyd.blogspot.com

I hope that this inspires you today to create your own garden bed.
Thank you for stopping by.


Cricut Savings on Materials & Machine Bundles

*This post contains affiliate links and I will be compensated if you make a purchase after clicking on my links.


Hey friends,  Today I want to share a sale with you from our friends over at Cricut.  
This week, Cricut is offering huge savings on Material & Machine Bundles

For my crafty friends out there, this is a must-have for all kinds of projects, especially with
Valentine's Day ahead!  

So if you are in the market to buy something like this to make crafting a whole lot easier, 
now it's the time to get it along with the supplies on sale.

There are many other products on sale right now on their site, so head on over to their site!

Cricut.com is offering Free Standard Shipping on orders $99+ 
with code CRICUTLOVELet me know what you get or what you have made with 
Cricut products. 

Christmas Tree Storage Solution


I hope that you all had a wonderful Christmas. We have enjoyed our Christmas celebration this
year with family and friends as we have sung songs, played games, and feasted on sweets. As
we move onto the twelve days of Christmas, it is our tradition to keep our Nativity set out until
the Epiphany which falls on January the 6th. The rest of our Christmas decoration is
put away until next Christmas. This year I have partnered with Tree Classics to share
our storage tips.

For this campaign, I received a Deluxe Upright Tree storage bag from Tree Classics, in order to
put away the Christmas tree and decorations with ease as we transition into the New Year.
When I received the Deluxe Upright Tree storage bag, I unpacked the bag from the box and laid
it out on the floor to get a better look.  My Tree Classics Christmas tree is 7.5 feet tall, so this
storage bag is a perfect solution for storage.
www.inspirationsbyd.blogspot.com

To store your tree make sure to unplug it, then remove all of the ornaments and decorations.
At our home, we usually start from the bottom of the tree and work our way up
to the top until everything is removed. I lay the ornaments on the table and then store them
away after the tree is in the storage bag. Here’s a tip to help make your transition
a bit easier. Purchase one to three ornament storage containers so that your
ornaments are all in one place when you need them.  This makes storing and decorating so
much easier year after year. There are many places that offer storage containers for
ornaments including online, you may be creative and use anything around your home as well.
I am currently using one of these storage boxes for my glass ornaments and store my other
ornaments in bags to store them inside the tree bag inside the bottom pocket.


Once all the decorations have been removed from the tree, I unplug each section of my Kennedy
Fir Narrow Christmas Tree from the center.  This will make it easy to move the tree sections if
they need to be moved.

The storage bag that I received is a tough canvas-like material.  It feels thick and sturdy plus
it looks like it will keep out dust and dirt from the tree. The bag has sturdy compression straps
that provide the tree with maximum support which I love.  This bag accommodates fully
assembled trees that measure up to 7.5 feet tall and features an extra pocket for storing away
extra ornaments and accessories.
Tree Classics
www.inspirationsbyd.blogspot.com
Tree Classics
www.inspirationsbyd.blogspot.com

The side handles make moving the tree easy. A clear tag holder allows you to identify the bag’s
contents conveniently.
www.inspirationsbyd.blogspot.com

The bag measures 30” long x 30” wide x 89” high and is made of heavy-duty 100% polyester
fabric.  The storage bag attaches to your tree stand and may be used as a simple tree skirt
during the Christmas season.
www.inspirationsbyd.blogspot.com
(Below is the image of the top opening of the Tree Bag.)
www.inspirationsbyd.blogspot.com

When it is time to put your tree away, you will open the bag, lay it flat on the ground and put
your arm through to the bag until you reach the bottom where you will place your tree stand.
Then align the bag with your tree base and slide the bag over it.  Tip the bag over to fasten the
straps to your tree stand with the buckles provided, then flip the stand back over.  Place your tree
on the stand, make sure that there are no ornaments on your tree.  Have two people pull the bag
upwards like a funnel as it compresses the branches upwards as you move it. Once you reach the
top of the tree gather the bag and pull the string tight. If you a have a tree that is taller than
7.5 feet, you may have to remove the top of the tree and place it in the bottom pocket.
When the tree is in the bag, fasten the buckles on the sides for further compressing into place.
To store it carefully tilt it a bit and carry the tree into storage until next year.
www.inspirationsbyd.blogspot.com

When it is that time of the year again, grab your tree from storage, unfasten the top zippers &
straps, pull it down and gather it on the inside of the bag’s base to hide the rest of the
bag forming a tree skirt.

I love my Tree Classics Christmas Tree Storage Bag, it is easier for me to put away my tree as
well as carry it out to get it ready for the Holidays. I think it is a great quality bag, I do not see
any negatives, but only the convenience of this bag. If you want a Tree Storage bag, head over
to Tree Classics, they are having a sale right now!

Thank you, Tree Classics for hosting the Deluxe Upright Storage Bag campaign.

Be sure to visit  Laura from Pet Scribbles for more creative ideas on how to store your
Christmas decorations and ornaments and visit the Tree Classics Facebook page live at
7:30EST as the campaign closes with Jennifer Lutz from Tree Classics.

*Disclosure: Tree Classics sponsored the item on this post. I was not financially compensated for this post. I received a sample for review purposes. There may be affiliate links in this post. The opinions are completely my own based on my experience.*



Christmas House Walk 2017

(*Some products were compensation of honest reviews.  All opinions are mine.)
www.inspirationsbyd.blogspot.com
Welcome to our home! It has been a couple of years since I posted a Christmas home tour.
I mean who can compete with those amazing Christmas homes around the web?
I usually decorate with handmade pieces, old pieces and perhaps with a couple of new ones
when possible.
We begin our little tour at our front door where you are met with our grapevine snowman
and our semi-handmade wreath.  Come in!
www.inspirationsbyd.blogspot.com
As you enter, you may encounter the scent of Northern Lights Black Spruce Essential Oil or
Christmas Spirit from Young Living diffusing in the next room. It is so fragrant and brings forth
coziness of Christmas.
As you continue to walk in, you will encounter our kitchen, you will see my little hot cocoa
section, set up on the counter.
www.inspirationsbyd.blogspot.com
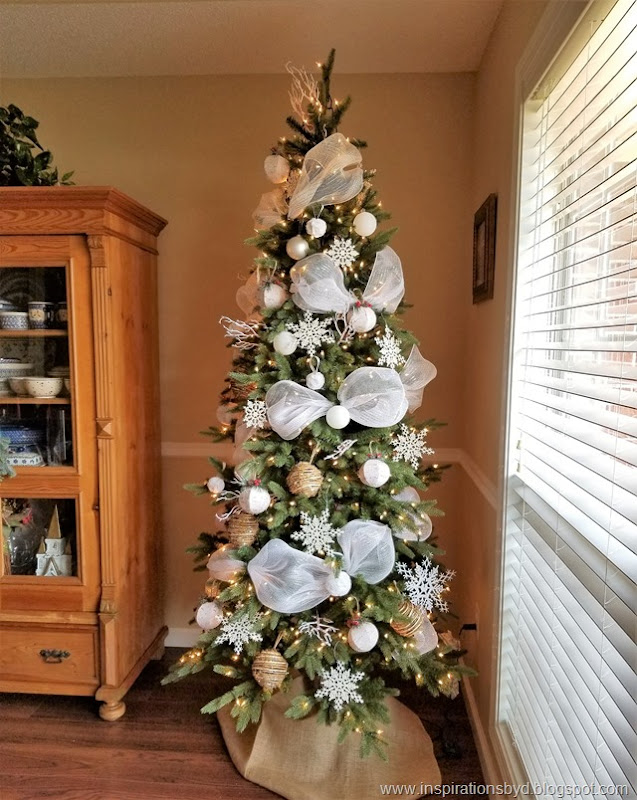
Our living room is decked out with the Nativity scene on the mantel and our Tree Classics
Christmas tree.  In the evening when the Christmas lights are all on, it just has a magical
ambiance and I love it. There are also hidden lights on the Nativity Scene.
www.inspirationsbyd.blogspot.com
Every year I place our Advent Wreath on our kitchen table and this year I am using the same
wreath that I made last year but with new candles.  I also added a Christmas sign above the chalkboard.
www.inspirationsbyd.blogspot.com

www.inspirationsbyd.blogspot.com
TreeClassics
www.inspirationsbyd.blogspot.com
We end the tour in our dining room with a simple festive plaid tablecloth and red candles.
I really wanted to add red here. I hope that you enjoyed our very simple and short Christmas tour.
I would have posted more, but with all the rain here and darkness, it makes it hard to capture everything.
I hope that you have a wonderful Christmas and festive Holidays ahead.


DIY: Christmas Tree in a Bottle Ornament

DIY Christmas tree in a bottle ornament

Bring a unique Christmas style to your home with this handmade ornament!  Add this bottle
brush tree decoration to your collection of Christmas ornaments and look forward to hanging 
it up on your tree every holiday season. Hang it up in the center of a wreath on your front door. 
You can even simply set it on a table or shelf to add a bit of festive holiday spirit wherever 
you need it. You may even tie several together to create a fun garland for your decor need.

This ornament contains a tiny winter scene that will perfectly complement the rest of the 
festive ornaments on your life-size tree! It's been partially filled with artificial snow, 
making it look like a winter weather scene. 

To make an ornament like this you will need the following:

  • artificial snowflakes/flurries
  • small glass bottles with cork tops (four inches or smaller)
  • small bottle brush Christmas trees, (different sizes optional, but that fit inside bottles)
  • hot glue gun and glue sticks
  • string for hanging (your choice of string)
  • looped hooks to place the string

www.inspirationsbyd.blogspot.com

To begin, you may cut the amount of string that you need and tie it through the looped hooks
as seen below.

www.inspirationsbyd.blogspot.com

Screw the hook into the cork making sure it is tight and snug.  You may twist it into the cork
with your hands.

www.inspirationsbyd.blogspot.com

Next, add a drop of hot glue to the bottom of the bottle brush tree and place it into the glass
bottle.

www.inspirationsbyd.blogspot.com

For the wintry effect, add the snowflakes into the bottle pushing it gently with a thin stick,
coffee straw or kabob stick so it stays in the bottom. Then add the cork to the top gently,
but tight to close it.  Make sure it is not loose, some may feel more comfortable by adding glue
to secure it, but I did not add glue to mine and it is fine.

You may make several of these for your Christmas Tree or home decor. They will be great
for an ornament exchange party, the ideas are endless. Aren't they adorable? I love it!
handmade Christmas ornament
Christmas tree in a bottle
christmas tree in a bottle ornament
bottle ornament
These are just too cute and so easy to make, you may be able to find the supplies at any craft
store.
Let me know your thoughts and thank you for stopping by for some Christmas inspiration
today.
Happy crafting!


Pin It button on image hover