Get ideas & inspirations delivered to your inbox. You won't want to miss a thing, so subscribe free to the Blog Feed or sign up for Free Email Updates on the latest projects, shop news, blog tutorials & more. Check out the Project Gallery, Garden, Recipes & Inspirations tabs above, to see what you have missed. Browse through the sidebar for this week's Popular Posts!
**Please note: Some links may be broken, if this happens, please let me know which post & search for the title of a post on the search tab on the right while I work on fixing the problem.---->

Showing posts with label Crafts/ DIY. Show all posts

DIY: Beeswax Candles


Today I wanted to share my experience in candle making.  I made small pillar 
candles out of 100 % beeswax in a couple of different colors.  
Beeswax candles produce negative ions, which cleanse the 
air of dust, odors, toxins, and pollens.  
They are completely non-toxic, non-allergenic and noncarcinogenic. 
With its healthful negative ions and warm, halo glow, they act like indoor air 
purifiers & they burn beautifully.  

The supplies that I used were the following:

- Square Braided Wick
- Aluminum mold (2 x 3) or desired size
- beeswax (I used a 1 lb. block- yields 4 candles)
(NOTE: Beeswax for Candle making come in blocks
 and Beeswax Pellets, also available in White Beeswax )
- Candle Dye Pigment
- cloth pin or pencil to hold the wick in place
- plastic plate or wax paper to protect working surface
- Metal bowl or Candle Making Pitcher
- a base for the mold to stand on leaving space in the center
- Wooden Craft Sticks for stirring
- scissors
- tape
- skewer stick
- pot
- water
- cooking spray

www.inspirationsbyd.blogspot.com

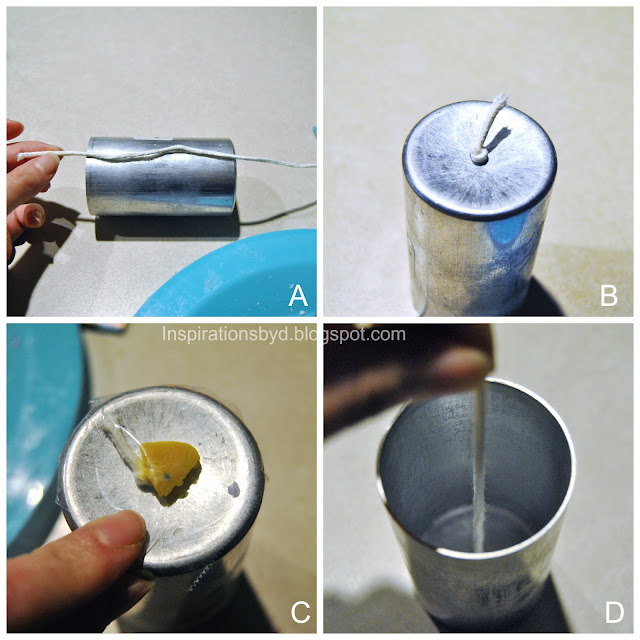
A) The first thing I did was measure the amount of wick that I was going to use, 
this ensures that you have enough wick for both ends.  Use a little cooking spray to spray 
the inside of the mold in order for the candle to slide out easily. Do not saturate. 
The mold has a hole in the closed end where you will pull the wick through. 

B) Make a knot leaving enough wick for the top of the candle. This end will be 
the top of the candle.
C) Take a piece of soft wax to seal that end making sure there are no leaks, then 
tape it off for extra support.
D) On the other side of the mold, pull the wick making sure it is secured.  Hold the 
wick up using the cloth pin until it is ready to have the wax poured inside of the mold. 
How to make beeswax candles

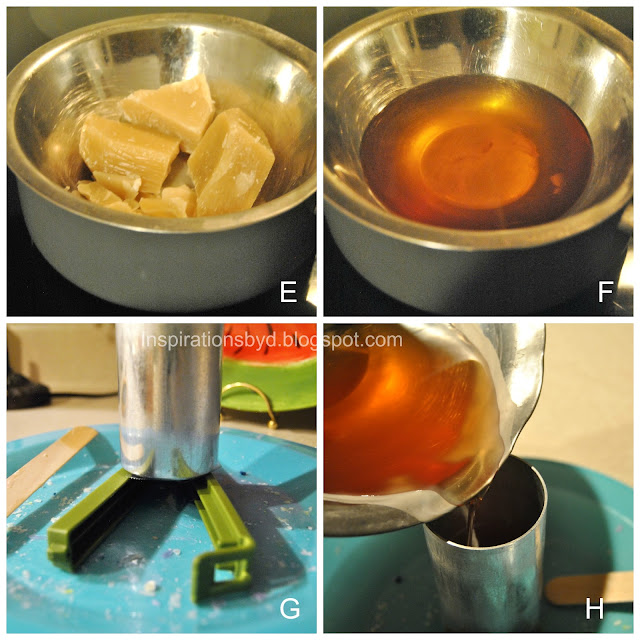
E) If you are using wax pellets, place them in the melting dish; if using a wax block, 
break it into pieces.  Make sure you measure the amount that you want to use.  
I used about 8oz.  Fill your pot about an inch deep of water.  You do not need to 
use too much water.  Place the pot over the burner and heat, do not boil.
Now place the bowl or whatever you are using to melt the wax in, on or in the pot.  
Observe and keep the heat low to moderate, watching the wax as it melts.  
Do not overheat.
F)  As soon as your wax is melted, turn the heat off and drop the color into the 
wax using a few drops. ( At this point you may also drop a scented oil if desired) 
Use the popsicle stick to stir the wax.  Make sure you have 
something to protect your hands from getting burned to handle the bowl.  
G) Before pouring your wax, make sure that the mold is steady, I used a plastic bag 
closure pin to keep my mold steady since the bottom has a bump due to the sealant.
H) Pour the wax very carefully, it is HOT.

www.inspirationsbyd.blogspot.com

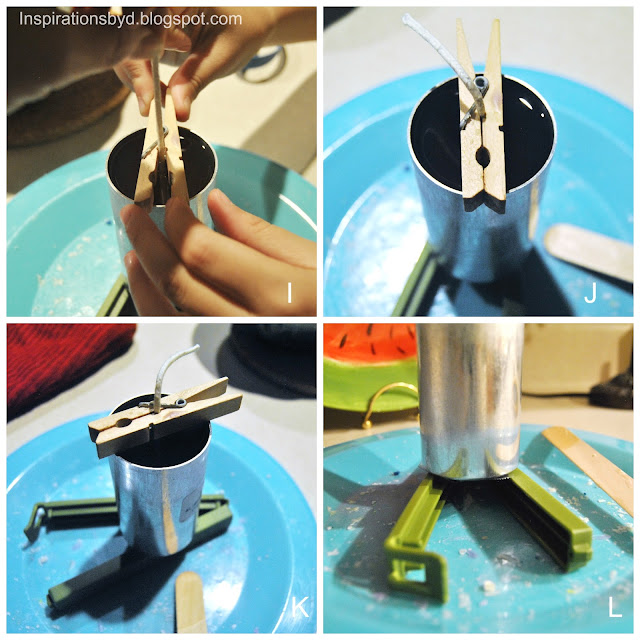
I) Now secure the wick so it is centered using the cloth pin.
J) Wait for the wax to cool, make sure you have a disposable plate or wax paper 
underneath for any leaks. 
K-L) Wait for the wax to solidify for about an hour or so.

www.inspirationsbyd.blogspot.com
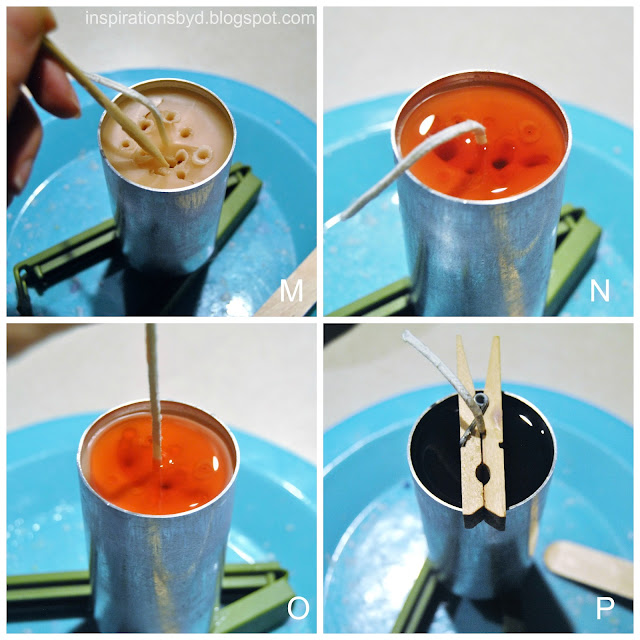
M) After an hour or so, take a skewer and poke holes into the wax to get rid of 
any air bubbles.
N) Let it cool for a couple of hours. then top it off with more melted wax.
O-P)  Let it cool for several hours or leave it overnight.

www.inspirationsbyd.blogspot.com
When the wax is completely solidified and the outside is cool to the touch, remove 
the cloth pin.
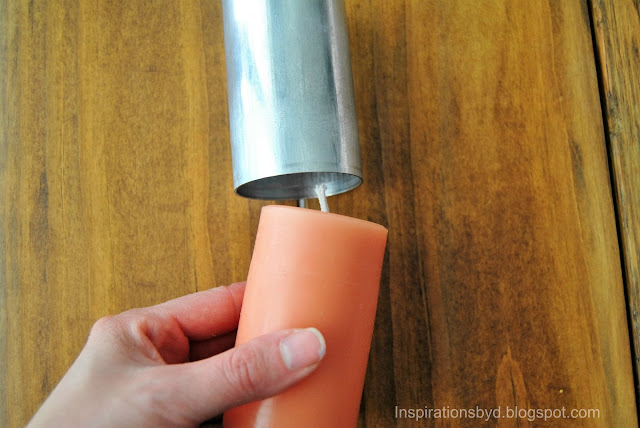
Grip the mold and turn it over to remove the tape and piece of wax at the end.  
Untie the knot.
Hold the mold upside down for the candle to slide out, if it doesn't come right out, 
you can put it in the freezer for a minute or two and try again.  You may have to 
squeeze the mold a bit to loosen candle, then it should come out.  Cut the excess wick 
on the bottom end of the candle.
www.inspirationsbyd.blogspot.com

In order for the candle to stand straight, you will have to level it. There are a number 
of ways to level the candle so it stands up straight. One easy way is to heat an old 
frying pan or cookie sheet and slowly rub the base of the candle over the heated surface 
until the bottom is flat.  As a final step cut the top wick to a 1/4 inch until ready for use.
www.inspirationsbyd.blogspot.com
Enjoy your candle!

Cricut Design Space


*This post contains affiliate links and may be compensated if a purchase is made after clicking it, thank you for your support.

When I first began crafting, I tried my best to create projects that were easy for all to do.  I used free hand to cut my designs, while many other crafters used machines for cutting and designing their projects.

I was bummed out knowing that their projects turned out so perfect and mine had imperfections. I wondered, how did they achieve perfect cutting and design?  After much research, I discovered Cricut.  I have mentioned Cricut in a few posts here on the blog, only because I want those of you who have a hard time achieving certain crafts to be creative without the hard work of design and cutting.  Cricut offers two awesome machines that do the work for you.

Not only that, but what bridges the gap between the creative ideas in your head and the Cricut machine is the Cricut Design Space™

Cricut’s Design Space™ is software for PC, Mac®, iPhone® and iPad® that you get for free with your Cricut machine of choice. 

Instead of trying to figure out how to make your project, Design Space gives you the ability to focus on what you want to make. Your Cricut machine takes it from there and brings it to life. 

With Design Space, you can start designing from scratch on your computer, iPhone® or iPad®, or you can use a pre-designed, Make It Now™ project. These ready-to-make projects are created by professional artists and include everything from home décor to fashion to paper crafting, and even a variety of FREE projects. 

If you want to use one of Cricut’s 50K+ images, you can try them out in the Design Space to see which will look best in your project before you commit to purchasing it. 


Uploading Images 

When you’re ready to start designing, you can either use one of Cricut’s 50K+ images or easily upload your own using the “Upload Images” tool in Design Space. You can upload and cut .svg, .jpg, .png, .bmp, .gif, and .dxf files absolutely FREE. You can even use fonts already installed on your computer. 

Cut What You Want® tool 

The Design Space’s Cut What You Want® tool makes it easy to convert your design into a cuttable image in just a few clicks! 

The Cricut Design Space™ app for iPad® and iPhone® 

Cricut’s easy-to-use app for the iPad® and iPhone® makes it possible for you can design anytime and anywhere inspiration strikes you.

It also allows you to access all the project’s that you’ve personally designed, whether on your iOs device or your PC or Mac, and gives you access to all the Make-it-Now projects. 

With this app, you can start a project while at the beach, enhance it at the ice-cream shop, add some embellishments while cozying up on your couch, and then cut it on the Cricut Explore in your craft room. Plus, it’s cloud-based, so your projects are always synced across all your devices. 

P.S. Cricut is working on an Android™ app right now, so don’t feel left out if you don’t have an iPad or iPhone. 

In a nutshell, Cricut Design Space™ gives you the creative freedom to design just about anything! Make party invitations, decorations, and favors. Create seasonal home décor or personalize wedding gifts. Add embellishments to your favorite photo memories. 

And that’s just the tip of the iceberg! That’s why sometime next week, we will focus on some really fun and interesting projects that people have created using their Cricut machine and the Cricut Design Space. 

So Stay tuned! 

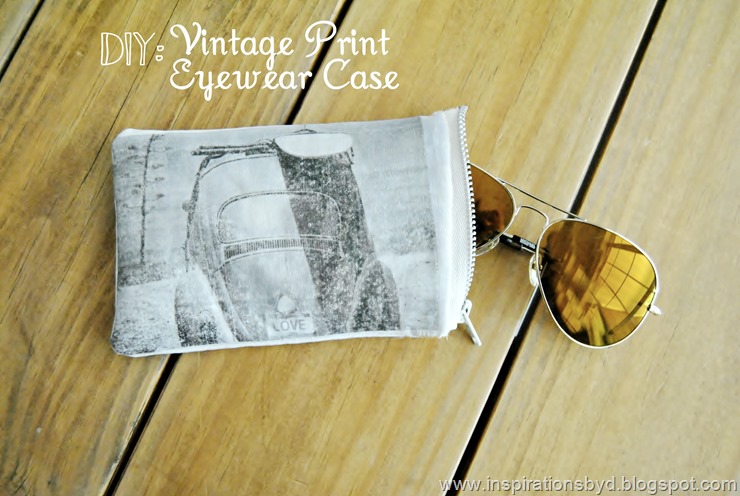
DIY: Vintage Print Eyewear Case

sunglasses pouch
For some time now, I have wanted to make this little case for my glasses.  I was inspired by A Beautiful Mess’s Cotton + Leather Clutch DIY.  I thought that was brilliant idea, but like any crafter, I wanted to re-create it to meet my need, so I left out the leather part and simply used the fabric I had on hand.  I also did not want an exact replica, so I opt to make my image look like an old tee shirt print and it worked!

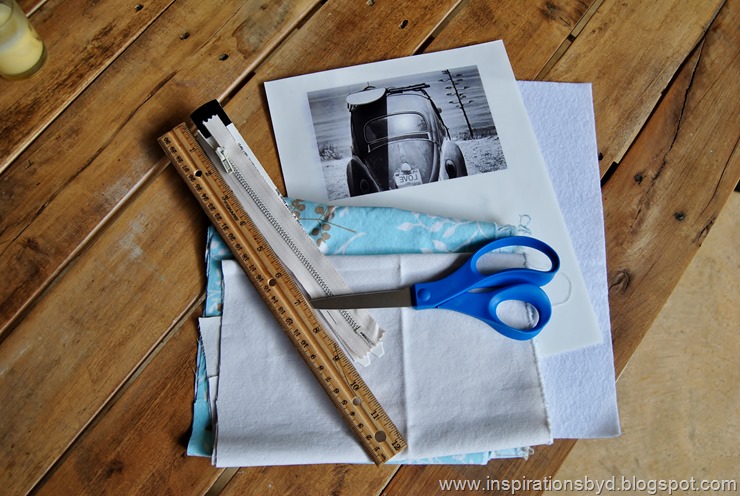
For this nifty little project, I used:


- 2 cotton fabric pieces 6 x 8 inches

- 2 printed fabric pieces 6 x 8 inches for the inside
- zipper shortest length available
- ruler
- scissors
- 1 adhesive felt sheet (white) 4 x 6 inch
- transfer paper
- sewing machine or Liquid Stitch/ Heat Bond
- iron
Inspirations by D

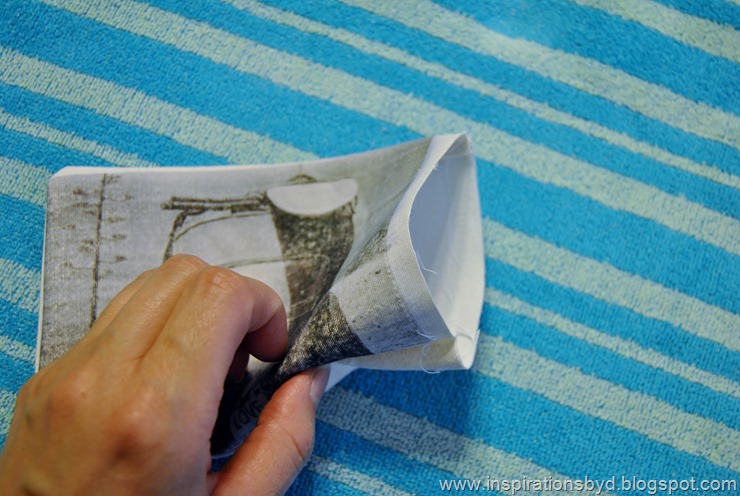
1. Select the image you want to use for this project, then print a 4 x 6 inch size to your transfer paper, use your product instructions.  Cut your image as seen in #2 below leaving 1/4 inch space on all sides. 
2. Iron your image to your cotton fabric sheet.
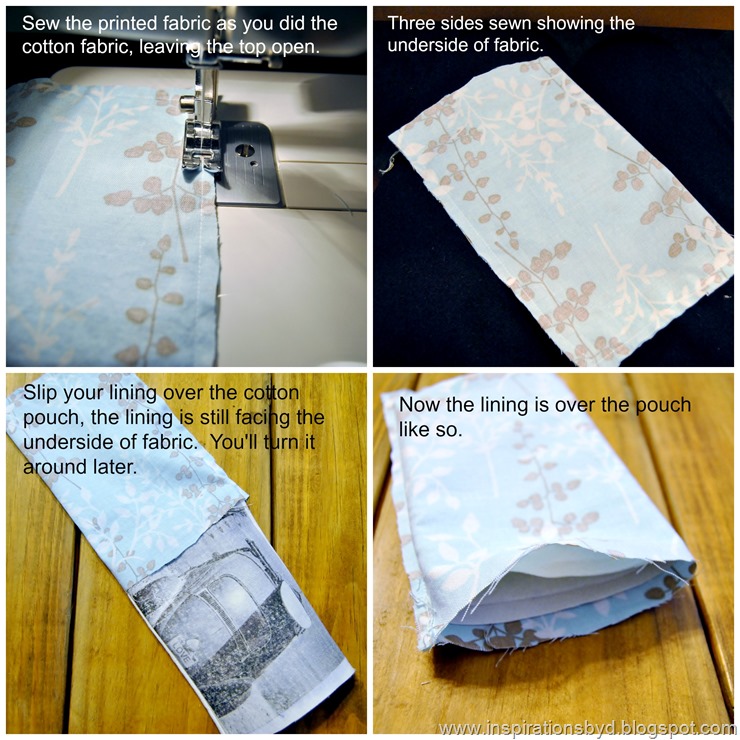
3. Sew the back, plain fabric to the front fabric.
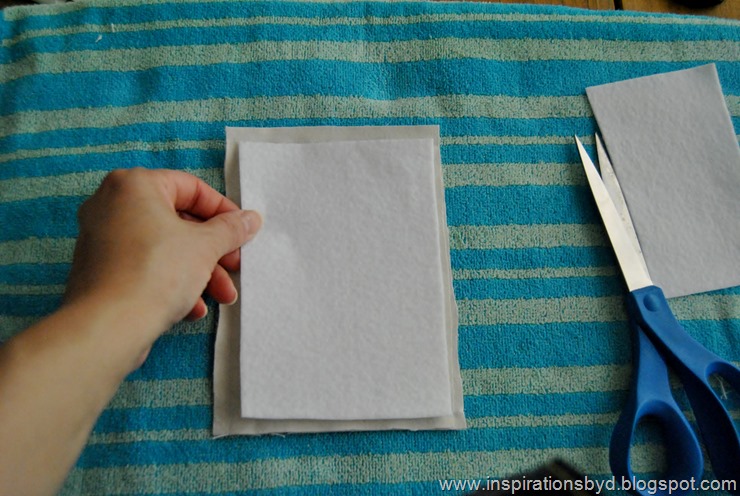
4. Place the felt piece to the back part of your photo piece fabric.  

www.Inspirationsbyd.blogspot.com

5. Continue to sew the other two sides leaving the top open.
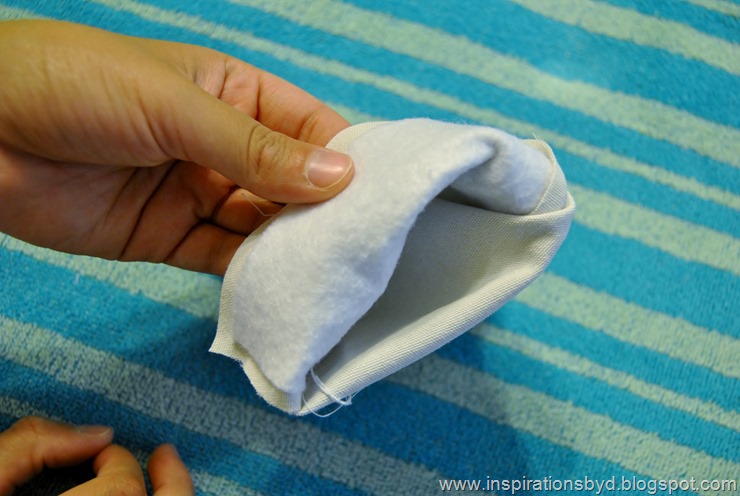
6. When felt is on the fabric, you may flip the case inside out so the felt is now inside of the pouch.

www.Inspirationsbyd.blogspot.comDSC_1987DSC_1990www.Inspirationsbyd.blogspot.com

Now this is the hard part. To get this right, you may want to watch this video, I found it more helpful than the others and wish I would have discovered it before.  It would have saved some time. Anyway, I didn't have regular pins, so I used the safety ones. Here you will attach your zipper. Watch the video to know how to attach the zipper, trust me it's better.

www.Inspirationsbyd.blogspot.com
sunglasses case
sunglasses case

And there you have it.  Amateur vintage style case. 
Hope that you enjoy and Happy Crafting!


Valentine Ideas

(via)

St.Valentine's Day is right around the corner, I want to share a few ideas on how to make it special for you and for your family.  If you click on the image from the list of photos below, it'll direct you to the post where you can get tutorials, free prints, and recipes for that image. You can also get more inspirational ideas on the Project Gallery Tab on the top and on my Pinterest board "here", be sure to follow me there and stay inspired!  
I hope that you enjoy!


Linked to:
Home Stories A to Z
Tip Junkie
Salt Tree

Advent Wreath

Advent Wreath
The Advent wreath is a wreath, or circle, of evergreens, made in various sizes. It is either suspended from the ceiling by ribbons (preferably purple) or placed on a table. The devotion is usually incorporated during the family meal, or during family night prayers. Fastened to the wreath are four candles standing upright, at equal distances. These candles represent the four weeks of Advent. Three of the candles are purple, reminding us of the penitential nature of the season. A rose or pink candle is lit for the Third Sunday of Advent, also known as Gaudete (rejoice) Sunday. The name is taken from the entrance antiphon or Introit "Rejoice (gaudete) in the Lord always, again I say, rejoice." It is reminding us that the end of Advent is almost here, and we can hardly contain our joy.
The wreath should be in a circle, a symbol of eternity, and a reminder that God has no beginning nor end. The evergreen is a symbol of eternal life and a reminder that God is immutable or unchangeable. (via)
The appearance of the actual Advent wreath is varied—everyone has their own interpretation of the Advent wreath. The look of your family's wreath depends on how much time and creativity you devote to it. Your family can create their own special wreath, or add personal touches to a store-bought wreath.  We make ours different every year depending on the supplies we have on hand. I like to use what I have on hand.

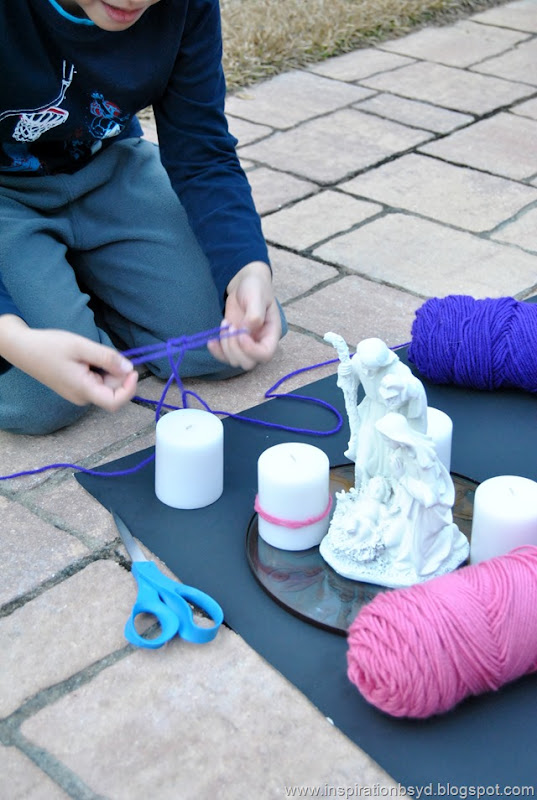
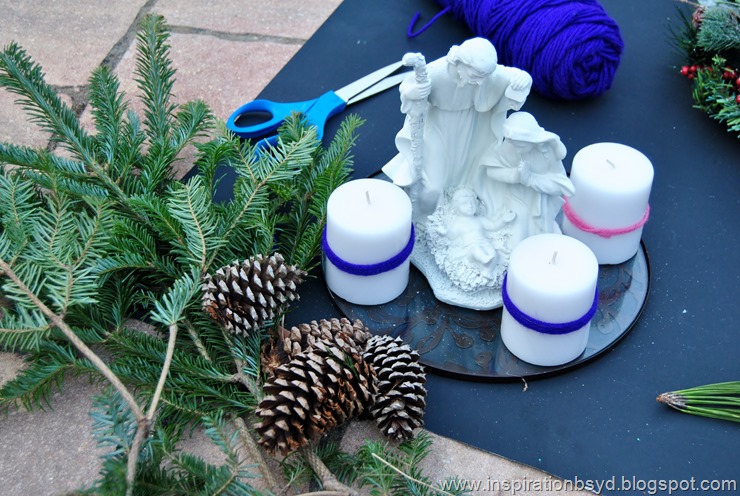
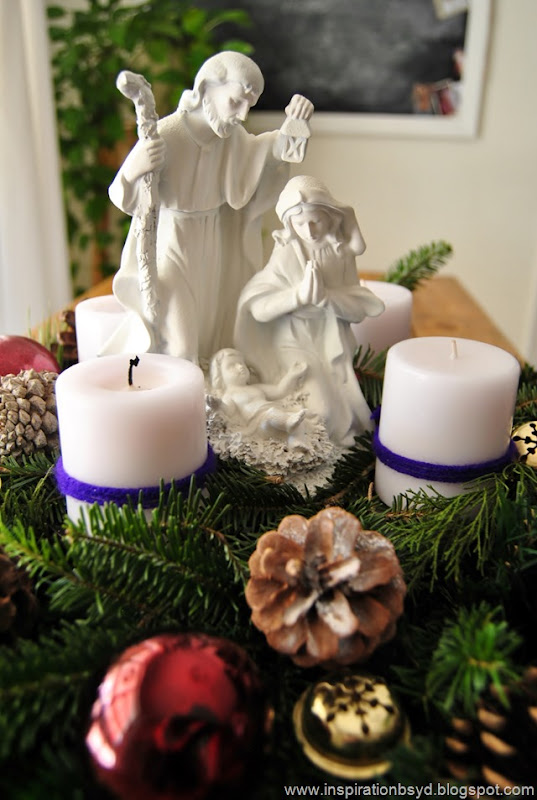
For our Advent Wreath this year, we used white candles because we could not find the purple and pink in our area.  So to make up for the candle colors, we wrapped the candles with yarn, three purple and one pink.

Supplies we used:

  • 4 candles
  • small Nativity Figure
  • yarn for colors
  • flat glass dish to hold candles
  • large candle holder to hold base up (or other wide base like an empty flower pot)
  • evergreens & pine cones
  • artificial wreath
  • scissors
  • ornaments
First the candles were wrapped with yarn.  We placed the base on the table in the center of the artificial wreath.
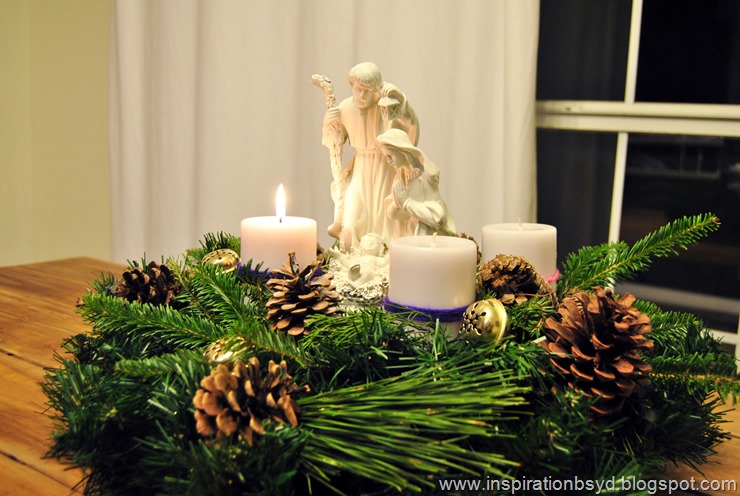
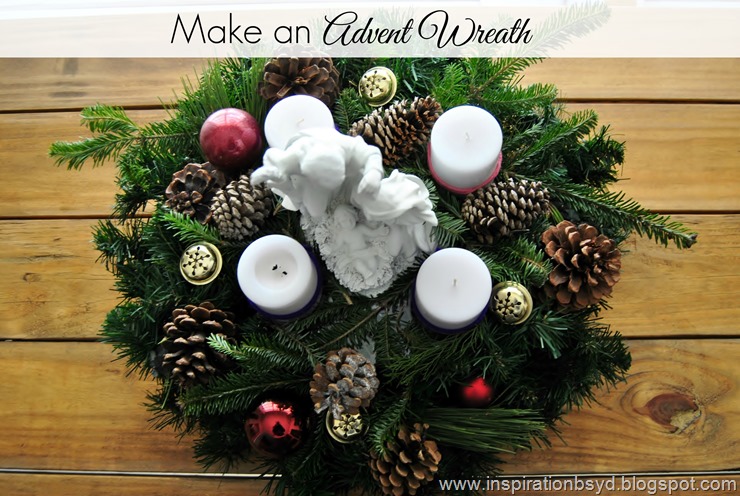
The flat dish was placed over the candle holder, then we placed the Nativity scene in the center.  The four candles were placed at equal distances around the Nativity Scene as seen below.
We added extra evergreens to add dimension and texture.  We then added pine cones and ornaments randomly around the wreath.
Inspirations by DInspirations by DInspirations by DInspirations by DInspirations by D
Inspirations by Dadvent wreathNativity Nativity
Thank you for visiting!  Love having you over,
Do you place an Advent Wreath in your home?
Have you ever thought about adding it to your family tradition?


Pin It button on image hover