Get ideas & inspirations delivered to your inbox. You won't want to miss a thing, so subscribe free to the Blog Feed or sign up for Free Email Updates on the latest projects, shop news, blog tutorials & more. Check out the Project Gallery, Garden, Recipes & Inspirations tabs above, to see what you have missed. Browse through the sidebar for this week's Popular Posts!
**Please note: Some links may be broken, if this happens, please let me know which post & search for the title of a post on the search tab on the right while I work on fixing the problem.---->

Showing posts with label Holidays. Show all posts

Homemade Hot Cocoa Mix in a Bucket

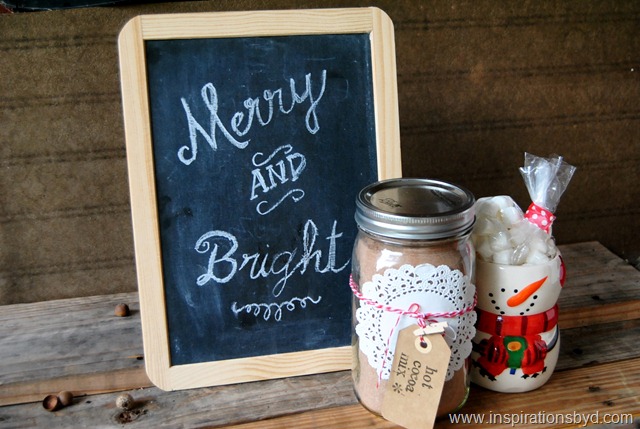
Homemade Hot Cocoa Mix
I have a sweet gift idea recipe for you guys today.  I have made this yummy
Hot Cocoa recipe, tried it and loved it!  It's perfect for neighbors, teachers, co workers and more.

To make this Hot Cocoa Recipe Mix you will need the following:
  • 4 cups of instant dry milk
  • 1 1/2 to 2 cups sugar, if you like it super sweet you may add more to your mix.
  • 1 cup powered creamer
  • 2/3 cups unsweetened cocoa powder
  • 1 package of instant store bought chocolate or vanilla mix pudding (optional)
  • chocolate chips (will melt and make the cocoa taste like melted candy bars)
  • (optional) add cinnamon to mix about a tablespoon or so, it makes it delicious
Homemade Hot Cocoa Mix
   Steps 1 - 4.  Mix all the ingredients into a dry large bowl; the dry milk, sugar, powdered creamer...

   Step 5.  This is optional, but I grinded my chocolate chips and added it to the mix.  
   You may keep your chips whole if you wish.

   Step 7.  This is also optional, add your pudding mix to the ingredients, I had vanilla on hand.  
   This just makes the cocoa creamier and rich in flavor.

   Step 8.  Add your cocoa powder.

Use a whisk to stir everything together, if the cocoa mix clumps, just smash the little balls with a fork.
When everything is evenly distributed, transfer into a clean mason jar, sealed canister or coffee can.
This recipe makes about 15 cups of Hot Cocoa.
Homemade Hot Cocoa Mix
Decorate your mason jar or coffee can as you wish and add marshmallows.

Add instructions on how to make the cocoa.  

For this recipe the instructions should read:

Add 1/3 cup of mix to mug and add Hot water 
or hot milk, top with marshmallows if desired.  Enjoy!
Psst!  For extra rich flavor, add brown sugar and enjoy.
Homemade Hot cocoa mixHomemade Hot Cocoa MixHomemade Hot Cocoa MixHomemade Hot Cocoa MixHomemade Hot Cocoa MixHomemade Hot Cocoa Mix
You may add one or two mugs to your gift or place it in a basket for gift giving.
Get creative and use your imagination.

The way I love to make my cocoa is by warming up the milk in a sauce pan
and add my cocoa mix to the milk stirring it for a minute, then I pour it into my
mug and top it off with marshmallows, cinnamon and whip cream, oh how yummy!
  I hope that you enjoy it.


Handmade Christmas Mantel (updated)

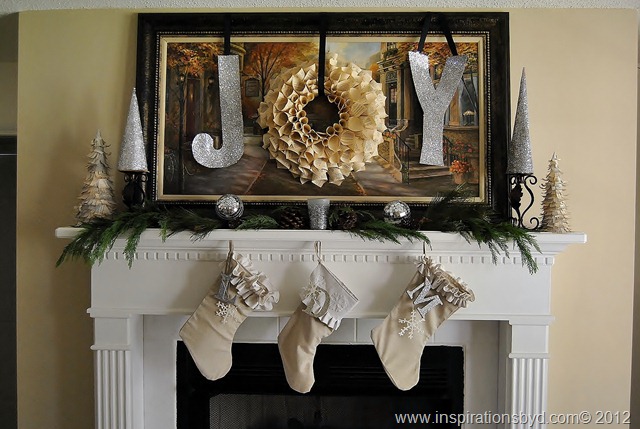
Christmas mantel
Hi friends, I'm sharing with you today my mantel decor.  I have to confess,
this is not my ideal mantel decor, but I had to use what I had on hand and that
includes this piece of art work.  Mr. M gave it to me for our anniversary and it's
not my favorite, but I must be grateful.  Moving ahead...

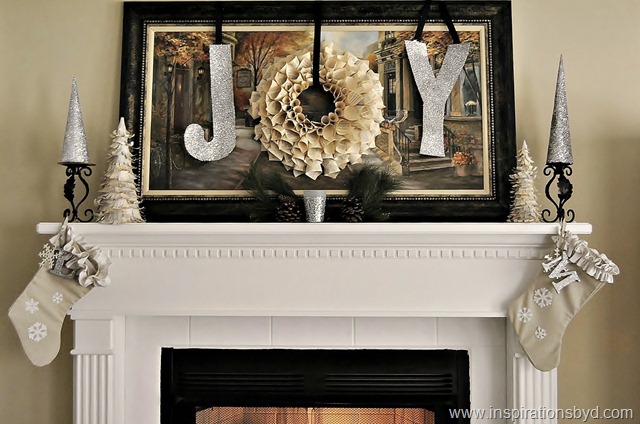
To keep it simple, I just added a few handmade items and two small disco balls.  
I added my third stocking and greenery to the mantel on the above image, what do you think?  

I started off with the image below and finished with the image above.
Before
Christmas mantel
DSC_0611d
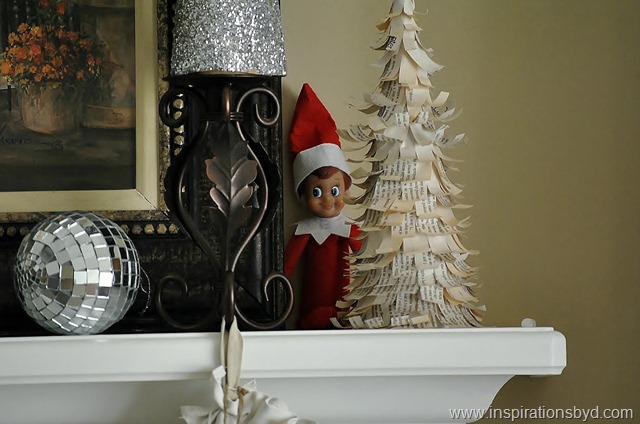
We caught the Elf hiding behind the paper tree.
After
Christmas mantel @Inspirationsbyd
Christmas stockings
Christmas mantel
Tutorials for the stockings can be seen here
Tutorial for the wreath available here.
Tutorial for the glitter alphabet letters can be viewed here
and the tutorial for the book page trees is here.
Thank you for stopping by today, I am linking to:

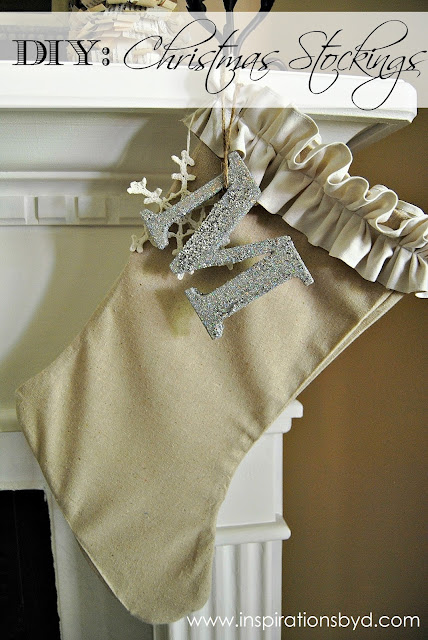
DIY: Christmas Stockings

How to Make Christmas Stockings
I have never sewn anything until now.  I made my first pair of 
stockings and I did it all on my own.  I had to read the sewing
machine manual first of course, but I managed and completed
my stockings.  I wanted to post it to show you that anyone can
do this.  If I can, anyone can!
Now if you do not own a sewing machine, no problem.
Did you know you can glue this baby with fabric glue instead of sewing it?
You sure can!


Tools and Materials

Chalk pencil
Linen fabric or fabric of your choice
Wide ribbon or strip of fabric 2 1/2 to 3 inches wide & about 30 inches long
Stocking template
Cutting mat/ table
Scissors
Embellishments such as a letter or ornament
Glitter for embellishment etc..
Sewing machine and sewing supplies
Thread
Or ----Fabric glue, such as Magna-Tac
  1. Print stocking, and cut out or trace an old stocking like I did below.
  2. Using chalk, trace stocking template onto 2 pieces of linen.  
  3. Use scissors to cut a stocking pattern from the fabric.
  4. Assemble stocking layers over each other.  
  5. Pin stocking together. Sew around the stocking, 1/4 inch in from the edge of linen piece, leaving the top open.
  6. Cut a 1-by-8-inch strip of fabric. Gather ends together to form a loop for hanging, and sew inside the stocking, at the back, toward the top.
  7. Another option instead of sewing is by gluing around the edge all around with fabric glue to form stocking.  Press the edges to make sure it sticks well.  Let dry.
  8. Using a wide ribbon or a strip of fabric about 2 1/2 to 3 inches wide and perhaps about 30 inches long, stitch in the center unto the stocking to gather the fabric forming a ruffle effect as see below. If you already have a ruffled ribbon or fabric piece, you may glue it to your stocking!
  9. Add an ornament for embellishment or create your own with letters and glitter as shown.
DIY Christmas Stockings
This is my first ruffled sewing craft.  I have to admit, it was pretty fun sewing it because
I followed no directions, I just scrunched it up as I went along.  Remember, it doesn't 
have to be perfect to be beautiful. 
DIY Christmas Stockings
glitter letters ornaments
To create this glitter letter effect, use this same method and
for letter templates visit this post.
glitter letters
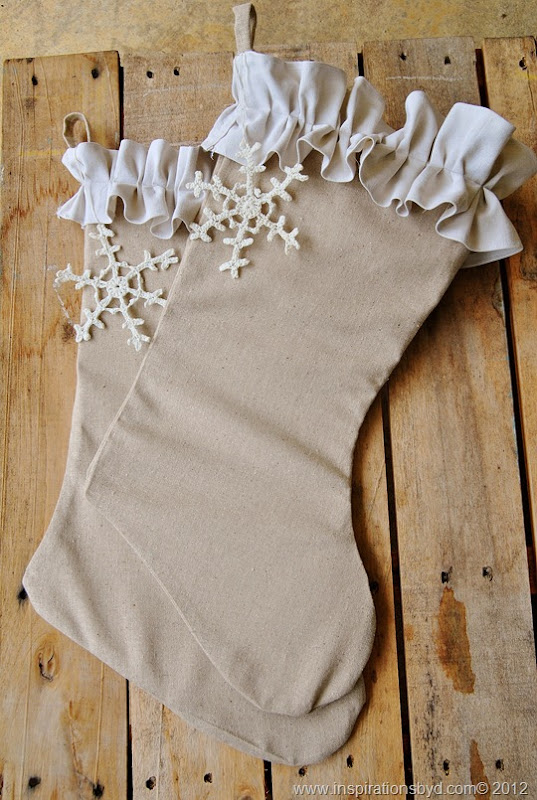
You may add more decor to your stocking by adding fabric stickers
available at your local craft store such as these snowflakes below.
I personally prefer it without it.
Handmade Christmas Stockings
All finished with my stockings.
View more here.
I hope that you enjoy!
Happy Crafting!


Angels Glass Magnets (Updated)

 I was inspired to make these lovely glass magnets by this poem.
Christmas Angels

Reach for an angel high on a star;
She sends you Christmas wherever you are,
Bringing you laughter and faith so supreme,
Touching your heart with a beautiful dream.

Peace and goodwill in each loving home,
Beauty and magic so surely your own.
Sweet Christmas angels - moments of love,
Part of the wonder God sends from above.

Santa and children - this wonderful day,
Hope for tomorrow in words that we pray,
Tree reaching tall - such a beautiful sight,
Music we treasure is heard on the night.

Bless you, my dear ones, this so holy time;
May God's richest blessings forever be thine,
Glad tidings I send you across every mile
Along with a faith to make each day worthwhile.

God's Christmas angels, precious and dear,
For a Merry Christmas lasting through a New Year.
By Garnett Ann Schultz 

The angels spreading the message of peace is a lovely reminder of the Holidays.  Drop a set of magnets in someones stocking this Holiday or make it part of your decor.

DIY: Felt Ball Ornament (Updated Photos)


 It's that time of the year again when everyone shops, travel, entertain and
decorate for the Holidays.  This year I wanted to add white to my Christmas tree,
 so I opted to make my own white felt ornaments.  Do you remember the scrunch flower tutorial?

In this tutorial you may use that method or use the method below to make the scrunch flower.
Lets begin.
(1)  You will need the following:

       (2)   Using your round template/cup, trace circles on the felt.  Cut out your circles.  {To make several of these ornaments, you will need lots of circles.  Each of these flowers has about 5-6 felt circles.}   Make sure you cut a smaller circle for each flower that you make, it will serve as a base.

       (3)   Place a drop of glue on the center of your large circle and fold in half.

       (4)   Take your folded circle and fold again in the shape of an "s" or use the method on the previous tutorial.  Either one works fine.  The "s" form gives it more depth.
www.inspirationsbyd.blogspot.com

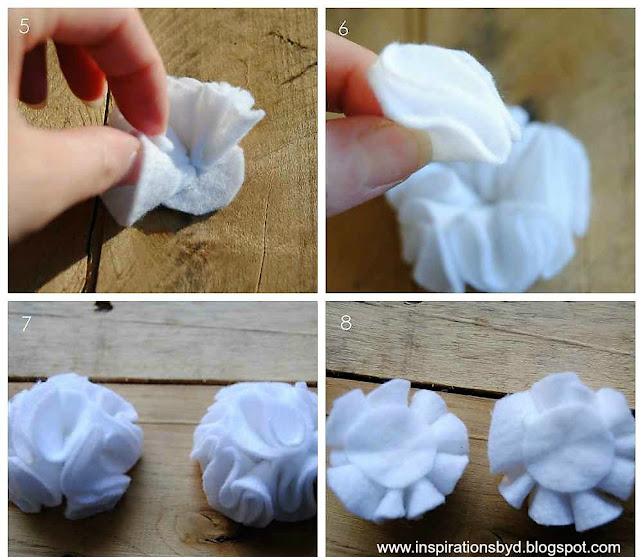
(5) Glue the folded pedal to the base and continue gluing your folded pieces 
around the base until it's filled.

(6) Place the top pedal to cover the open center.

(7)  When done, this is what your flowers will look like.  Repeat for more felt ball ornaments.

(8) Turn your flowers over to their back.

(9) Cut a piece(s) of ribbon; glue one end of the ribbon to the back of the flower 
using one drop of glue.  Glue the other end of the ribbon over the glued ribbon to hold it in place.

(10) Add glue to the back side of another flower and lay over the ribbon & flower.

(11) Press firmly to make sure it is glued properly and evenly.

(12)  This method should form your scrunched felt ball.

You may spray it gently with adhesive and add sparkle to your ornament(s) with fine glitter.
And there you have it, a Scrunched Felt Ornament.


Happy Crafting!!


How to Make a Heart Wreath

How to Make a Heart Wreath
I love this little heart wreath! 
The different shades of pink and red bring out each individual heart.

On this post, I have included two different Heart Wreaths that you can make yourself,
thanks to Better Homes & Gardens and Everything Etsy.

The first one I'd like to share with you is this Paper Heart Wreath.
To make this wreath follow the link or:

Get several shades of pink and red paper.
-Scissors
-Glue
-1 Cardboard or heavy stock paper
-Heart shaped template (ex: heart shaped cookie cutters)
-Circle template--you may use a paper plate

Trace paper plate over card stock or cardboard.
For the inner circle, use a smaller plate or large can/ jar whatever you have on hand,
trace the inner circle.
 Once traced, cut the circle carefully.

Using a heart template, cut several hearts in different sizes.
Glue them around the circle,
To add interest, overlap several hearts.
Continue to glue hearts until the card board is completely covered.
Let dry and hang to your heart's content!

Here is the second wreath, a beautiful heart shaped wreath by Everything Etsy.
Pinned Image
Kim used felt to make this wreath.
You may use the same method as I used here by placing the felt
on a heart shaped foam.
Find her step by step tutorial here with great photos.
Enjoy &
Happy Crafting!

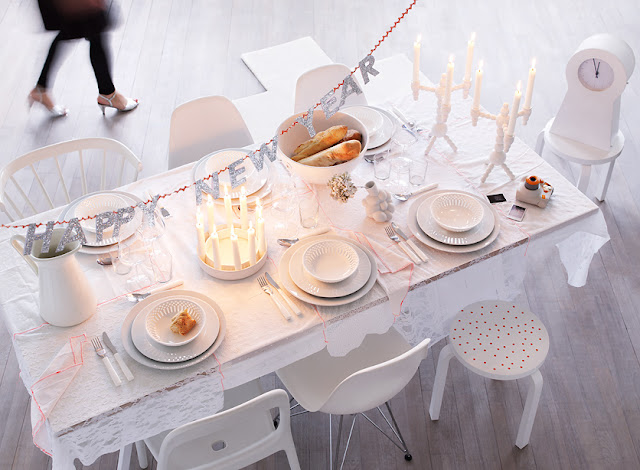
New Year Ideas: Happy New Year!

Image Detail

Here's wishing you and yours a Blessed & Happy New Year!
Cheers!  View more ideas here.

Gran Ventana Beach Resort


Hello friends! I hope that your Holiday weekend was filled 
with lots of Love, Warmth & Happiness.


We had a blessed Christmas.
We had a wonderful opportunity this year to spend
our Christmas weekend with my family at the 
Gran Ventana Beach Resort, in the Dominican Republic. 
I had a wonderful time and my son absolutely loved it!


The Gran Ventana offers a distinctive blend of sophisticated design 
with the charm and hospitality of the Dominican Republic. 


It was an all inclusive stay! 
Beaches, pools, shows, activities and so much more.


The resort's lobby extends with beamed ceilings, a huge cast iron chandelier and a 
view of the ocean as its centerpiece.


The water was crystal clear, blue and just beautiful.
We loved it!


Hope that you enjoyed!  Thank you for stopping by
and enjoy the rest of your Holiday!


Pin It button on image hover