Get ideas & inspirations delivered to your inbox. You won't want to miss a thing, so subscribe free to the Blog Feed or sign up for Free Email Updates on the latest projects, shop news, blog tutorials & more. Check out the Project Gallery, Garden, Recipes & Inspirations tabs above, to see what you have missed. Browse through the sidebar for this week's Popular Posts!
**Please note: Some links may be broken, if this happens, please let me know which post & search for the title of a post on the search tab on the right while I work on fixing the problem.---->

Showing posts with label Sweets. Show all posts

Brownies in a Mason Jar

Brownies in a Mason Jar
Happy Friday friends!  I hope that you all had a great week.
We've been pretty tied up here with life, you all know how that goes.
My little man is due for minor surgery next week,
and we are praying that everything goes well.
This week, my boys were craving chocolate,
or was that me?  Nevertheless, I had this idea to put brownies in a jar
as a treat and also as a gift.  I've seen some cute ideas around the web, 
but I have not seen this one, so I went ahead and made this.

To make your very own, you will need the following:

  • scissors or x-acto knife
  • paint brush or small sponge
  • fabric paint
  • your choice of fabric
  • mason jar
  • mason jar open lid
  • paper or vinyl template
  • string
Before you begin, bake your favorite brownie recipe first!
Click here for the top 10 brownie recipes.
When brownies are done, let it cool.
Print a template of a bunny or other figure unto your sheet, 
then cut out your figure with scissors or x-acto knife, I recommend x-acto knife.

Cut out a piece of fabric that can fit nicely over the top of your mason jar.
For a regular sized jar, about 4.5 to 5 inches works well.  
You may need a larger piece, for a large jar.
Place your template over your fabric piece, 
make sure that your figure is small enough to fit
on the top of your jar.  
An open lid helps determine the proper size of template.
Use the open lid to hold the template down and start painting the inside of the template 
covering the exposed fabric.
 When you are done, allow your paint to dry on the fabric.

While you wait for the fabric to dry, 
cut your brownie into squares, then into bite size pieces.
 Stuff your brownie bites into a clean mason jar and top with 
your favorite brownie frosting.

To protect the inside, 
seal the lid with press & seal plastic wrap.
Take your painted fabric and place it on the top of your jar,
you may hold it down with the open lid that you used before,
this allows you to wrap the fabric around the jar with your string as you see here.
To make it look pretty, you may also add a lovely gift tag.
You know, after all was said and done, I realized I could have added some berries
for color and flavor, that would've made it extra special. 
I hope that this inspires you to make your own sweet and tasty jar treats,
they're perfect for friends, neighbors, favors and Easter.

Thank you for visiting,
Happy Crafting & Baking!
Hope that you have a wonderful weekend!

Valentine's Day Goody Bags

Today is the Valentine's Day party in my son's school.
I had to get several goody bags ready for his classmates. 
I started laying out the chocolate and cookie dough, 
(confession)  I bought the dough, I just added the chocolate, so it's semi-homemade.
Look at these beauties!  They are so vibrant and so tasty too! My son loved these swirls,
I think he ate a few before mixing it into the cookie dough.
I read over at Lemonade Makin Momma, that if you sprinkle a bit of sea salt 
on the cookies, that they are out of this world, so I had to give it a try.  
Wouldn't you know it, they are delicious! Gooey, sweetness!
Do you remember my son telling me that he wanted toys in the goody bags?  
These are the little things he picked out; erasers, spikey balls, 
and bracelets to go along with the cookies.
We added the cookies in a Valentine themed zip lock bag
 and placed them inside these paper bags 
along with cards and the little items above.
Then I took small doillies and clothes pins covered in red glitter
and pinned to the bags.
I've never done anything like this before, 
so I was pretty pleased with them, not too shabby huh!
Valentine's Day Goody Bags

Do you have any plans for Valentine's Day?

Fall Cupcakes: Last Minute Ideas

Fall Cupcakes

Are you going to bake any goodies for the Autumn season?
I have collected some last minute
cupcake ideas to inspire you.


Fall Cupcakes

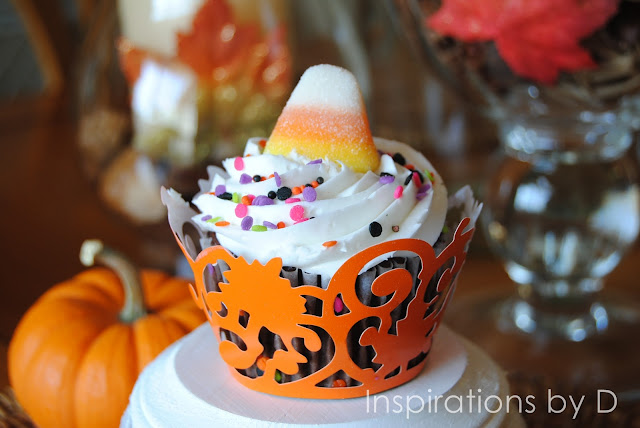
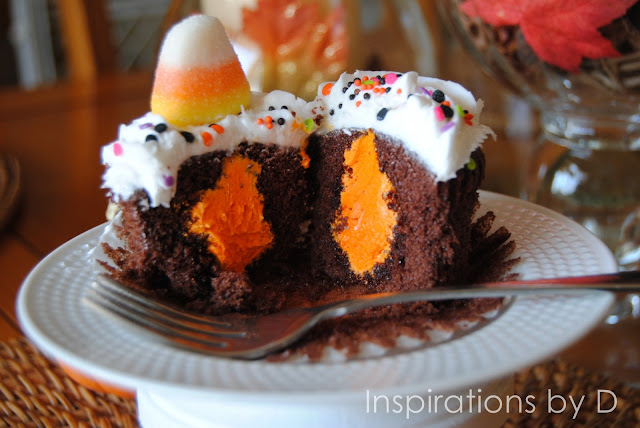
We made this cupcake with a boxed chocolate cake mix; you may always use your own recipe. 
We filled it with vanilla cream colored with orange food coloring.
 In order to fill it, we used this technique.
(Orange wrap at Walmart)

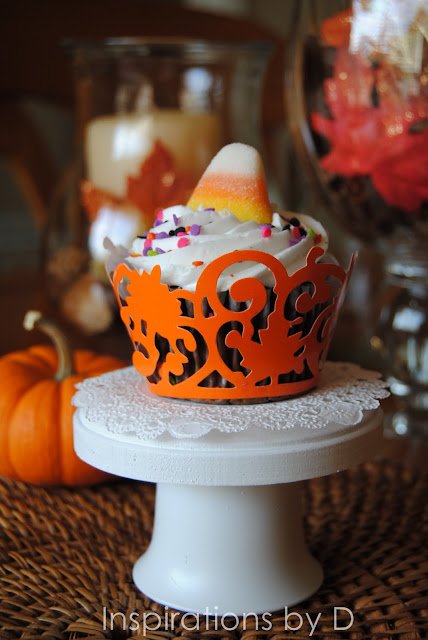
To make this cupcake stand click here.

Fall Cupcakes


Pumpkin Patch Cupcakes: Buttercream icing dipped in orange sugar crystals with an Airhead as the vine and a Rainbow Twizzler as the stem!

Which is your favorite idea?


Cake Pops

Cake Pops
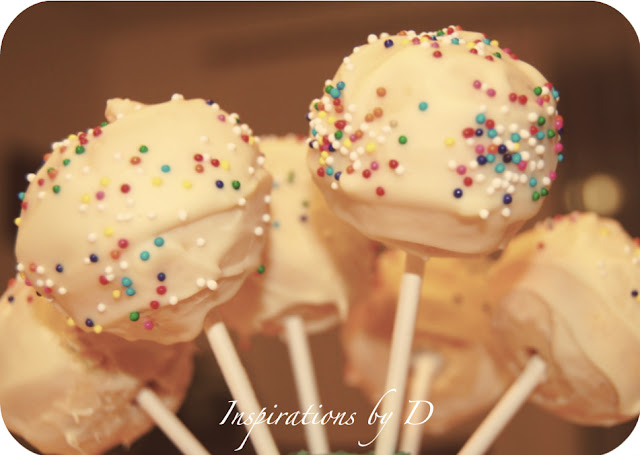
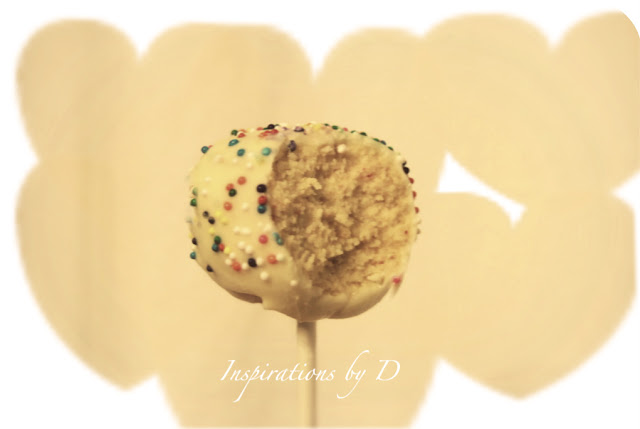
My son and I were craving these goodies the other night and I couldn't resist making them; the pictures are not the best quality due to the darkness in the room that night, but hope that you enjoy, I know that we did:-)

We started with what we needed...
Classic Yellow Cake Mix (and ingredients listed on the box)
Styrofoam to hold up the cake pops
1 Tablespoon of Shortening 

This is what we did.
Placed the cake mix in the bowl.

Added the ingredients specified on the cake mix and followed the directions from the box.

We mixed the batter with hand held mixer.

We poured the batter into a non stick cake mold.

Baked according to the directions on the box, then when it was done I took it out of the oven and allowed it to cool on the counter.
We then cut the cake into pieces and crumbled the cake with our hands in a bowl.

We added a 1/3 of the frosting to the crumbs, some people use 1/2 of the can, we prefer more cake so we used less frosting.

I then had to mix the frosting and the cake crumbs together.
I got messy, I mixed with the spoon first, then had to use my clean hands to mix the rest.  After the cake crumbs and frosting looked like play-do, I rolled the mix into individual balls at about 1"  in the palm of my hands, then placed them on a non stick cookie sheet, you may also use waxed paper.

One box makes about (35 to 40) 1"  cake balls. I then placed the cake balls in the freezer for about 10 minutes, this helps harden the chocolate candy faster when it is applied to the cake balls.

I then melted the candy in the microwave.
You must follow the directions on the box otherwise you'll have a disaster, like I did.
Once these are melted, I stirred the melted candy with a small spoon, 
when it is smooth, I added the spoon full of shortening to thin out the consistency a bit and then I stirred again.
Once the candy was smooth, I took a candy stick and dipped it about an inch into the melted candy, this serves as the glue to hold the cake ball and stick together.
I placed the stick in the center of the cake ball, but not all the way through, about half way. I added the candy coated sticks to all my cake balls.

 I then dipped the balls into the melted candy making sure it was completely coated, sorry guys I forgot to take a photo of that process.
I coated the cake pops on their sides first,
 it's a tricky process, you can take a look at the process on the Bakerella video.
You may use a spoon to help with the coating.
When your cake pop is completely coated, 
slightly tap it on the spoon or bowl so that the excess candy can drip off, 
remember do not tap it too hard or your cake ball may slide off the lollipop stick.
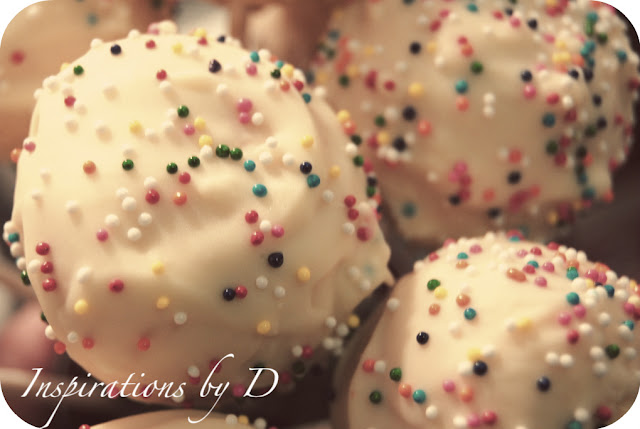
After I coated the pops with the melted candy, I sprinkled some confetti candy for color while the chocolate candy was still soft.

Cake Pops
I gently placed the cake pops on the Styrofoam to hold them up in place.  After they were all done, I placed the cake pops in the freezer for about 10 minutes to harden the chocolate.

Cake Pops

Hello Delicious!
Cake Pops
If you try this recipe, I hope that you have as much fun as we did making them, and even more fun eating them, yum!
Enjoy!
(Retro effect on photos thanks to photobucket editing.)


Don't forget to Rate My Blog @ Top Mommy Blogs

How to Make Easter Cake Pops


How to Make Easter Cake Pops
source: modern foodie
Aren't these adorable?  
These lovely eggs are cake pops made by April Boyer at Modern Foodie.  
You can find her decorating technique at her site.
If you want to make your own cake pops for Easter you can find the cake pop recipe here.  
You will also find other Easter decorating ideas for cake pops at Bakerella.

Making cake balls is fun, get creative with your cake pops and share them
with your friends and family.  Kids love them!

I just added this great step by step video for the tutorial on how to make the cake
pops from bakerella, hope you enjoy!

Don't forget to Rate My Blog @ Top Mommy Blogs

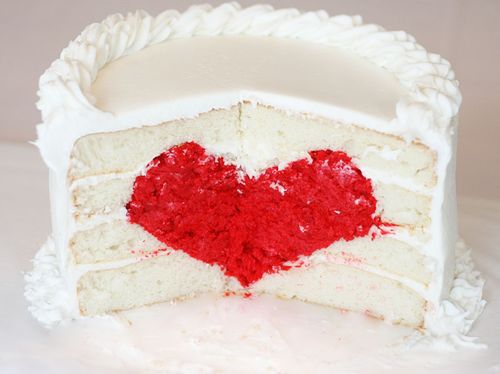
Heart Cake

I love this!

There is nothing better than getting creative in the kitchen.  I was completely amazed when I spotted this beautiful cake on Amanda's blog.  Amanda is a mom blogger with a passion for God, a passion for her family and a God given talent for baking beautiful cakes and other goodies.  You may check her mommy blog here.

 When I saw this cake, my first thought was; if I could only make that!  Well guess what?  I can and so can you!


I am a Baker, which is Amanda's Baking blog,  provides a step by step tutorial on how to create your own heart cake.  She provides great photos and directions on what to do. If you want to learn how to make this amazing cake or even buy baked goods from Amanda' site, then pay her blog a visit here.
Doesn't it look delicious, yum!!

Cupcakes Y'all

Hello friends!  Today I wanted to share with you a nifty find on the Internet. 
I am happy to inform you that there is a site where you can create your very own
"KEEP CALM" sign.  Yes you read right, if you visit Keep Calm-o-Matic,
you will be able to generate your very own KEEP CALM message
and find out the story behind this poster.
The best part of it is, that it's free, so have fun creating your own.

Now for my cupcake find.
Below are some of the cupcakes that I purchased at a local shop.
As you may or may not know, I have been living in our new home for three months and I have not had the opportunity to set out and explore this little town much, but as my husband & I were driving home the other day, we decided to take a different route.  On our way home, I spotted a Cupcake Bakery.

I went into Cupcakes Y'all that is the name of the shop.  After looking at the colorful, scrumptious and fluffy cupcakes,  I ordered a variety pack to take home to my family.
My son had the rich Peanut Butter cupcake and it was rich, fluffy and so delicious!
 I had the "Key Lime" cupcake, I wasn't even aware there was such a thing, but it was
"oh so very good"  Mr. M had the "Cream Cheese Pound Cake Cupcake",
I believe that's their signature cupcake and he absolutely loved it.
These cupcakes are amazing, I love that they are always fresh.

(Key lime Cupcake)
  Cupcakes Y'all has a variety of cupcake flavors everyday.  They are not limited to just cupcakes, but offer many other items as well such as ice cream, lunches, soups, gooey bars, frappes, smoothies, two layer cakes and much more.

While I looked around, I noticed that they host Birthday parties for children and provide cute little aprons that read "Cupcakes Y'all for the kids to wear as well as a baker's hat. The kids have loads of fun while they decorate cupcakes and play games.  The shop also caters other events.

If you are ever in Enterprise, treat yourself to a delightful lunch and tasty cupcake and ice-cream, they are fresh everyday.  You will love it!

Below are some cute items I found online for the cupcake lover in you!


This is a great Mini Dessert Stand to have for a special occasion such as
 birthdays, baby shower, graduations, and tea party etc...

For our vegan friends...


This is a sweet and sassy guide to baking your favorite treat without using any animal products.  It contains over 50 recipes for cupcakes and frosting-some innovative, some classics-with beautiful color photographs. It is highly rated, you may want to check it out!
 Vegan Cupcakes Take Over the World: 75 Dairy-Free Recipes for Cupcakes that Rule

Enjoy!

Don't forget to Rate My Blog @ Top Mommy Blogs


Pin It button on image hover