Get ideas & inspirations delivered to your inbox. You won't want to miss a thing, so subscribe free to the Blog Feed or sign up for Free Email Updates on the latest projects, shop news, blog tutorials & more. Check out the Project Gallery, Garden, Recipes & Inspirations tabs above, to see what you have missed. Browse through the sidebar for this week's Popular Posts!
**Please note: Some links may be broken, if this happens, please let me know which post & search for the title of a post on the search tab on the right while I work on fixing the problem.---->

Showing posts with label kids crafts. Show all posts

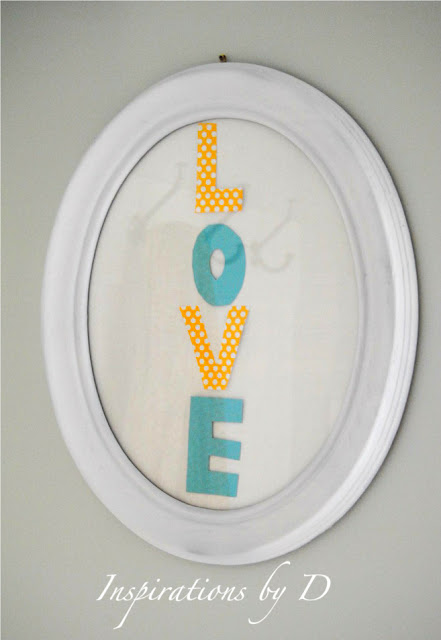
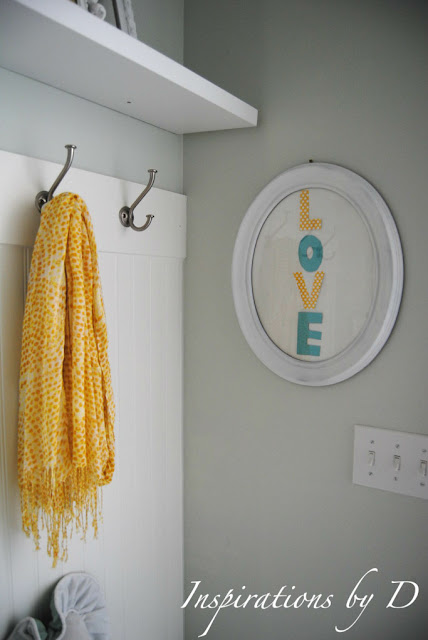
Simple Word Art for Kids

Simple Word Art for Kids
This is a simple and easy project for kids.

What you will need:

I had an old oval picture frame that I purchased for $3 at a second hand store and decided to paint it white.
if you wish to use an old frame and paint it, you may.  I used spray paint.


After the paint dried, my little guy traced the letters on the scrapbook paper,
then he cut the letters out, 
 he glued the letters to the background, then placed the word art on the frame
and voila!

Simple Word Art for Kids
  
This is a great project for kids; have them cut out their names or favorite words to hang in their rooms or favorite play area.  It makes it special when you hang up their creation!
Happy Crafting!

Don't forget to Rate My Blog @ Top Mommy Blogs

An Autumn Day

Tutorial Below
We enjoy the change of weather from season to season, 
especially in the Fall.
Our favorite things in Autumn are:
Today is a perfect cool and rainy autumn day.
The trees sway gently and the birds chirp in enjoyment of the gentle falling rain.

weheartit

I can hear my son with his dad's light-saber, in the next room. 
The light-saber is made of glass which means that my 
little guy is too young to play with it on his own.  
Dad supervises when this device is in use, 
so it belongs to his dad; remember, 
he is a Star Wars fan too!
We did find a new light-saber for children in the 
store yesterday, it is very similar to the one he 
is currently playing with, but it's made of plastic parts. 
This may be perfect for a Christmas gift for the little man this year.

I have been working on some crafts and I stumbled 
upon one that is perfect for this time of year and it's made with natural 
leaves, you really don't have to spend a dime on this one, 
unless you are out of straws and the kids will love gathering 
leaves for this little project.
Here is a look on how to make your own natural leaf garland.

Source: lorajeansmagazine.blogspot.com via pinterest

Clever isn't it!
I hope that you are enjoying this fine day.  

How to Make a Hummingbird Feeder (Updated)

How to Make a Hummingbird Feeder
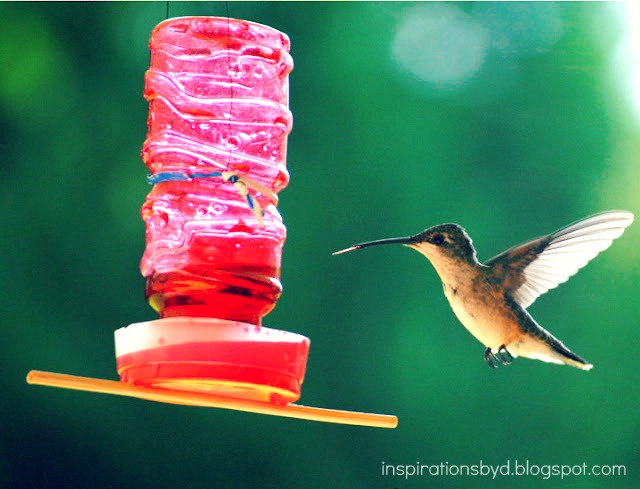
Look at what we captured by photo outside our kitchen window!  
I didn't have enough time to adjust the settings on the camera and started snapping 
photos immediately after spotting this little guy.  
We were so excited because we had just made this hummingbird feeder and this was 
just minutes after hanging it up.  Do you want to make one?  If so this is what you need.
Supplies:
 an empty bottle
 plastic cup
hot glue gun
 wire
 and a skewer.
We cut a plastic cup in order for the bird to be able to drink their sweet nectar.
Using the original cap, we poked five holes which allowed the nectar to flow down.
The bottle cap was hot glued to the plastic cup leaving some space between the cap and cup to 
allow the flow.  Only 4 to 5 small drops of glue was used to hold it in place.
The final step was hot gluing a skewer stick to the bottom of the cup which serves as a perch.
I  wasn't sure this feeder was going to work.  Sure enough within two hours 
of hanging it up, the hummingbirds started coming.  Now we get to see these little 
guys outside our kitchen window everyday, seriously, like every 5 minutes.  
We love it!
Do you have any hummingbirds in your area? 
 What type of birds do you see outside your window?

Don't forget to Rate My Blog @ Top Mommy Blogs
How to Decorate Alphabet Letters

How to Decorate Alphabet Letters

It's that time again for more decorative crafting tips from yours truly.  My son and I decorated these lovely letters to display on his bedroom wall.  It's a great project for anyone on a budget.

Here is what you will need for this project:


1. Thick cardboard letters from craft store ex:.Hobby Lobby,Michael's...)
2. Scissors
3. Mod Podge
4. Paint brush
5. Decorative paper
6. Embellishments (optional)

The first step is to cut the decorative paper to the shape of your letters, leaving a quarter inch to wrap around it..


Using your paint brush and mod podge, brush the glue onto the letter covering all areas on the surface and also on the sides of the letter.  
Gently place your letter over the paper as seen above to cover the surface. 
 Use a bit of the glue to rub on the remaining paper, so that it sticks on well around the letter.
  Press the paper to the letter smoothing it out.
Repeat each step with each letter.  
If you have areas that are not covered with your decorative paper, use pieces of your remaining sheets to match the missing areas and cover with mod podge.
Wait 24 hours to dry completely.
Once your paper has dried on the letters, use your mod podge to coat the outside. 
(I used a glossy glue to give it a sheen.)
Set to dry another 24 hrs.
  Once it dries, you may decorate with embellishments.
Now your letters are ready for display.  Use picture wires for hanging.

Happy Crafting!

Advent Wreath for Kids

How to make your own Advent table wreath, by a four year old.
DIY Advent Table Wreath for Kids
Supplies:
Votives, candle holders, candle stand, greenery.
DIY Advent Table Wreath for Kids
Hope you all enjoyed the simple table advent wreath by my little guy.
 Holiday Wishes to you!

How to Make a Paper Leaf Garland

Create a special Thanksgiving tradition by having your kids
write down or draw something they are grateful for each day,
and for a fun activity, have them make crafts to help decorate the home for the fall.
My four year old is currently grateful for fall leaves, he loves it!
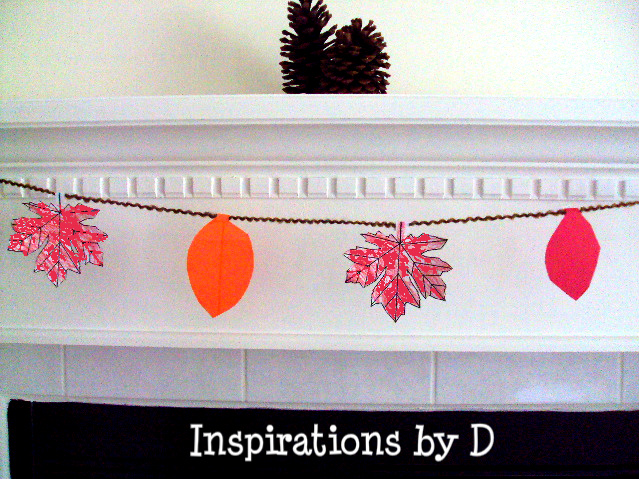
As a fun craft, he created a string of leaves.
Kids How to Make a Paper Leaf Garland
For your child to create their own you will need:
  • Construction paper (yellow, orange, red, brown)
  • Crayons or markers
  • Safety scissors
  • tape
  • A long piece of yarn or any string


Template provided by "enchantedlearning"

The template provided can be printed and colored by your little one.
Use it also as a template to draw a leaf on the construction paper.
Make sure to draw a thick stem on the top of your leaf  (your leaf will hang from this stem,
which will be folded over).

  1. Cut out the leaf.  Draw the leaf veins if you wish.
  2. Fold the leaf's stem in half.
  3. Attach the leaf to your string using the tape.  Make more leaves and continue attaching them to the string.  Use as little or as many as you like. 


Hang your string of leaves/ garland across the room or across a mantel
for that warm Thanksgiving feel.

For adults, you may use felt as we did here,
pattern paper or fabric to create your own decorative garland.
Happy Crafting!


How to Make a Tube Rocket

This summer my family & I went to watch the Space Shuttle launch at the Kennedy
Space Center.  We drove down to a town called Titusville and settled in a park to
watch the spectacular view.  Now keep in mind that we have seen several launches
from our own backyard and they have been awesome, but we wanted to have a closer view.
We waited, we saw and we heard the amazing sounds of the shuttle.  It was incredible!  

After that experience, my son has been fascinated with the space shuttle and astronomy.
He now has stars in his bedroom, the planets, a space shuttle model, a constellation lamp and so on.

For a fun activity, I asked him if he wanted to make his own space rocket and he loved the idea,
so this is what he made.
How to Make a Tube Rocket
     To make a cool rocket with your child or children this is what they will need.
A string of yarn, glue,  toilet paper tube, construction paper, markers,
crayons, paint,  tape and scissors.

Allow your child to color or decorate the tube with crayons, markers, stickers or paint.
let them by the artist, you supervise.
Using construction paper, cut two triangles that are about 2 inches wide and
1 1/2 inch tall.  Fold the triangles in half, then rub the glue on the crease of the triangle
and paste it on the tube.  Take the construction paper and cut a circle about 4 inches in diameter,
 then cut it in half.
Turn the half circle into a cone and secure it with glue or tape.
Tape or glue the cone to the top of the rocket.
Cut the yarn into several strips and tape it to the inside  bottom of the rocket.
How to Make a Tube Rocket
Now you have a rocket!
Hope you and your kids enjoy making your rockets!

How to Make Paper Bunting

It's that time again, rain, rain, rain which in my house means "Get your Craft On".  My son  loves to get crafty, especially if scissors and strings are involved.  Don't worry, he has the rounded tip safety scissors and I supervise him at all times.  Since this craft had a lot of cutting, I did the cutting for him and he did everything else.
For this project you will need, 
construction paper or any pretty printed or colored paper you have on hand,  Scissors, Yarn the length you wish, Small hole punch, and Crayons or markers.


1-Create a triangle template to the desired size.

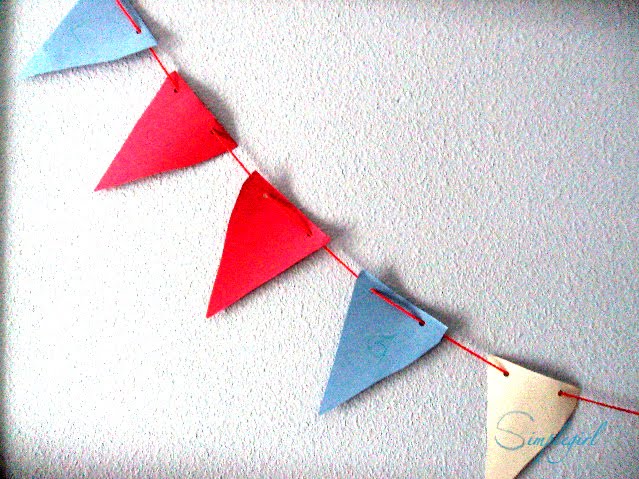
2- Trace a triangle template unto the construction paper.  Bend the top half of each flag and then trim the sides, so they match the triangles edges.   Now you will have triangular shaped paper.

3- Next take the hole puncher and punch holes on each corner on the short flat side of the triangle(you should have only two holes per triangle).  Let your little one draw on the triangles or write words, their names etc...

4-  After all the triangles have their holes and have been decorated by your child/children, thread the string through one hole then the other.  Start inserting each triangle through the string.  In order to keep it in place you may use scotch tape to stick the string to the paper.  Little man loved inserting the triangles and when he saw what the outcome was, he was thrilled.  He is so happy to have done this all on his own. 

How to Make Paper Bunting
We hung it in his room and he loves it.

Try this at home with your kiddos, they will enjoy it.
How to Make Paper Bunting
For other cute ideas you can try printed scrapbook paper, vintage book sheets, and even fabric.
Happy crafting everyone!


How to Make a Storage Container

So today my little boy and I got creative again.  It was dark, thundering, and raining all day, so we stayed in and got crafty.  I made my own bag storage container and he made his own crayon storage container.
how to make a storage container

To make your very own plastic bag container you'll need the following:


A container such as this one works well.
Make sure it's empty and washed clean inside.


Remove the wrapper.

You can either use wrapping paper, scrapbook paper, or what ever pretty design paper you have. 
 Cut out a piece to place on the container. 
Make a label in your {word doc.}.  
Insert an oval shape to your word document, change the color of the line on the oval if you like;  insert a text box into the oval and type "bags".   
You can insert a little design from clip art.
Then when you are done, print it on sticker paper so it's easy to mount.
Once your label is printed, cut out your label and stick it to your design/print sheet.
You can use tape or glue to stick it unto the container.


Now you have a nice storage container for your plastic bags.

Next we have a
CRAYON STORAGE Container
You will need a coffee can or some kind of carton can.


 or
 In this case we used the carton can, no sharp edges.
My little boy used construction paper.
Let your little ones choose their own color;  measure the paper against the can, and cut it so you have the right amount to cover the can all around.

 Have your child (children) draw on the paper. 
When they are done with their art work, help them wrap the can, place the crayons inside and cover for storage. Voila!  


He now knows where his crayons are at all times and loves his new crayon box can:-)
What do you think?

How to Make Cupcake Liner Flowers


Today I am feeling a bit icky, pain and discomfort is no fun during the recovery process, but that does not stop me from spending time with my little one.  He and I agreed to have a craft day on this stormy and humid afternoon, he loves crafting, so this is what we did, or shall I write what "he" did; he's at the stage where he wants to do things all by himself.  My four year old enjoyed it and gave the final product as a gift to Grandma.
This is a great project for you and your little ones.

You will need Cupcake liners (5-8  per pipe cleaner) solid, prints or mix it up, Pipe Cleaners, Floral Tape and Safety Round Tip Scissors for the kids.


Bend an inch of the pipe cleaner tip rolling it into a small ball to prevent liners from slipping off.


Once your pipe cleaners have a round end, pinch a hole on your cupcake liners with the opposite end of the pipe cleaner (watch your fingers)
Insert the pipe cleaner into the holes through the inside of the cupcake liners one at a time. Keep repeating until your desired amount of cupcake liners are all threaded unto the pipe cleaner.

Begin pinching each cupcake liner with your fingers one at a time, beginning with the top one. Repeat until all the cupcake liners have been shaped.

how to make flowers with cupcake liners

Starting as close as you can to the edge of the cupcake liners, wrap your pipe cleaner with the floral tape, it takes a little practice before you or your little gets good at it. I helped my son start it, then he was on his own.

Covered in the the green floral tape and shaped; Now you have a beautiful flower!

how to make cupcake liner flowers

Happy Crafting!


Pin It button on image hover