Get ideas & inspirations delivered to your inbox. You won't want to miss a thing, so subscribe free to the Blog Feed or sign up for Free Email Updates on the latest projects, shop news, blog tutorials & more. Check out the Project Gallery, Garden, Recipes & Inspirations tabs above, to see what you have missed. Browse through the sidebar for this week's Popular Posts!
**Please note: Some links may be broken, if this happens, please let me know which post & search for the title of a post on the search tab on the right while I work on fixing the problem.---->

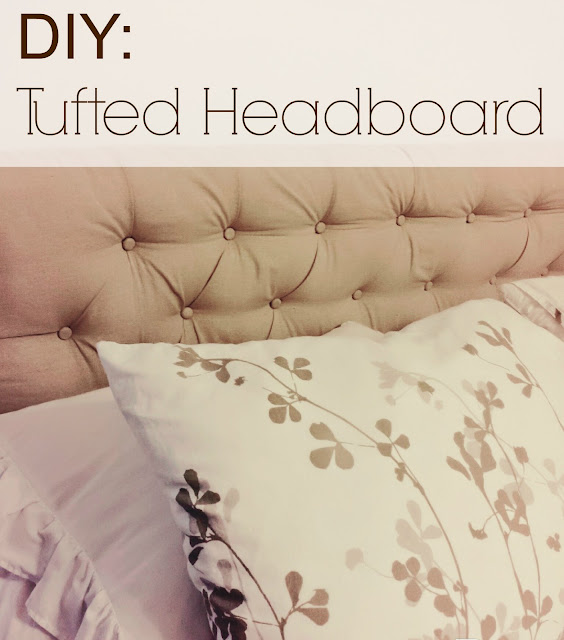
DIY: Tufted Headboard

(Disclaimer)* This post may contain affiliate links & I may be compensated if a purchase is
 made by clicking my links. 
www.inspirationsbyd.blogspot.com

I have finally finished one of my DIY projects, and this one had been sitting
around my bedroom for months if not, dare I say, a year.  I am not going to
post detailed instructions because I got my directions from here.
Be sure to visit the site for detailed instructions, her headboard is gorgeous!

I have posted the basics on how I made my own.
I have to say that I did not drill holes on the headboard, nor did I sew my
fabric covered buttons on.  That is too much work, so I stapled each section 
and hot glued the buttons on.
It worked!!

I also did not really measure but eyeballed where I was going to staple each 
section. I know, I know, not smart, but even though it's not perfect, it's done and 
it's mine to enjoy.

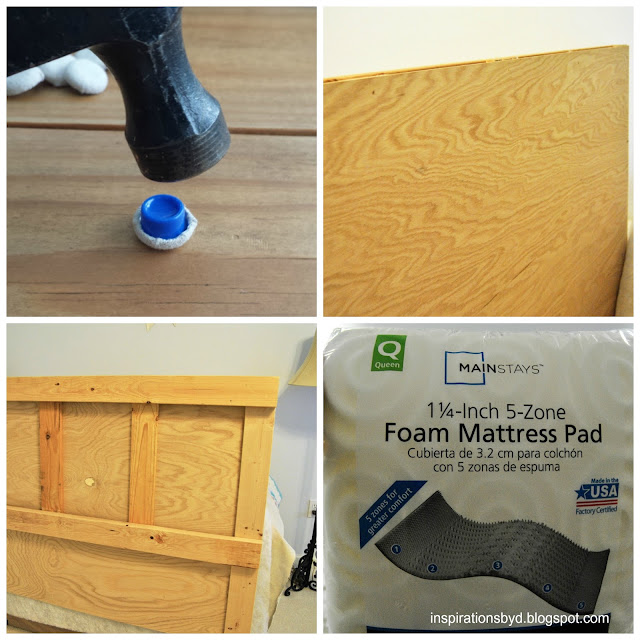
I already had a headboard made of wood scrap from our garage, so we 
purchased a flat piece of wood to cover the front of the board.

I purchased two packs of the Dritz Craft Cover Button Kit - Size 30
it completely depends on the size of your headboard, you may need three.

I already had my fabric on hand, it was about 3 to 4 yards.  I have a 
queen size bed.

I purchased a Mainstays 1.25" Convoluted Foam Topper Size: Queen which I 
folded in half for the cushion.  You may most certainly get a 
Mainstays 1.25" Convoluted Foam Topper Twin Size Mattress Pad Bed (TWIN) for less.  
Psst!  Walmart carries this foam.

I also used matting that I had on hand.

I used a Mini Hot Glue Gun with Melt Glue Sticks
already had one on hand a Staple Gun Kit.

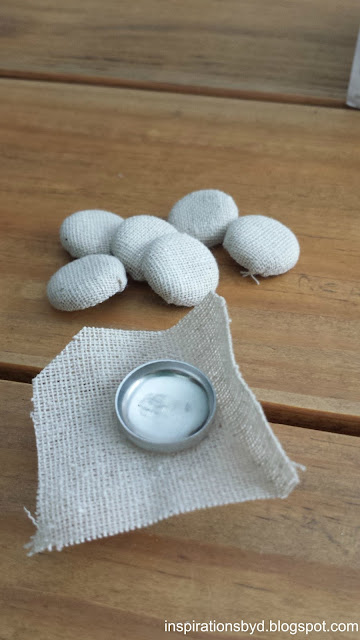
Then I went to work.  I covered about 30 buttons for this headboard. 
The kit explains how to cover them with fabric.

www.inspirationsbyd.blogspot.com
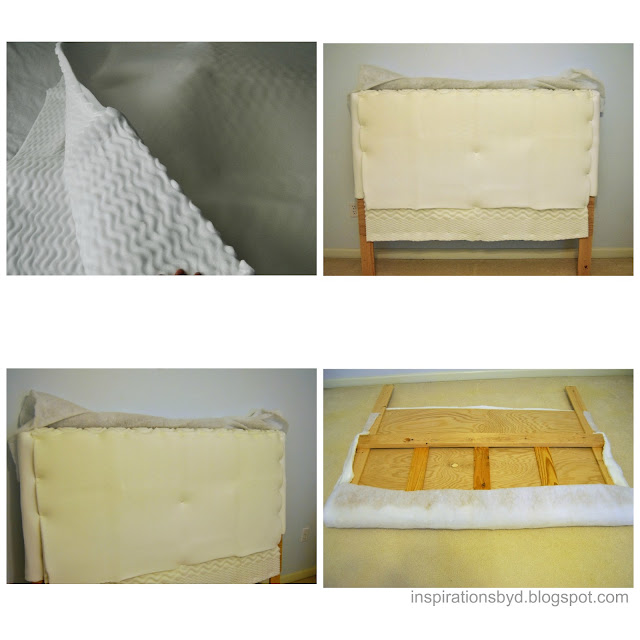
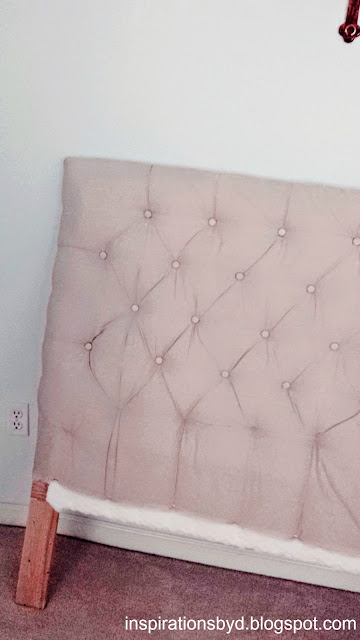
I opened the foam package and folded the foam over the headboard.  I noticed that the edges/ 
sides were left exposed.  So, I cut a piece of the foam to cover each side as seen in the images. 
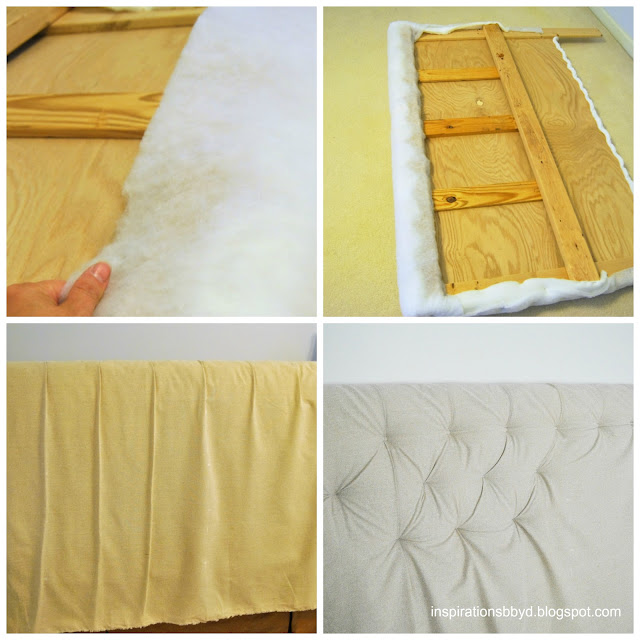
 I stapled the foam onto the headboard as seen above.  Then I covered that with batting and 
stapled it in place.

I then placed the fabric over the batting.  I just draped it over & made sure it covered 
all the sides well.  

Before I secured the fabric, I measured how far apart I wanted my buttons to be; below 
you will see that I folded seams to have an idea how far apart they should be
and I marked it with a white pencil.

www.inspirationsbyd.blogspot.com
When I was ready to secure the fabric at the top, I stapled it in the back to hold it in place.  
After the fabric was secured at the top, I began to staple the areas that the buttons would 
go on the first row.  In the areas that needed adjustments, I simply removed the staples 
with a staple remover and re-stapled my mark.  I continued stapling the 4 rows and finally 
the edges on the sides and bottom to hold the fabric in place.

When it was all secured and stapled in place, I added the buttons with hot glue, pressed 
it hard and held in place for about 15 seconds.  Then it was done, just like that.  I think 
the hardest part was making sure the rows were straight and the same distance apart. 

www.inspirationsbyd.blogspot.com
There you have it, my tufted headboard. 
Thank you for visiting and Happy Crafting!

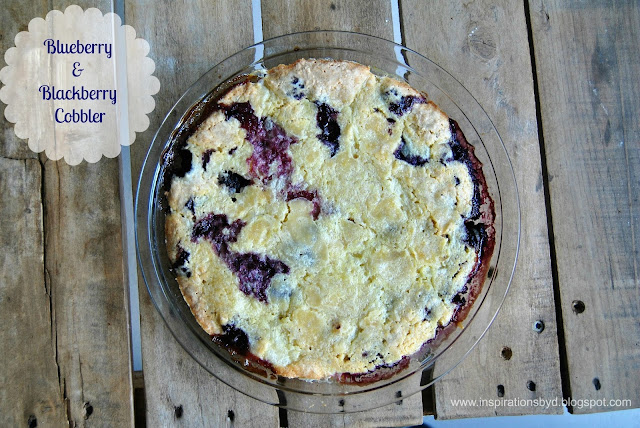
Blueberry & Blackberry Cobbler

blackberry cobbler

Summertime is here and it is the perfect time for sweet & easy recipes.  When I have guests, this is one of my favorite desserts to make.  Scoop it up and add whipped cream and garnish with fresh mint leaves and you're good to go.  

My dad and my sister were recently here visiting for a week and my sister loves desserts, so I just had to whip up some goodies along with sweet purchases.  This recipe is basically the same as the previous blackberry cobbler that I made, but I added blueberries to the mix.  For the ingredients, scroll to the end of the post.

Instructions:
Preheat oven 350 degrees.
Wash the berries and lay them on a paper towel to dry a bit.  Lightly grease an 8-inch baking dish.
Place the berries in the baking dish and sprinkle the berries with the lemon juice.
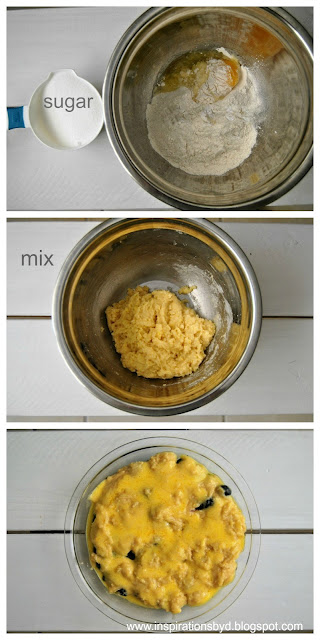
In a mixing bowl, stir in the egg, flour, & sugar until it resembles a coarse meal.
Sprinkle the mixture over the berries.
Drizzle melted butter over the mix.  Bake at 350 degrees for 30 minutes or until lightly brown and bubbly.  let stand for 10 minutes.

www.inspirationsbyd.blogspot.com
Ingredients:

4 cups of fresh blackberries and blueberries
1 tablespoon of lemon juice
1 large egg
1 cup of sugar (if you like it extra sweet, add more sugar)
1 cup of all-purpose flour
7-8 tablespoons of butter
Whip cream (optional)
Garnish: fresh mint sprig
blueberry cobbler
cobbler


Hope that you enjoy!


Linked to:
Massive Sway/SITS Girls


Celebrate Easter with Peeps


Happy St. Patrick's day y'all!  For today's post, I will be sharing some of our ideas for the coming Easter.  This Easter season we will be celebrating our festivities with Easter baskets filled with Peeps & Company goodies along with some reading books.


PEEPS & COMPANY® was sweet enough to send me several items and treats to share with you and others, such as PEEPS® earbuds, luggage tag, Orange Delight Flavored Marshmallow Dipped in Orange Fudge,  Marshmallow Bunnies, Decorated Eggs, Party Cake Flavored Marshmallow Chicks, Sour Watermelon Flavored Marshmallow Chicks, Chocolate Mousse Flavored Marshmallow Bunnies,  Chocolate Covered Marshmallow Chicks, Rainbow Pop, • MIKE AND IKE® Easter Treats,• MIKE AND IKE® Jellybeans & HOT TAMALES® Jellybeans.  Peeps & Company also has many other items that are not candy, they have beach balls, socks, luggage tags, pillows and so much more.


This year I used a light wooden basket along with the traditional Easter baskets to add a little theme.  I chose a farm/ shabby theme, so I painted the wooden basket with white craft paint and decorated my basket with Easter stickers and a tiny banner.


I chose a few of my child's favorite items from Peeps & Company, placed them in a large plastic Easter egg, then I used jars to fill them with the Peeps jelly beans and covered them with a decorative lid featuring bunnies.


There are numerous ways to celebrate using Peeps & Company, one of my favorite ideas are decorative Peeps marshmallows used to decorate cakes for Spring festivities.


For your Peeps & Company Easter, be sure to check them out and order your peeps favorites for your Easter baskets.  Peeps & Company will give all Inspirations by D readers 20% off on your purchase when you use code: EASTERTREATS at checkout.

I hope that you have a wonderful and blessed Easter and let me know which Peep & Company items you choose to fill your baskets with.


(Disclaimer)* I received Peeps & Company products for review. All opinions are solely mine and I have not received any monies for my opinion.

Easy Shrimp and Vegetables

Easy Shrimp and Vegetables
It's no secret that we love vegetables in our home, but what a great and refreshing 
way to add flavor, color, and texture to a dish by combining shrimp and vegetables. 
Did you know that by placing onions is the refrigerator you can avoid tearing up 
when chopping it?  Good to know for those of us that cook with lots of onions.
NOTE: For this recipe, you'll need to have your shrimp already cooked, so make 
sure you cook them before adding it to this dish.
In a pan add a tablespoon of olive oil,  add chopped garlic and cook until oil is hot.  
Add red onions, zucchini, and baby Bella mushrooms.  Make sure your mushrooms 
are rinsed.  Add salt and pepper to taste. While they cook for a minute, bring a pot of 
water to a boil, add 1/2 Tsp of salt to the water and add small potatoes.  I used 
a mixed bag of potatoes that contained, gold, red and blue/ purple small potatoes. 
Let it boil until tender.  Remove potatoes from heat and drain the water.  Set it aside.
recipe
After 2 minutes or so, add cooked shrimp to your vegetable mix.  Cook for another 
2 minutes make sure the vegetables are not overcooked but nice and tender.  
Then add your cooked potatoes to the mix.  Blend and serve.  You may add a side 
of corn on the cob and/ or avocado.
INGREDIENTS: (Serves 3)
1 Tablespoon Olive Oil
2 Cloves of Garlic.
1/2 Red onion
1 Zucchini
3 cups Baby Bella Mushrooms
1 Bag of Cooked Shrimp
1 Bag of Small Potato Mix
Salt & Pepper
I hope that you enjoy this tasty meal, it's easy and fast.  
If you don't like mushrooms or other veggies, just replace them 
with your favorite veggies. 
What I love about this, is that you can even put them on a stick and grill them, 
they make great kabobs too.
Happy Cooking!


Linking to:
Sunday's Best#38
BBQ Link Party/Censationalgirl

How to Make Sushi Rolls-(Re-Post)


I published this recipe in 2013 and it continues to be one of the hottest posts on this blog.
After I posted it, there have been several other blogs that have copied it or changed 
something in the recipe to make it their own.  I wanted to re-post it for those who 
missed it or for those that may be looking for something different to make for dinner.

It is one of our favorite things to eat, especially during Lent and summer.  
Today I will be sharing with you a simple sushi recipe that has no raw fish only imitation crab 
and the rest are veggies.  In the sushi world, we tend to call this a "California Roll".
www.inspirationsbyd.blogspot.com
To make this you will need:

Tip: Cover bamboo mat with plastic wrap to prevent rice form sticking to mat.
www.inspirationsbyd.blogspot.com
For instructions on making sushi rice click this link or here.
Making sushi rice is important to have good sushi.  It needs to be tasty and sticky to roll.
www.inspirationsbyd.blogspot.com
sushi
Add avocado too!
www.inspirationsbyd.blogspot.com
how to make sushi
www.inspirationsbyd.blogspot.com
inspirationsbyd.blogpost.com
Instructions:
  1. Cover bamboo mat with plastic wrap to prevent rice from sticking to it.
  2. Take out a sushi seaweed sheet and cut the sheet to make two smaller sheets. Tip: Using one full sheet will make your rolls too big. 
  3. Place the shiny side of the sea weed sheet faced down over your plastic wrapped bamboo mat.
  4. Wet your fingers to begin placing rice on top of the sheet. Tip: Wet fingers help prevent rice from sticking to your fingers.
  5. Cover sheet evenly and do not overload with rice. Tip: Do not press rice hard, you do not want to mash your rice.
  6. At this point, you may sprinkle sesame seeds over the rice, it adds flavor and texture.
  7. Turn your sushi & rice sheet over to the opposite side. (Don't worry, it won't fall off)
  8. Make sure your sheet is lined up with the edge of the bamboo mat for easy rolling.
  9. To this side of the sheet, add your veggies and crab meat.  Line them up evenly as seen above.
  10. Once you have your veggies in place, start rolling your sushi. Leave about an inch or so out of the end and tuck your sushi in as seen above, then finish rolling the whole sushi roll. (This helps prevent the sushi from falling apart).
  11. Tap the ends of the sushi so it is even and flat.
  12. Once you have your roll wet your knife and slice your roll into half.  
  13. Then cut your rolls about an inch and a half wide, one sushi roll will make 6 sushi rolls/bites.
  14. Repeat steps for more sushi rolls.
You may refrigerate them for company later or enjoy right away.
Happy Eats!

Linked to:
SITS Girls
I Should Be Mopping the Floor
Tutus and Tea Parties
The Frugal Girls
Jennifer Rizzo


Pin It button on image hover