Get ideas & inspirations delivered to your inbox. You won't want to miss a thing, so subscribe free to the Blog Feed or sign up for Free Email Updates on the latest projects, shop news, blog tutorials & more. Check out the Project Gallery, Garden, Recipes & Inspirations tabs above, to see what you have missed. Browse through the sidebar for this week's Popular Posts!
**Please note: Some links may be broken, if this happens, please let me know which post & search for the title of a post on the search tab on the right while I work on fixing the problem.---->

Showing posts with label Home. Show all posts

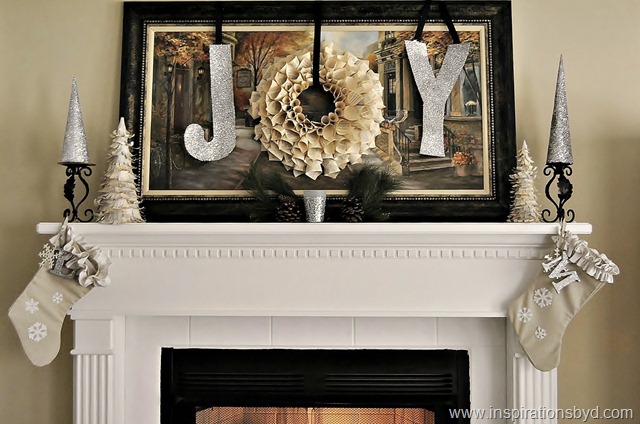
Handmade Christmas Mantel (updated)

Christmas mantel
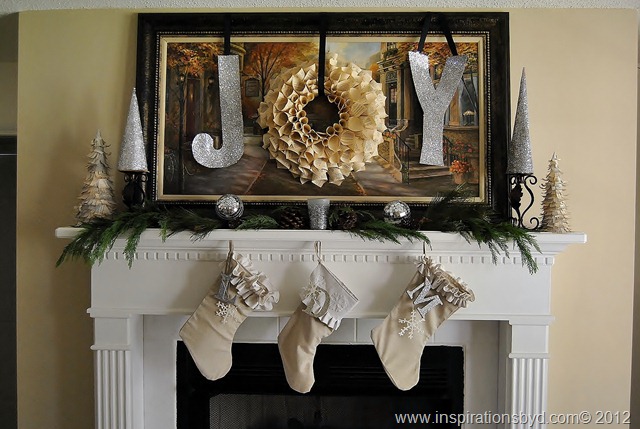
Hi friends, I'm sharing with you today my mantel decor.  I have to confess,
this is not my ideal mantel decor, but I had to use what I had on hand and that
includes this piece of art work.  Mr. M gave it to me for our anniversary and it's
not my favorite, but I must be grateful.  Moving ahead...

To keep it simple, I just added a few handmade items and two small disco balls.  
I added my third stocking and greenery to the mantel on the above image, what do you think?  

I started off with the image below and finished with the image above.
Before
Christmas mantel
DSC_0611d
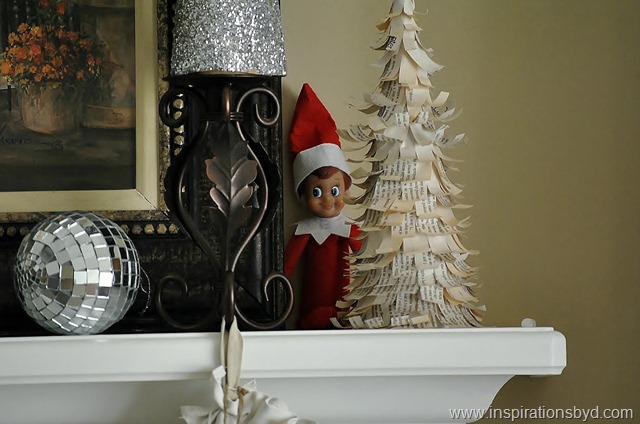
We caught the Elf hiding behind the paper tree.
After
Christmas mantel @Inspirationsbyd
Christmas stockings
Christmas mantel
Tutorials for the stockings can be seen here
Tutorial for the wreath available here.
Tutorial for the glitter alphabet letters can be viewed here
and the tutorial for the book page trees is here.
Thank you for stopping by today, I am linking to:

Flower Pot Makeover

Flower Pot Makeover

This year I decided to plant lavender in a clay pot, but did not want the 
typical brick looking clay planter for the interior of the house.
So I dressed it up.  Here is what I did.

painted flower pot

Supplies:
clay planter 
craft paint 
paint brush
spray paint
lace ribbon
and Mod Podge

I primed the clay pot with craft paint even though it didn't need it.
Then I painted the pot with a hammered affect spray paint, this gives it a sheen and hammered metal look.
After it dried, I brushed on Mod-Podge to stick two layers of lace ribbon on the planter.
I brushed the lace over the pot and brushed more Mod Podge.
When the glue was dry, I sprayed the entire planter to unify the look.
painted planter
laced flower pot
flower box makeover
painted flower pot
 Here is how it turned out, I love it!
This was super easy and may I add fast, not to mention all for only $8, can't beat that.

DIY flower pot makeover
lace on flower pot
Inspirations by D
I added the lavender by filling the pot with gardening soil
and topping it with a sprinkle of organic bone meal.
Now it sits by a very sunny window.
See my other flower pot ideas here.
Do you have favorite plants you wish to bring indoors?


Handmade Christmas Home 2011

Welcome to our home!

I've kept the decor simple.
Foyer mirror decorated with a simple branch and ornaments.
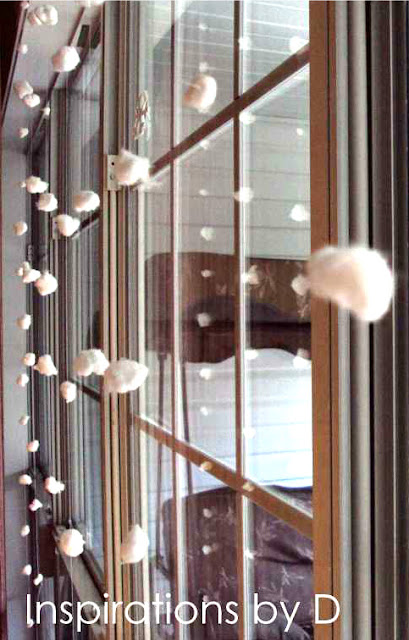
This is faux snow made from cotton balls and it hangs behind our Christmas tree for a snow fall effect.
My son got a kick out of making these.
Handmade cones with glitter!
Just rolled paper, glued it and added sparkle.
The work of my little one.
His letter block fort.
I kept the mantel very simple this year with only a few handmade items and candles.
Dining table with bright reds.

Oh Christmas Tree, oh Christmas tree...
More views here.

Remember what Christmas is all about?


Free Printable
via google
thenester.com


Here's wishing you a Merry Christmas & Happy Holiday Season!

Deck the Halls with Handmade Goodies

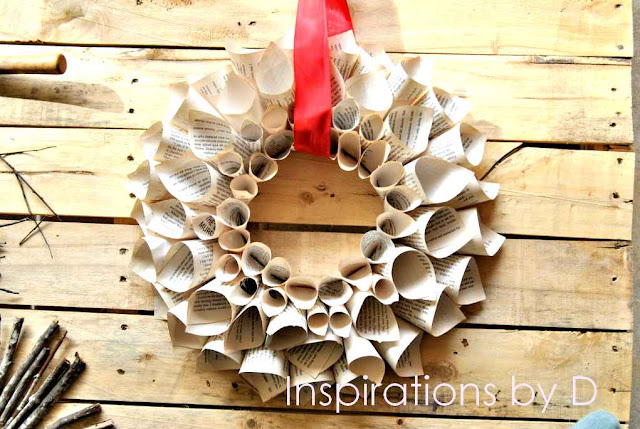
how to make a paper wreath
This year I will be decorating my home with some old Christmas decorations from the past
and a few handmade pieces of my own.  I have looked around my home for items that I can use
to make my own hand crafted decor.  This is a good way to save for the Holidays.
how to make book page  wreath
I hung on my back door a wreath made out of pages of an old book that my father-in-law
purchased in a second hand store a year ago.
how to make book page  wreath
It was fun to make, but a lot of work too,
not to mention the mess I created with the glue gun on my fingers.  I forgot to take
photos of my little project, so I will share the tutorial from this site here
We also gathered items from the outdoors, like pine cones, branches and berries.
My son's favorite are the pine cones.
I took a couple of recycled jars and I wrapped them in scrapbook paper
and ribbon to hold festive candy canes.
You all know this one.  It's my felt ornament!  I added some glitter to add sparkle.
It's hard to see the glitter on here, but it looks like snow balls on my tree.  I love it!
At our home our focus during Christmas is the birth
of Jesus Christ.  I add little reminders around the house such as nativity sets,
and words written on our chalkboard, after all he is the greatest gift.


Will you be adding anything handmade to your decor this year? What is it?

Rooms That Inspire

I love the color used here for this lovely entrance by adding the blue bench.
I have had these photos in my files for a while,
I love the look of each room and hope that it serves as inspiration
to you as it does for me.
Unfortunately I don't know the source for these photos,
perhaps some may be found on Pinterest and others on Google.
Peaceful retreat.
 Hope that you enjoy these as much as I do, I love the simplicity of each room.
Do you have any favorite rooms that inspire you?

Small Mudroom Entry Reveal!

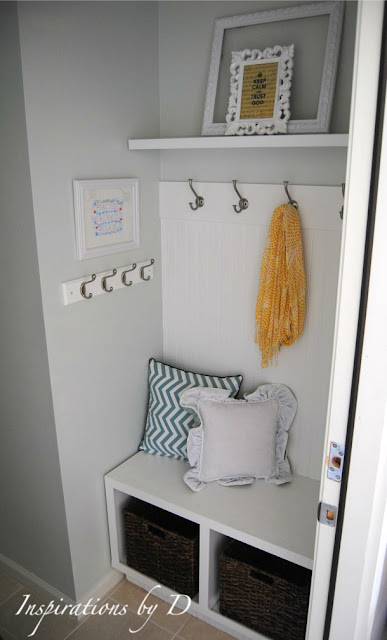
The Mudroom Entry project is finally done!
AFTER

BEFORE
It is finally finished and I am content with the
outcome, hurrah!
Let's go back to the beginning of this project,
shall we.  It began here!
After Mr. M was done with the construction of this space,
I painted the walls, bench, bead board and hook
rail and was finished with the work here.  I wanted a different kind of shelving,
but we worked with what we had on hand to keep cost low.
We can always change it in the future.

With a few accessories in the space,
I was able to give it life.
I wanted to place a seat cushion on the bench,
but that will have to wait for another time,
for now this will work.
I added some personal touches and a bit of color for pop.
The oval picture frame on the right side of the
wall reads "love" and it holds my son's art work.
The art work on the left wall is by Katie Daisy Art and it
reads "practice patience please",
it is a great reminder of that virtue.
On the wall shelf above the hook rail,
you see two different size photo frames.
 I spray painted the large empty frame with white
spray paint and I left it as is, meaning no art work,
no glass or photo in it.
The point of that was to create a bit of an
architectural shabby look.
For the smaller frame I created my own art work and added
yellow to the background to coordinate with other pieces.
The white throw pillow is handmade by my loving mother,
she made this pillow for me when I first got married
several years ago.
It has two sides to vary in color and the chevron pillow
behind it is also two sided and from Target.
The baskets below serve to hide the shoes, slippers and other
items such as dog leashes and so on.
 On the opposite wall from this area are silhouette photo 
frames made by yours truly.
Creating this space and hand making most of the items
was so much fun and the excitement of it all was self-rewarding
 both for Mr. M and myself.  My favorite part of this area
is that it serves as storage and is functional for the whole family.


Pin It button on image hover